

![]()
01/03/09
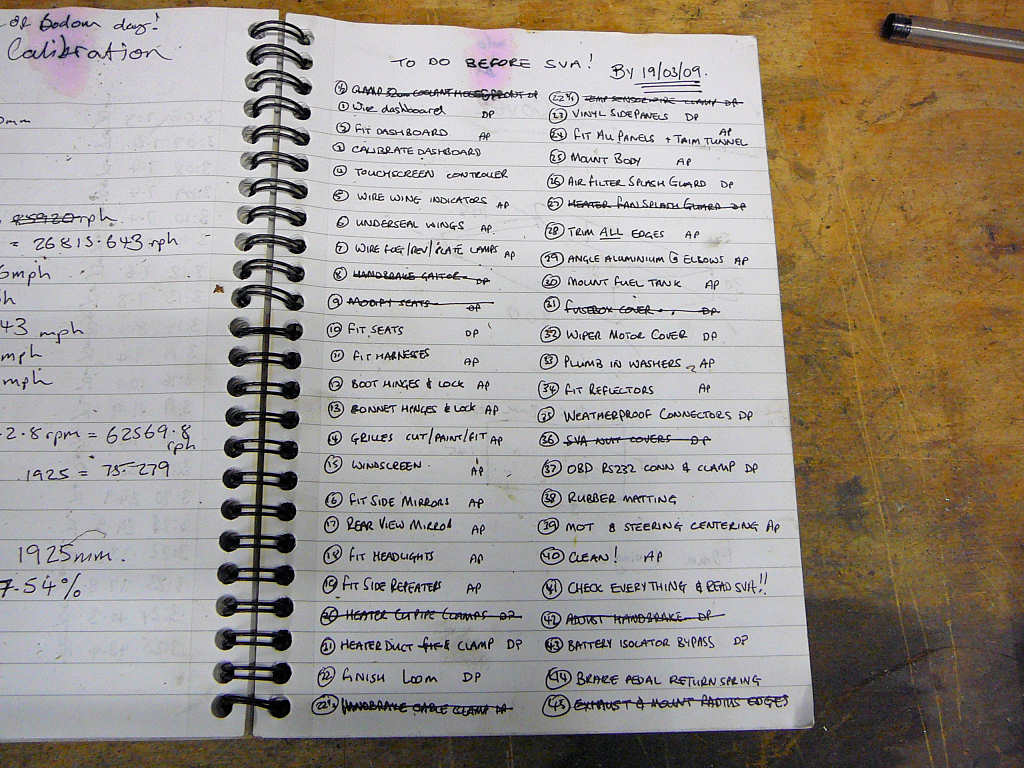
So the countdown to SVA begins! Well, actually it's the countdown to MOT first which is booked for March 20th... There's a fair number of jobs to do so the first job is to make a list of them all! In case you're wondering - 'DP' is 'during paint' and 'AP' is 'after paint'.
First, I've fitted the required SVA nut covers.
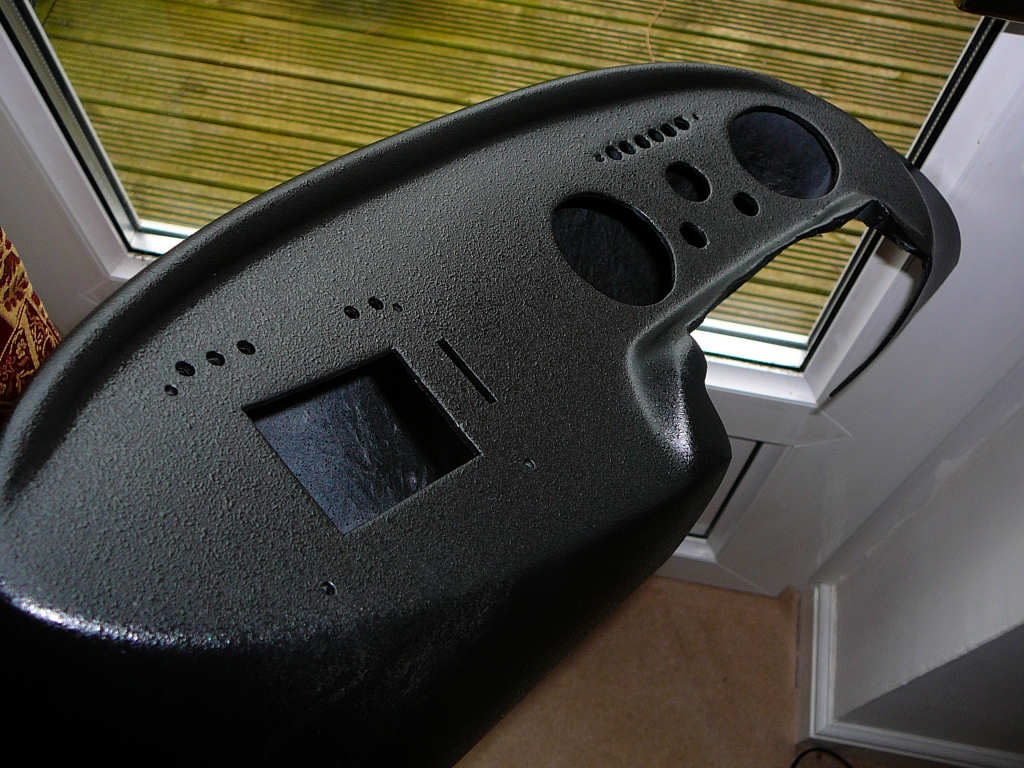
I've also made and fitted a cover for the fuse panel. I've been Googling for 'SVA fail' recently - not because of any pessimism on my parts but I thought it would be a useful way to find out the sorts of things that cause people problems. One in particular is sharp edges underneath the dashboard so I fitted a cover to the fusebox. The wiper motor will also need a cover.
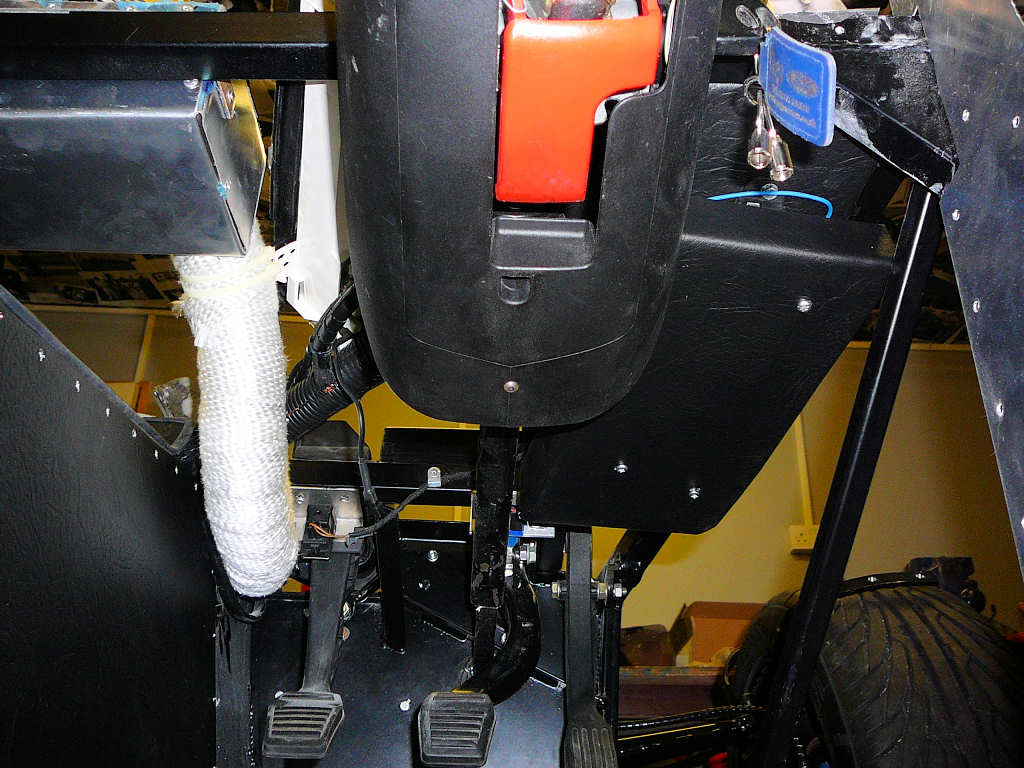
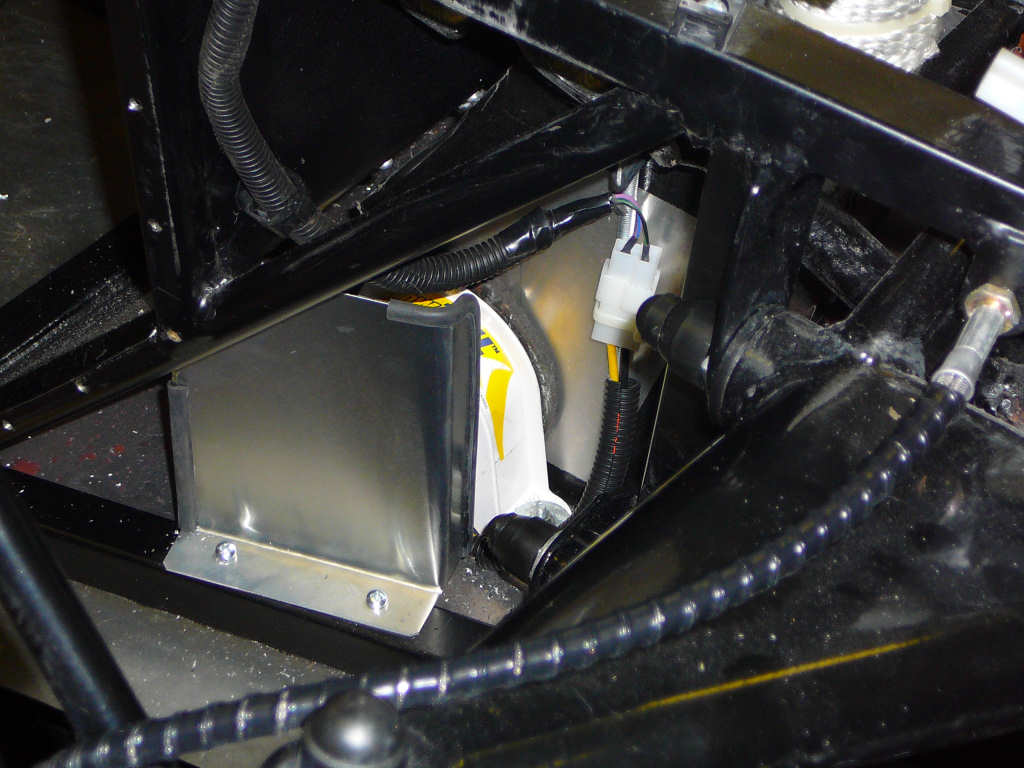
The fan for the heater is in a somewhat vulnerable position right behind the front wheel, so I made a cover for that too. I doesn't seem that long ago when all I seemed to make was brackets - now it's covers! Ho hum...
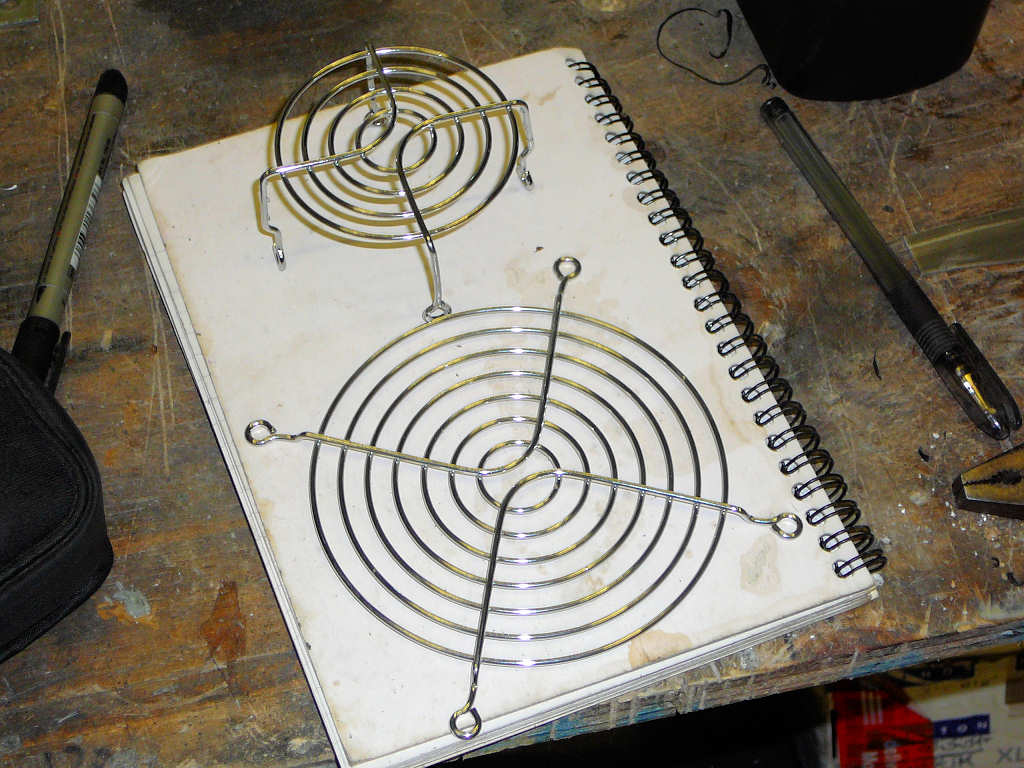
Firstly, I modified a 120mm fan guard and bent it into shape. This is a leaf/stone guard for the fan blades.

I then bent up an offcut of 1mm aluminium to form a splash guard just to stop some of the smaller debris that will get kicked up from the tyres.
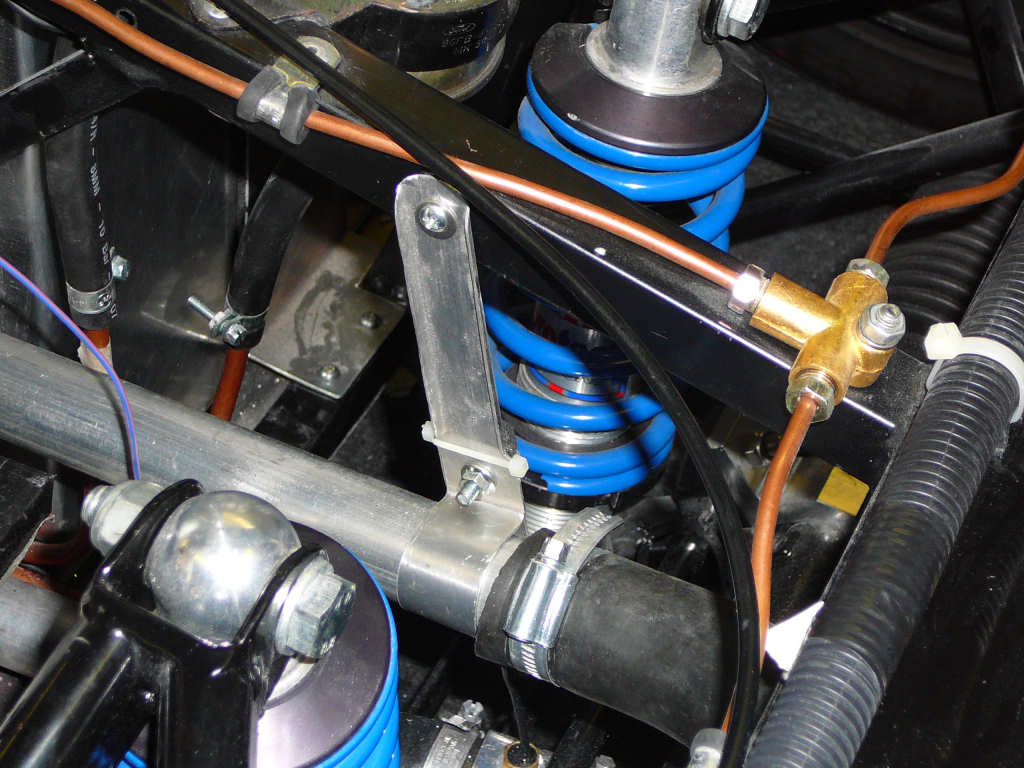
I've started going around the car looking for problems and/or things I've forgotten to do. During this, I found one of the front coolant pipes that looked unsupported and I was concerned about it failing due to vibration. The solution - make a bracket (yay! A bracket! Not a cover!).
The handbrake also had some edges that needed covering (groan) so I modified the Fiesta gaitor to fit the Mojo. This involved some cutting, gluing and a couple of small brackets.
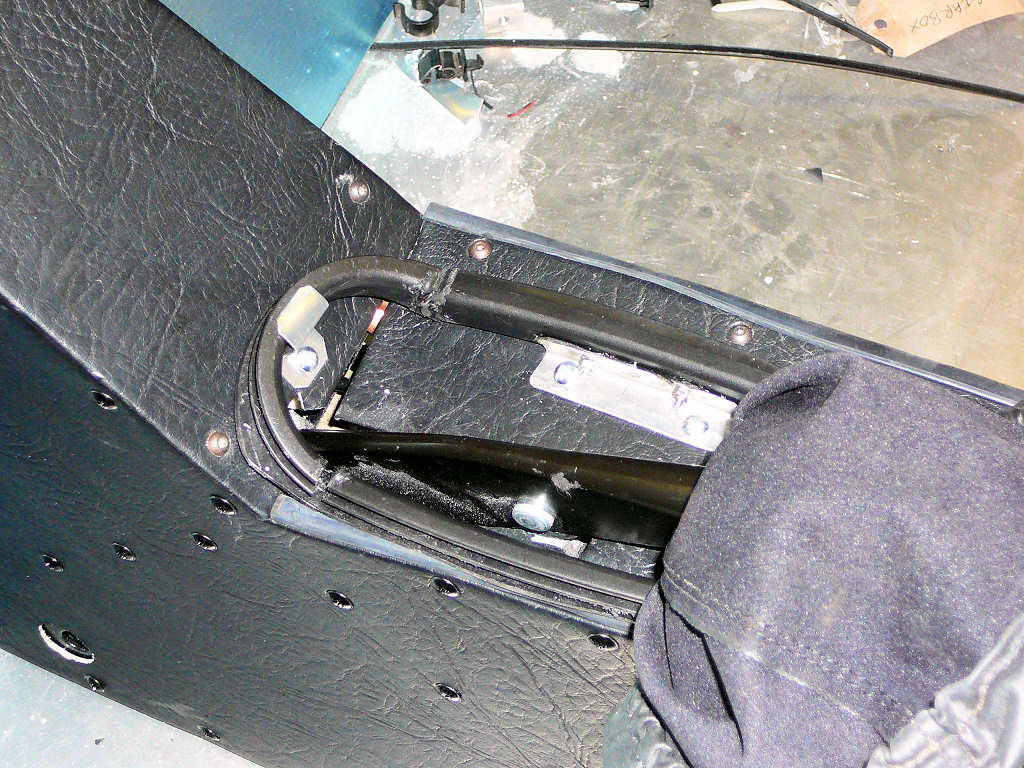
You can see some of the edge trim I've been fitting in this photo - it's Caterham cheap-and-nasty black rubber and looks decidedly ugly IMHO. If anyone wants some of this it'll be in a ditch just outside the SVA test centre in Norwich in a few weeks.
Finally, I've modified the seat backs so that the harness brackets sit properly. Basically, I just chopped about 30mm off of the seat back so that the top sat a little lower. I also took the opportunity to move some of the foam around to make them a bit more comfortable.
Other than these jobs, I've been depleting the world's supply of cable ties and p-clips, along with working on the vinyl covering of the side and back panels and the final fit of some of the tunnel panels. Nothing that interesting to look at yet, so no photos...
![]()
Spent the weekend going over the car looking for anything that may cause a problem at SVA. Hopefully, this will mean that Mr SVA will put his fine toothed comb away and settle for a cursory glance, but then I may be living in dreamland!
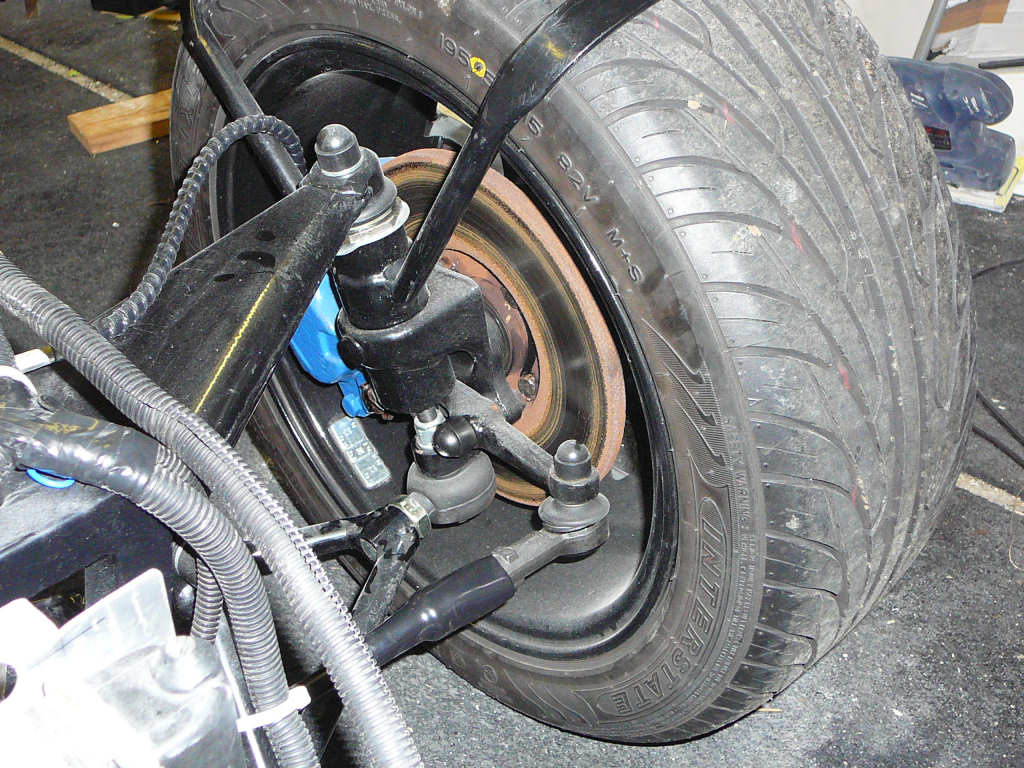
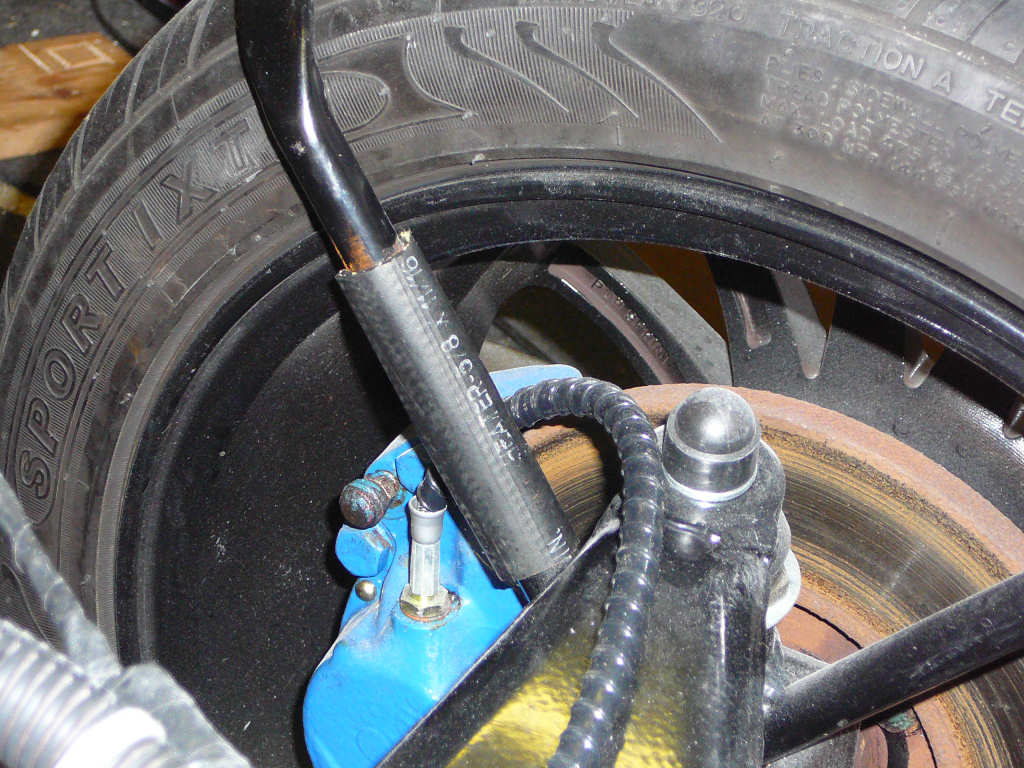
Several SVA reports have noted that the brake pipes needed padding where they rubbed against the cycle wing stays, so I checked mine and they are perilously close. Therefore, I split a length of coolant hose and fitted it over the wing stays. This will get tywrapped on when I fit the wing indicators.
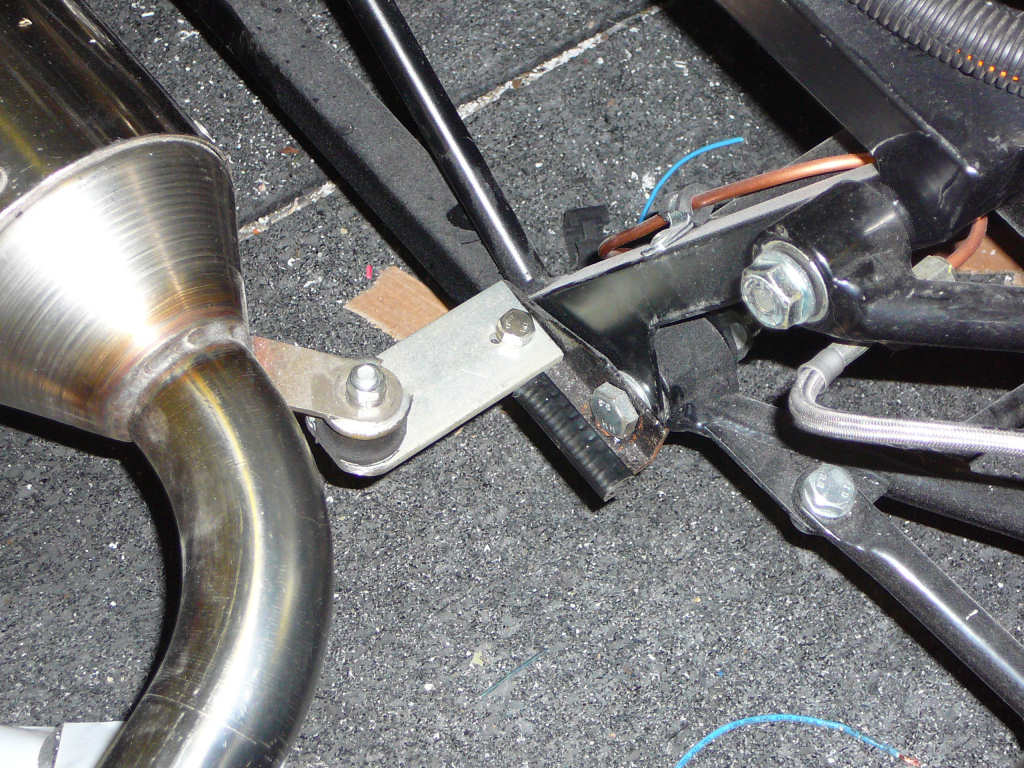
I've also fitted some small pieces of trim to the exhaust mounts which have been known to cause a problem.
The aluminium panels have all now been trimmed and I started to fit them onto the chassis. Some have been fitted with rivets (driver and passenger footwell side panels) but the remainder are fitted with No8 x 1/2" self tapping flange headed screws just in case I need to remove the panels at any time.
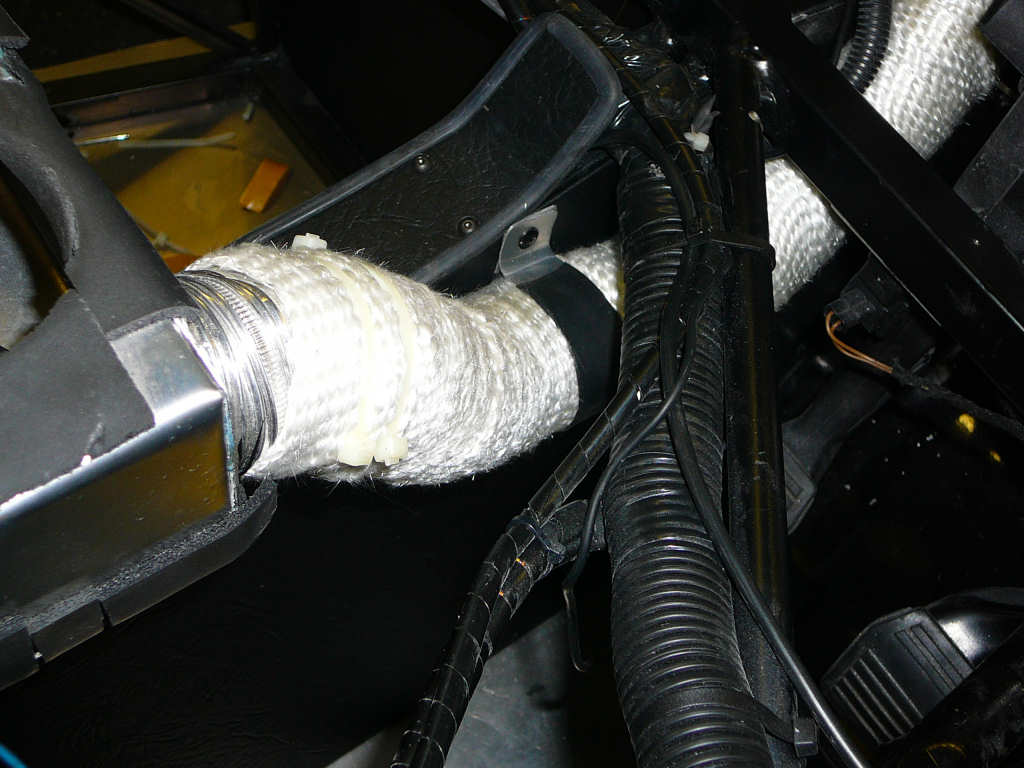
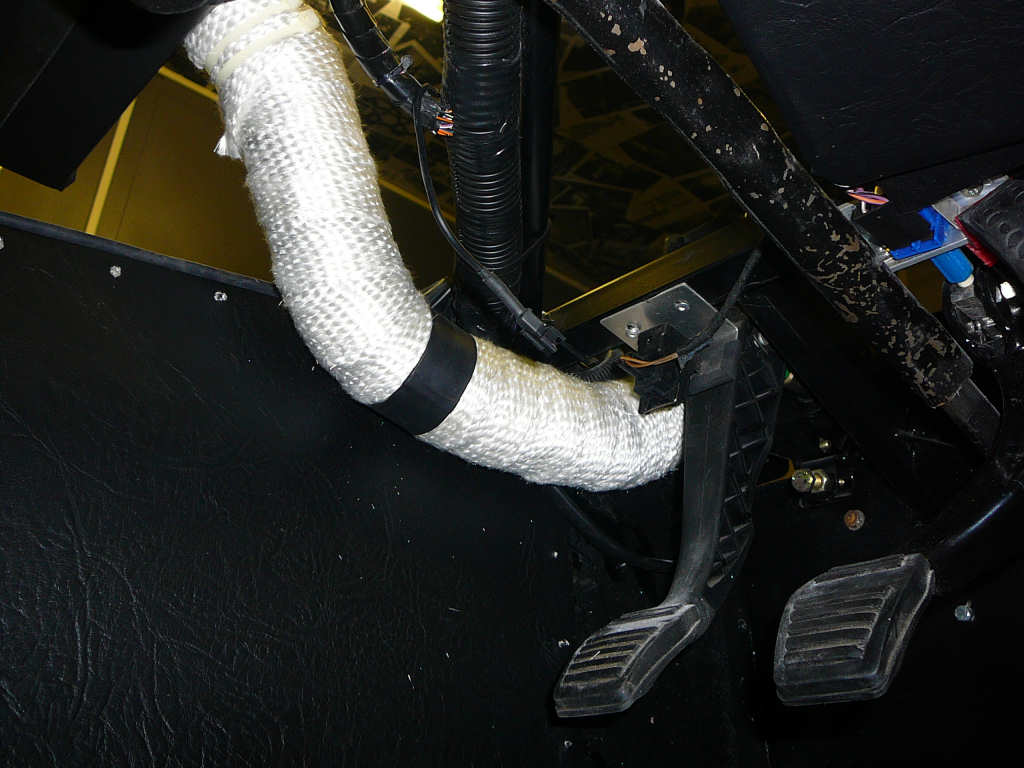
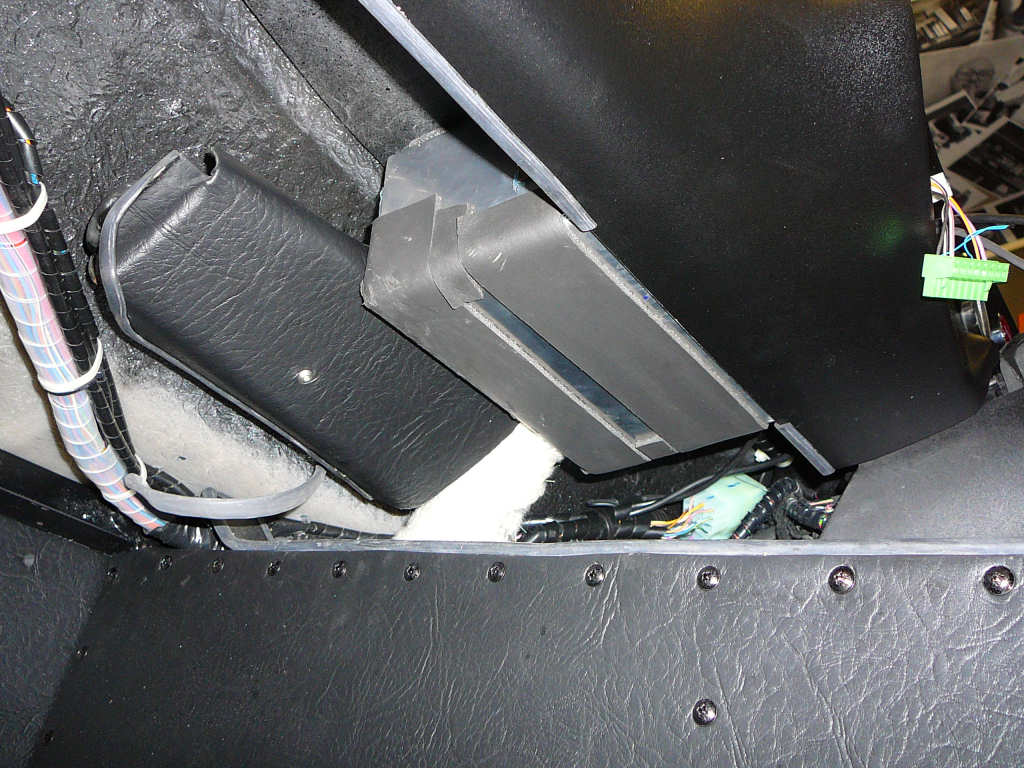
Whilst mucking around in the footwell, I fitted a clamp to the heater duct to make sure it was mounted firmly.
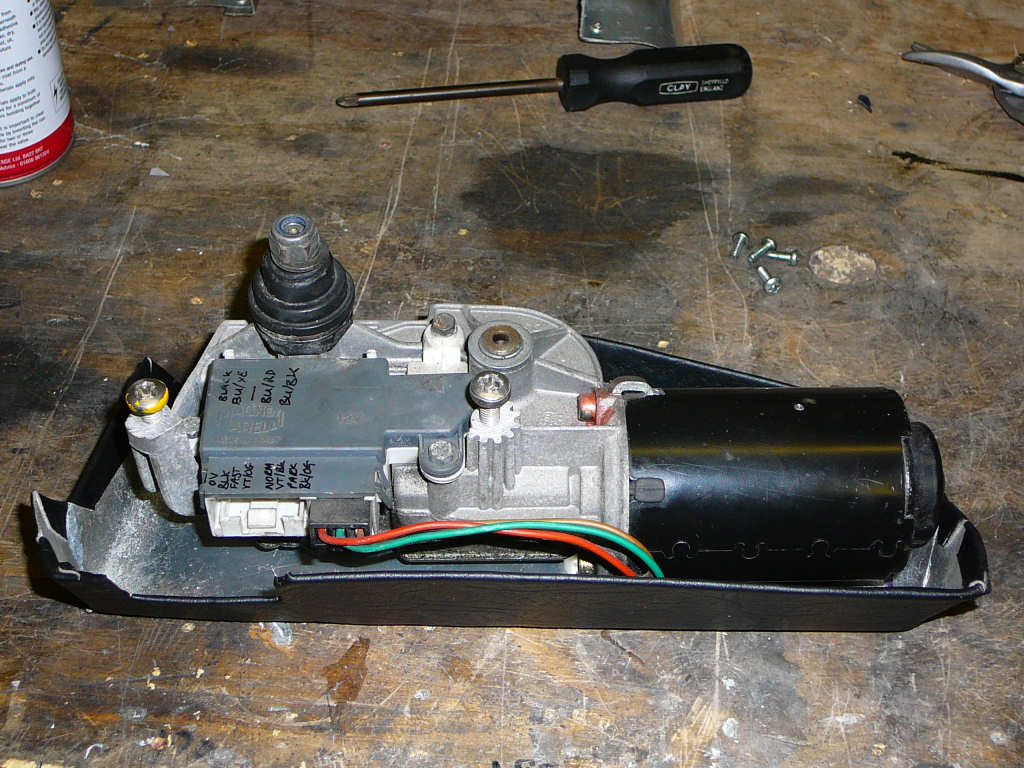
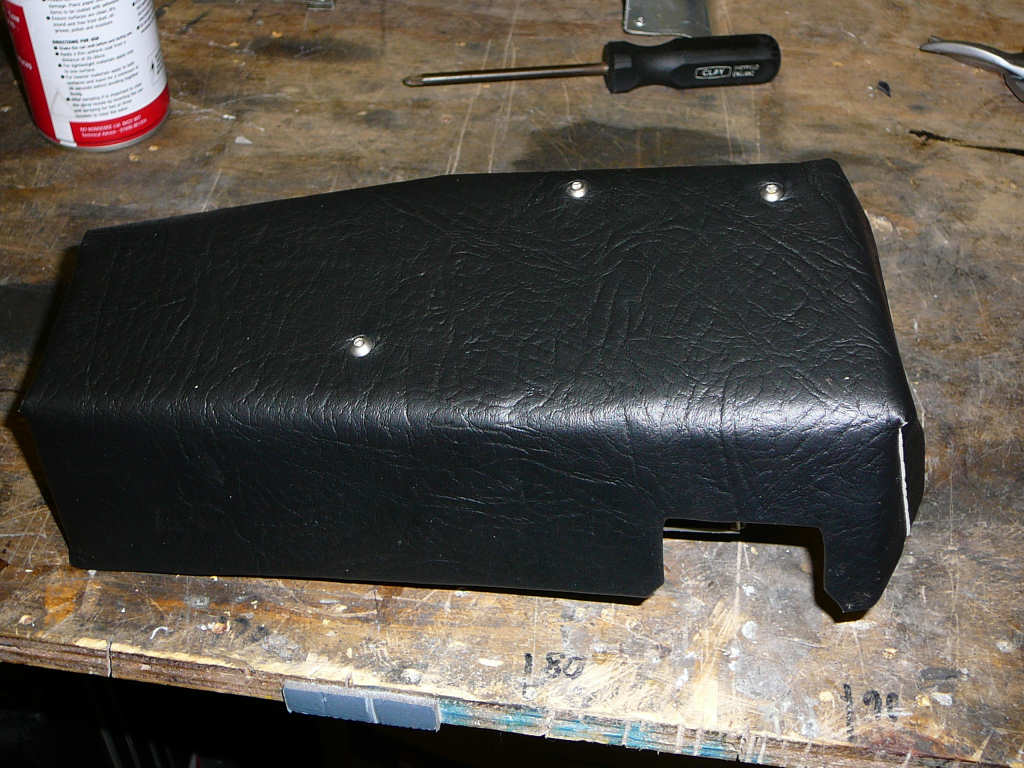
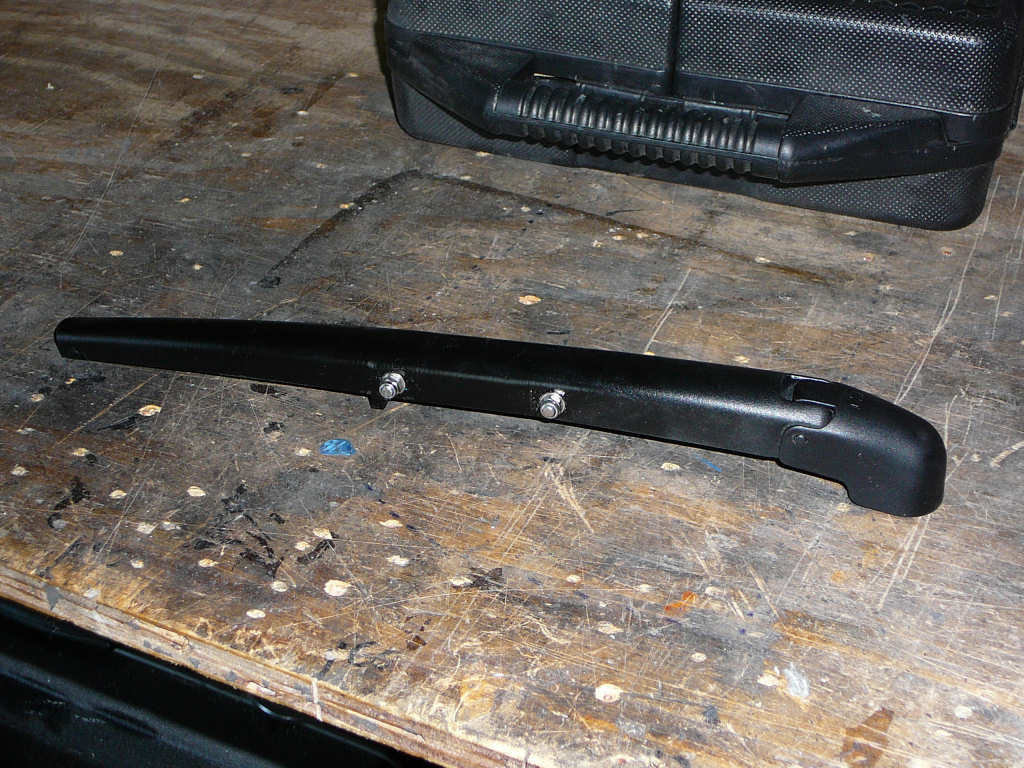
and I made the cover for the wiper motor...
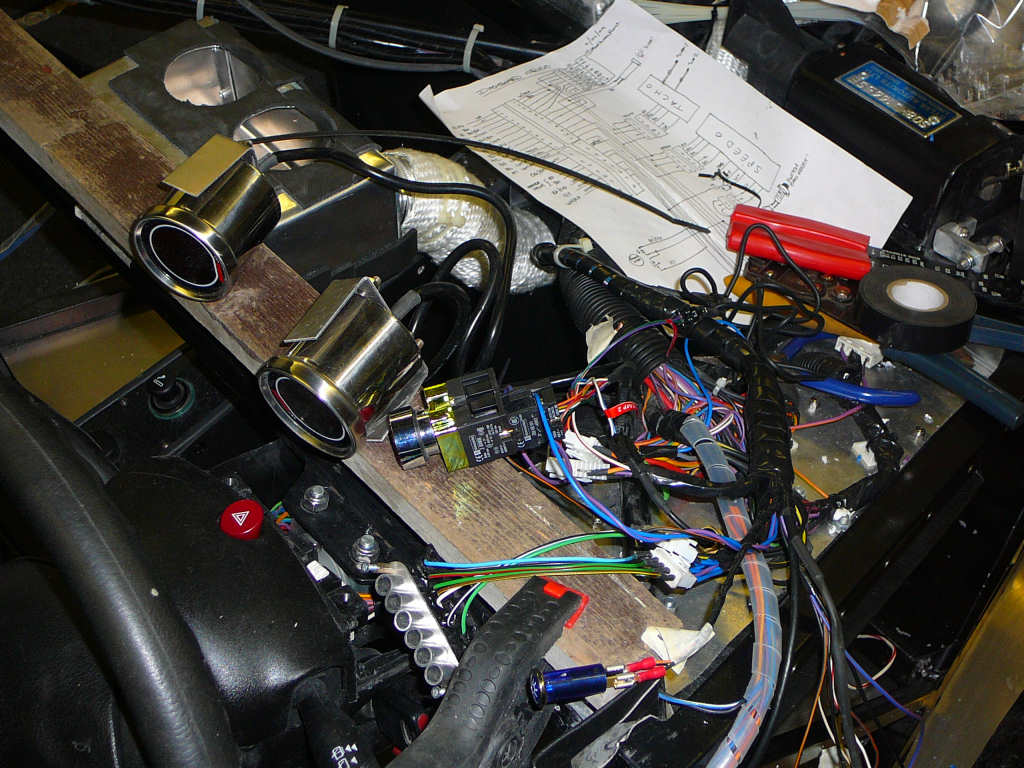
After all that, I fancied a bit of a change so I tackled the dashboard wiring. Up until now I've been using the Fiesta instruments to check things but the time has come to change over to the new gauges and indicators. I'd already worked out the wiring modifications so it was just a case of working through methodically and making sure I didn't cross any wires over. After a whole day of soldering, cutting, and insulating, it worked first time! Woohoo! It needs a bit of tidying up though...
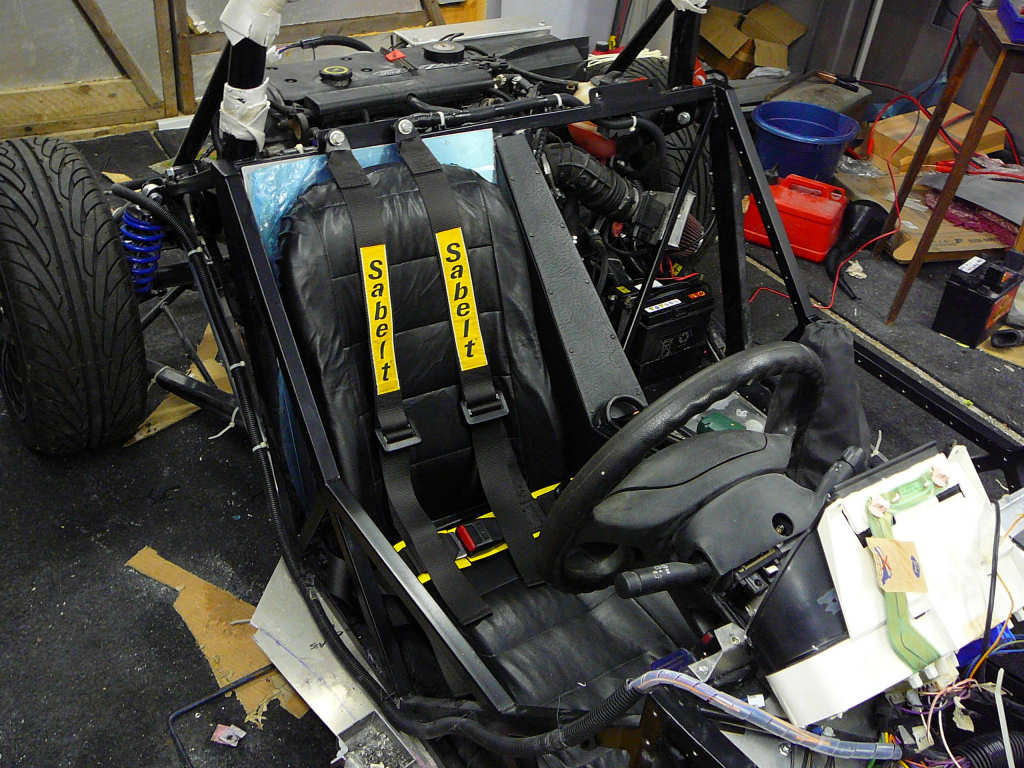
I then turned to fitting the seats. I've borrown Neil Everett's idea of how to mount the back rest which has turned out very nicely. A couple of bits of bent aluminium and voila! Good solid seat mounts.
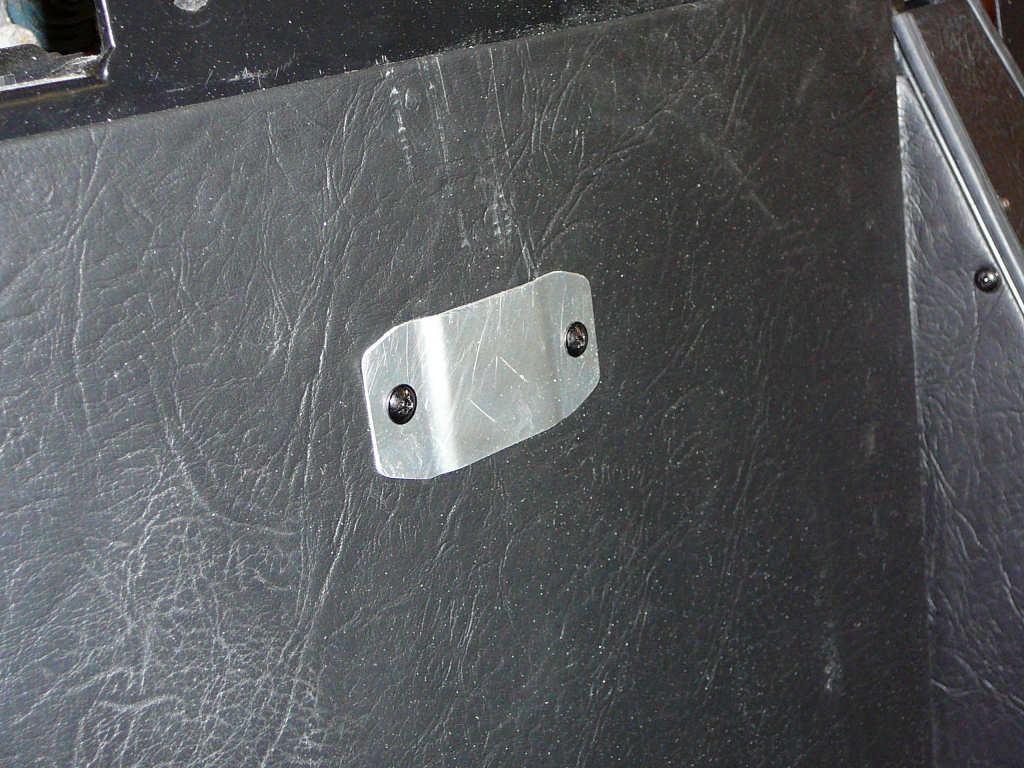
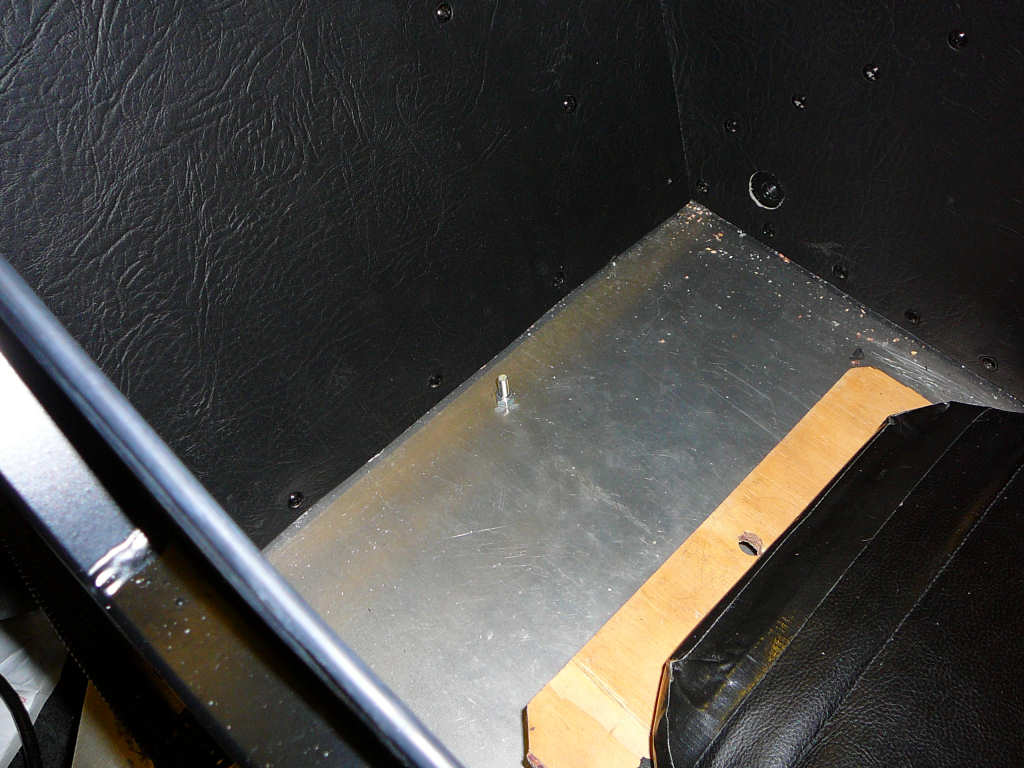
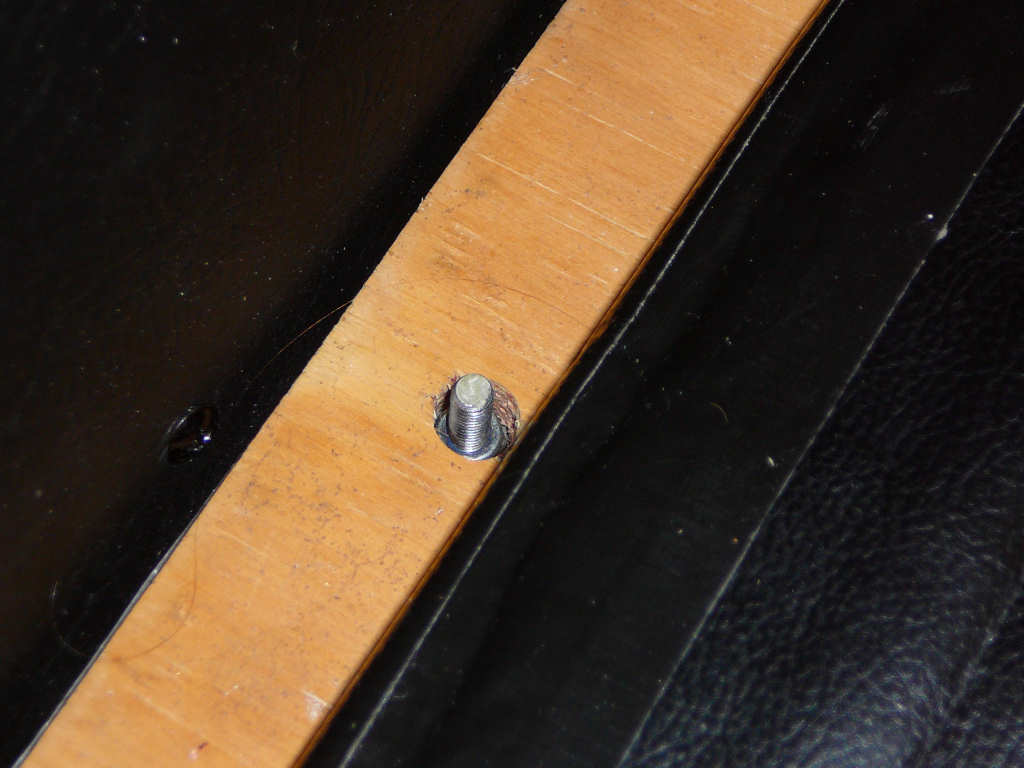
For the base, I've used a slightly different method. Since these are home-made seats, there is an area of plywood at the back which seemed to be a suitable candidate for a mounting hole. I drilled a 6.5mm hole in the floorpan and fitted an M6 x 25mm bolt with a nylock nut. This pokes through a hole in the plywood, and a penny washer and nut then clamps the seat base to the floor. The seats are a tight fit laterally anyway so there is no sideways movement and the bolt just stops them sliding forward.
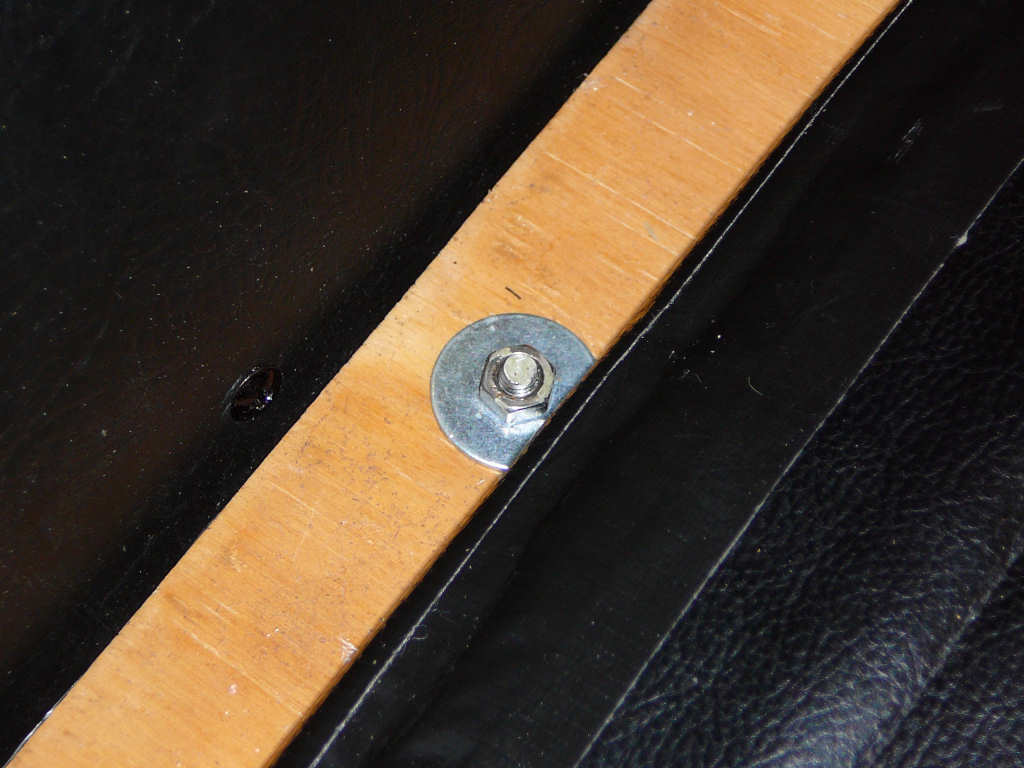
To remove the seats, I just need to lift out the back rest and remove this one nut. Easy.
So now I'm just waiting for the body to come back from the painters (due middle-end of this week) and I need to finish off the touchscreen controller (at least to an SVA standard).
14 days to SVA...
![]()
A couple of issues have been noticed as I've been reading through the SVA manual...
1) Since I have a catalytic converter, I will need a restriction in the fuel filler cap so that I can't accidentally put leaded petrol in the tank. Ok, but when was the last time you saw a leaded petrol pump? Ho hum... I couldn't find anything off the shelf that was suitable so I dug out an old lump of Acetal and machined up something that would work. Well, I didn't machine it - about the only thing I can do with a lathe is draw blood and cause accidents so I enlisted the help of Pete once again (he also welded the gear linkage for me earlier) and I was soon presented with a tailor made, custom fit, bespoke idiot guard.
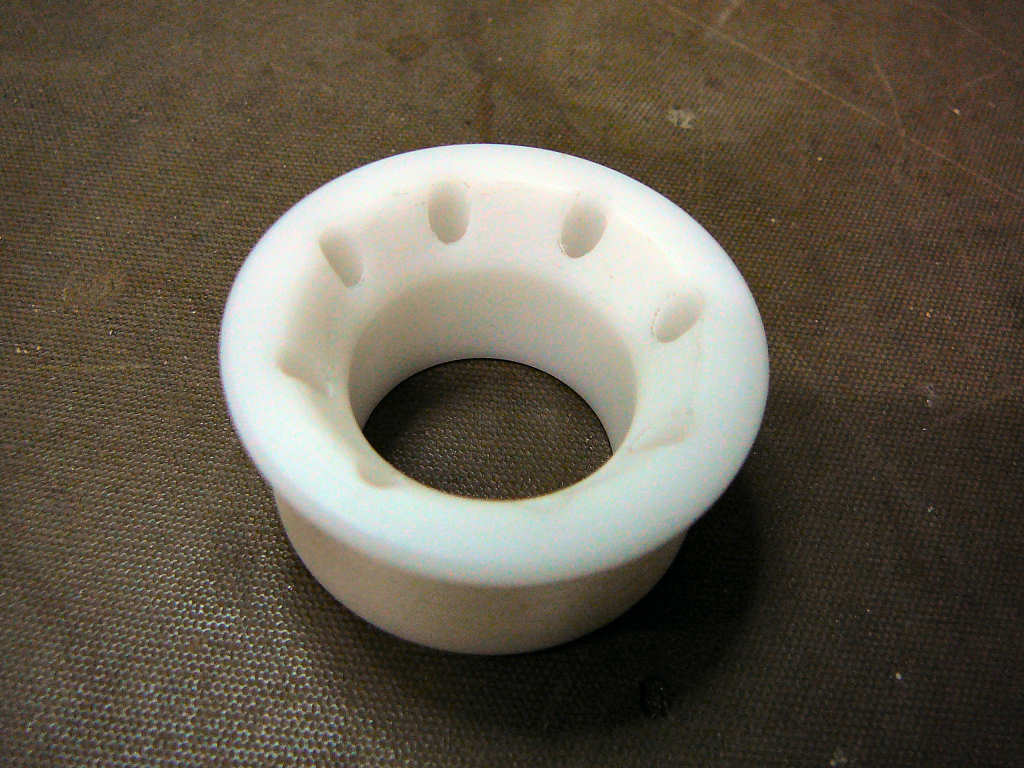
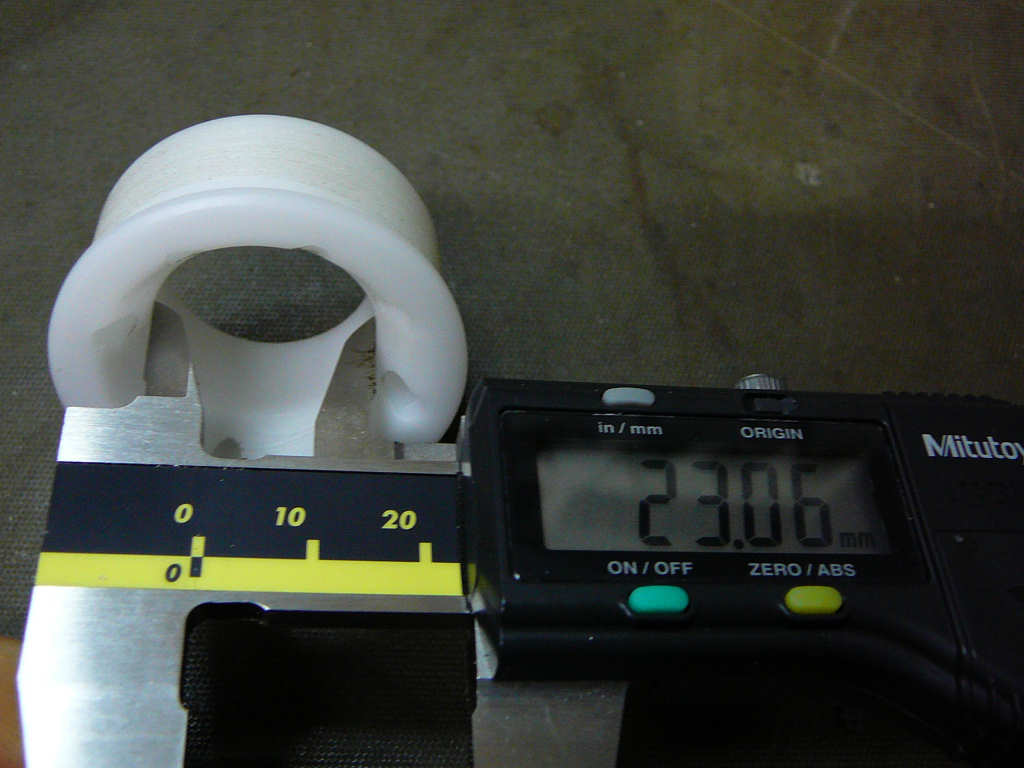
As you can see, it passes the SVA test of being smaller than 23.6mm and it fits like a charm. Thanks Pete!
2) The second issue caused slightly more initial panic. I quote from section 13, 3d:
Wheels, wheel nuts, hub caps or wheel discs do not have any pointed or sharp features (ie all edges must be blunted) which project beyond the external plane of the wheel rim.
Bugger.
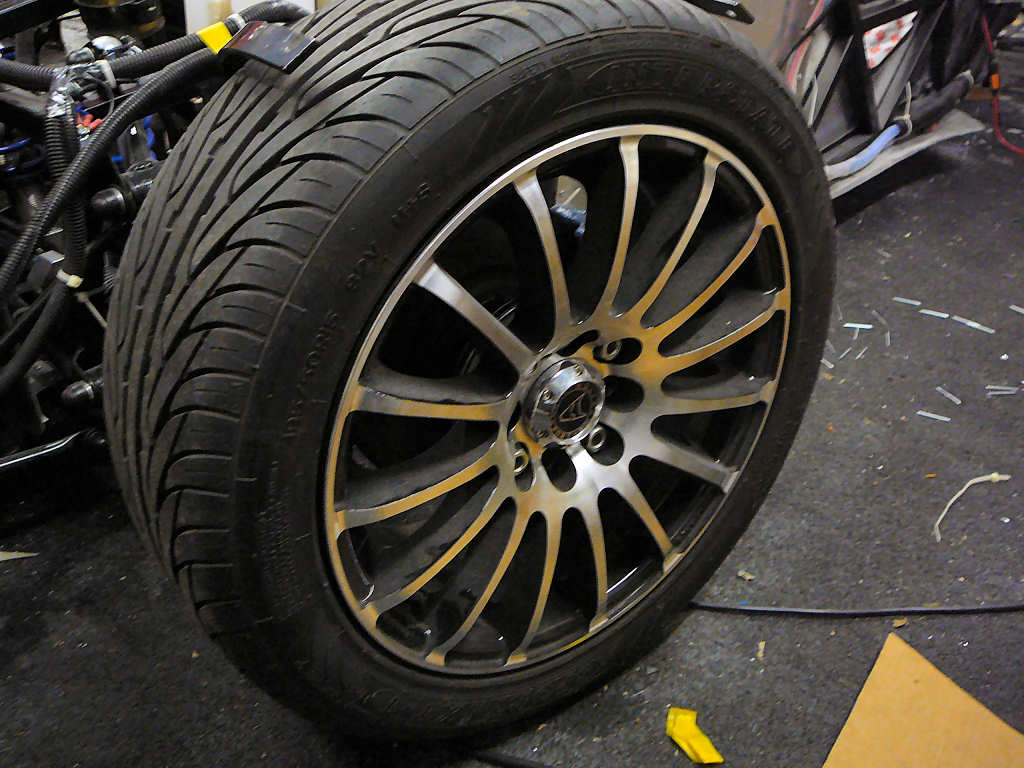
My lovely Wolfrace alloys look rather splendid (IMHO) but will present the SVA man with a total of 120 sharp edges which I am sure he would notice and chuckle heartily about <sigh>. There's only one thing for it - I need new wheels. Like I said, "Bugger".
A couple of cups of weapons-grade strong coffee later and I started searching for some replacements. First port of call was eBay (where else!) where I found these.
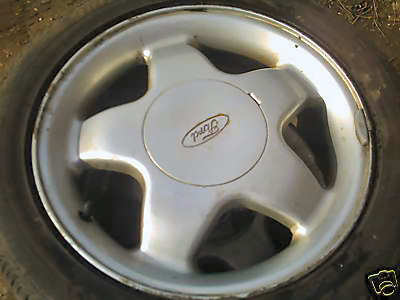
Ok, so they're not that pretty, but they are just up the road, they do have 4 legal tyres, and they are only £30. <Click>. I bought them immediately! At the end of the day, I've now got some wheels to get me through SVA, and may prove useful for trackdays or similar in the future. Can't really argue for £30!
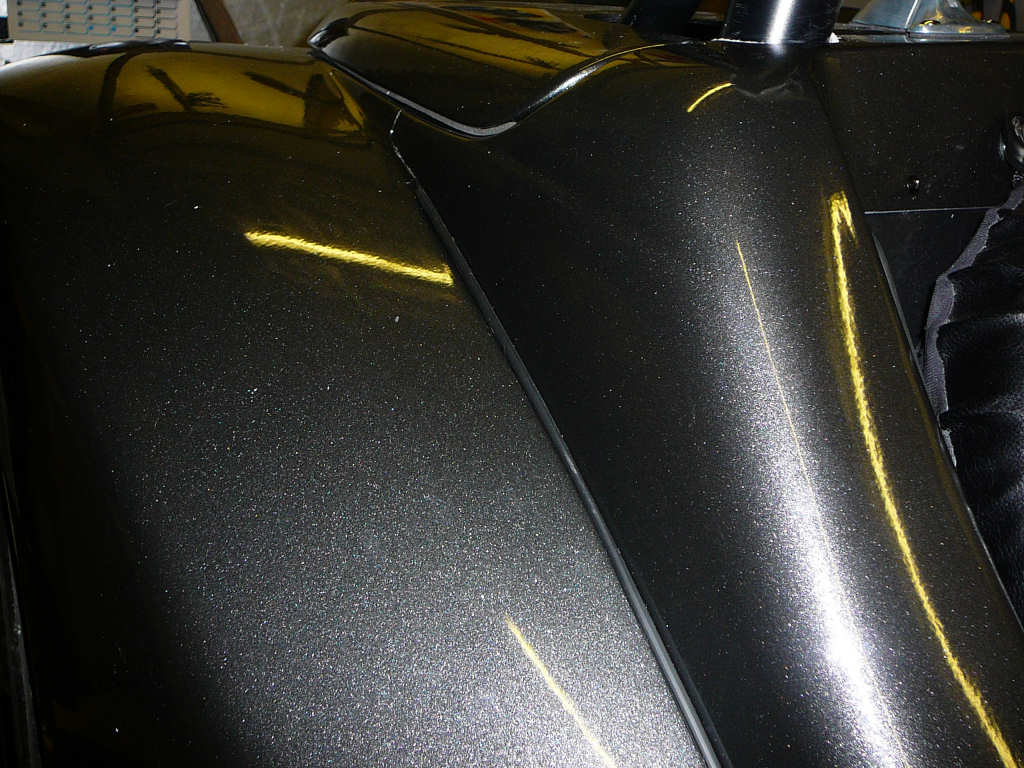
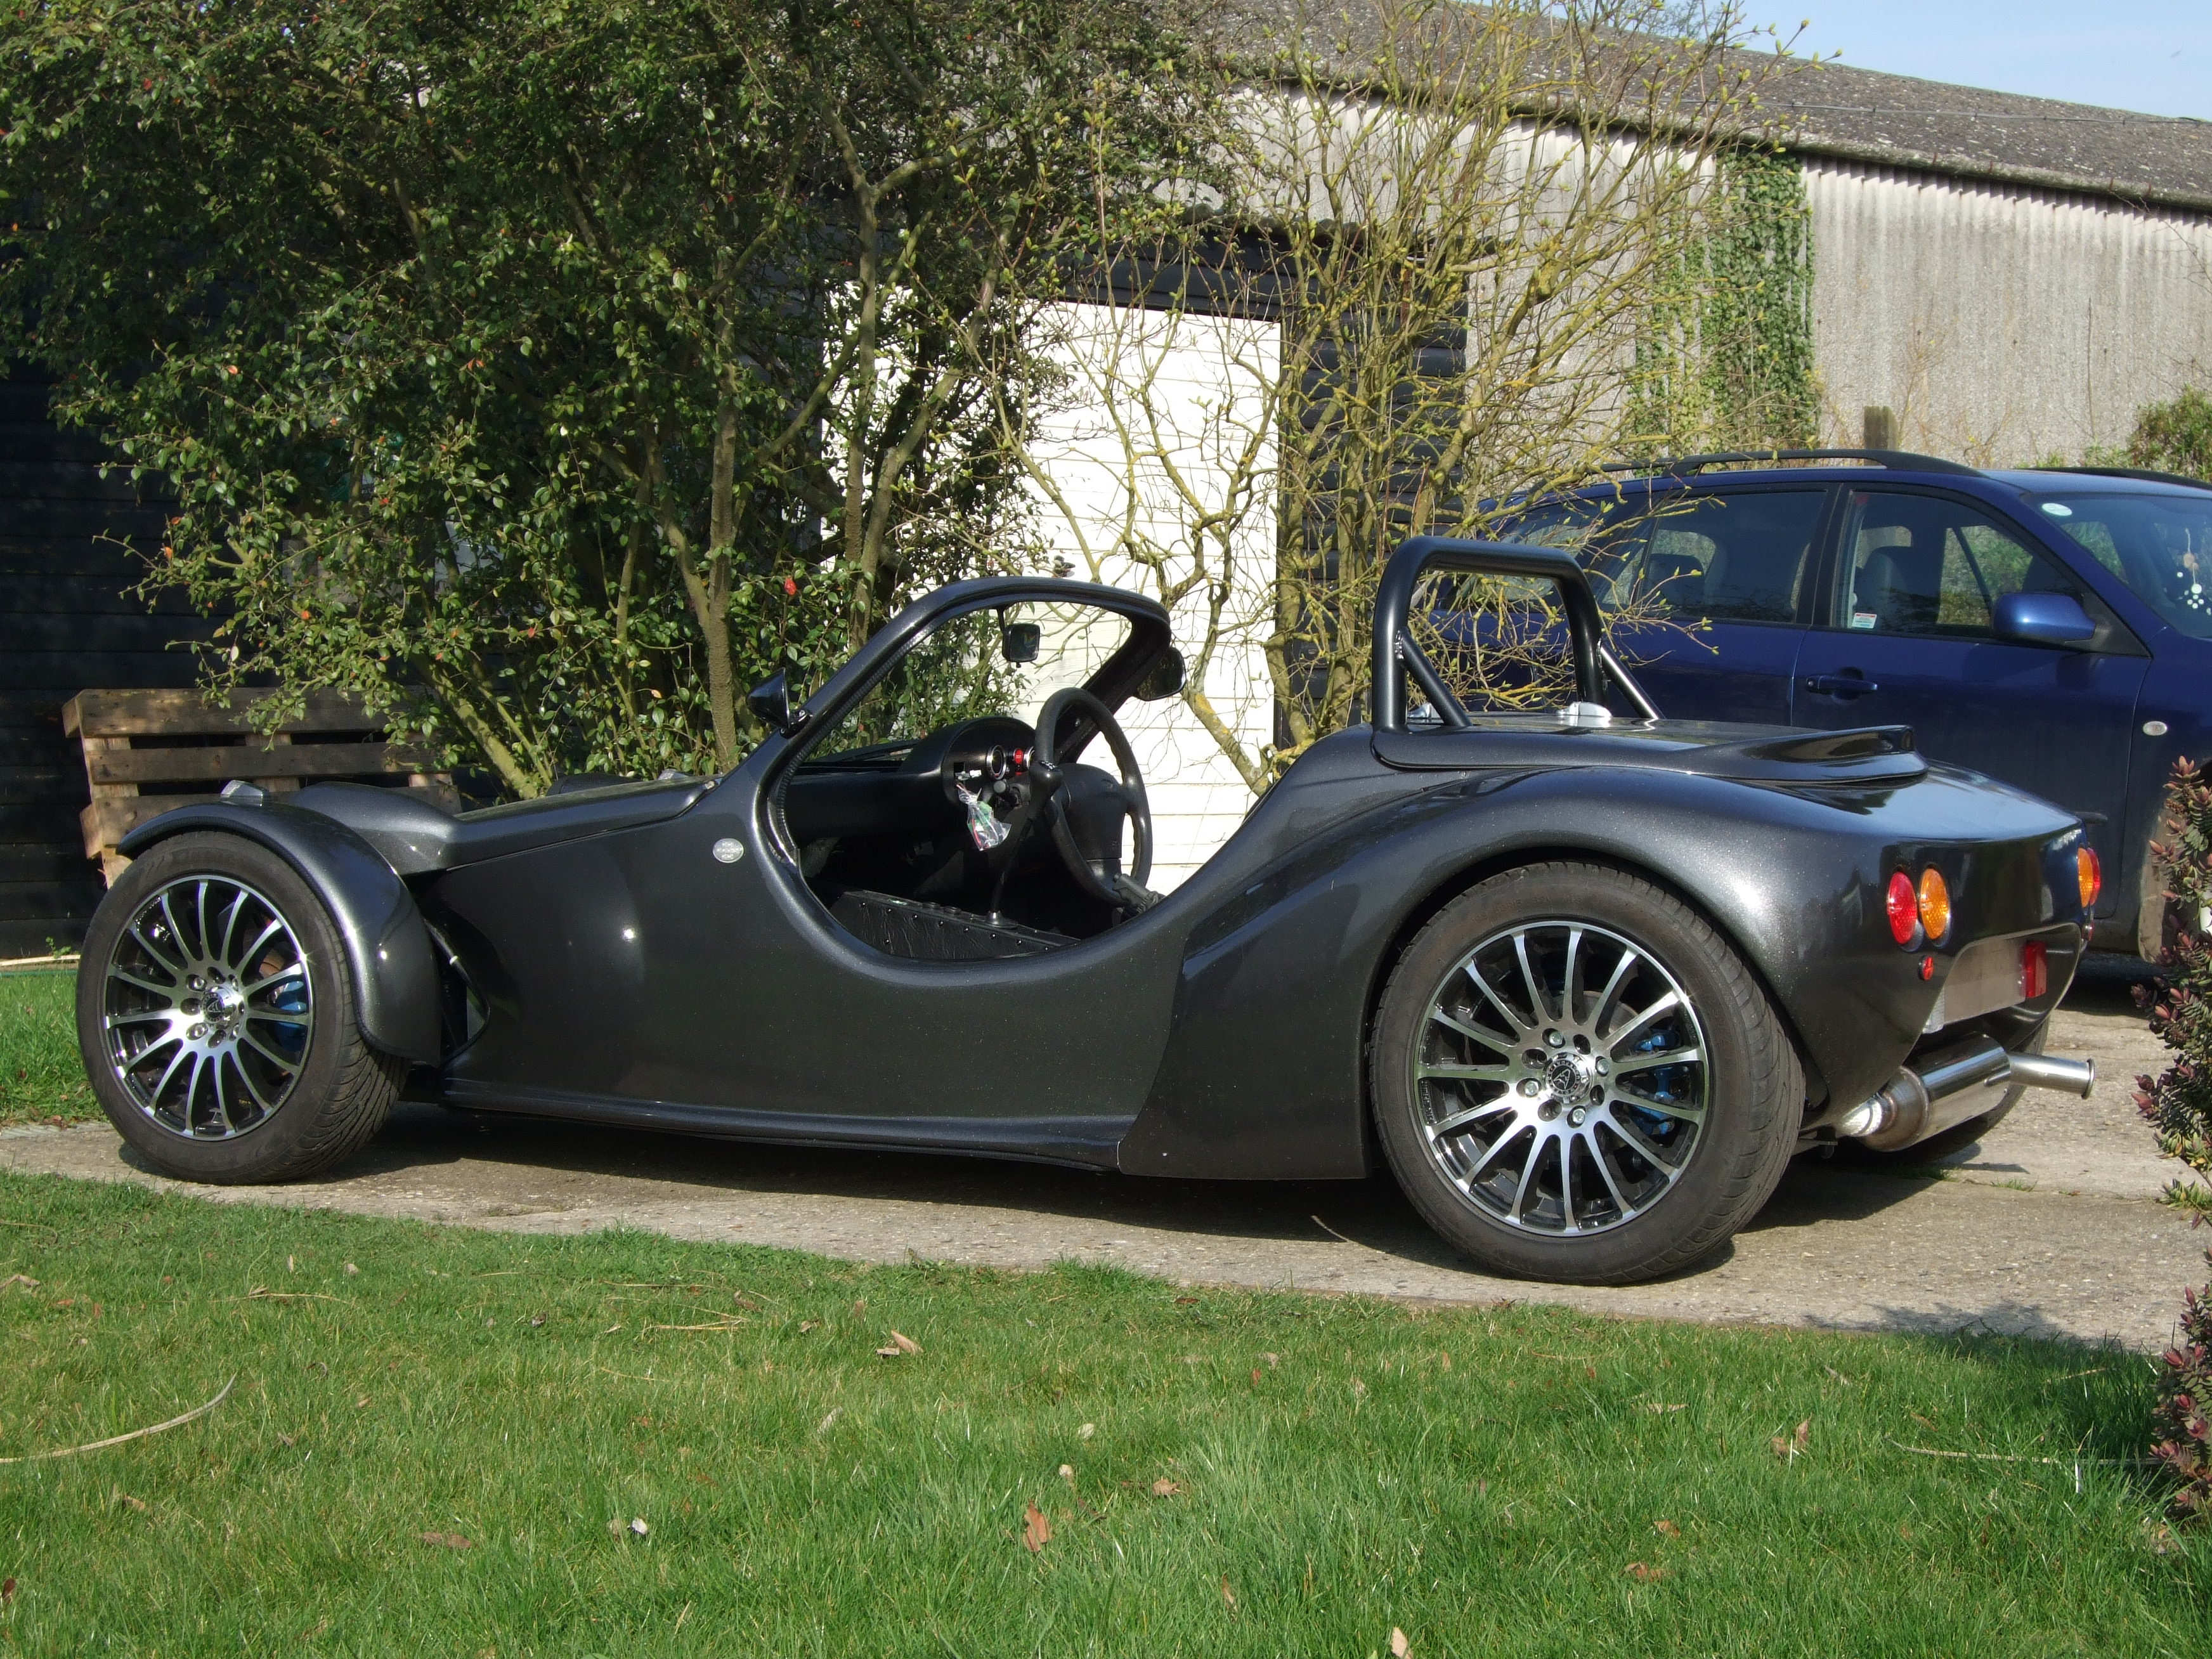
Oh - I forgot to mention <ahem>. The body is back from the painters! I've had more than a few emails asking about the colour, and I know it may not be to everyones taste, but I think it looks gorgeous...
...<fanfare>...
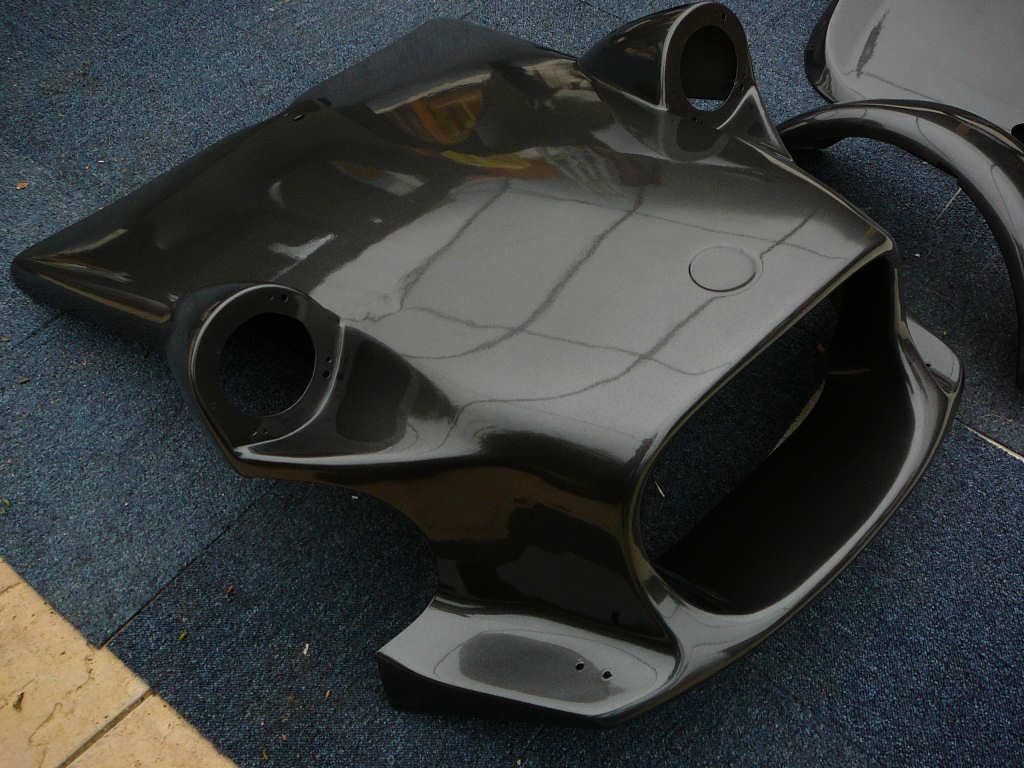

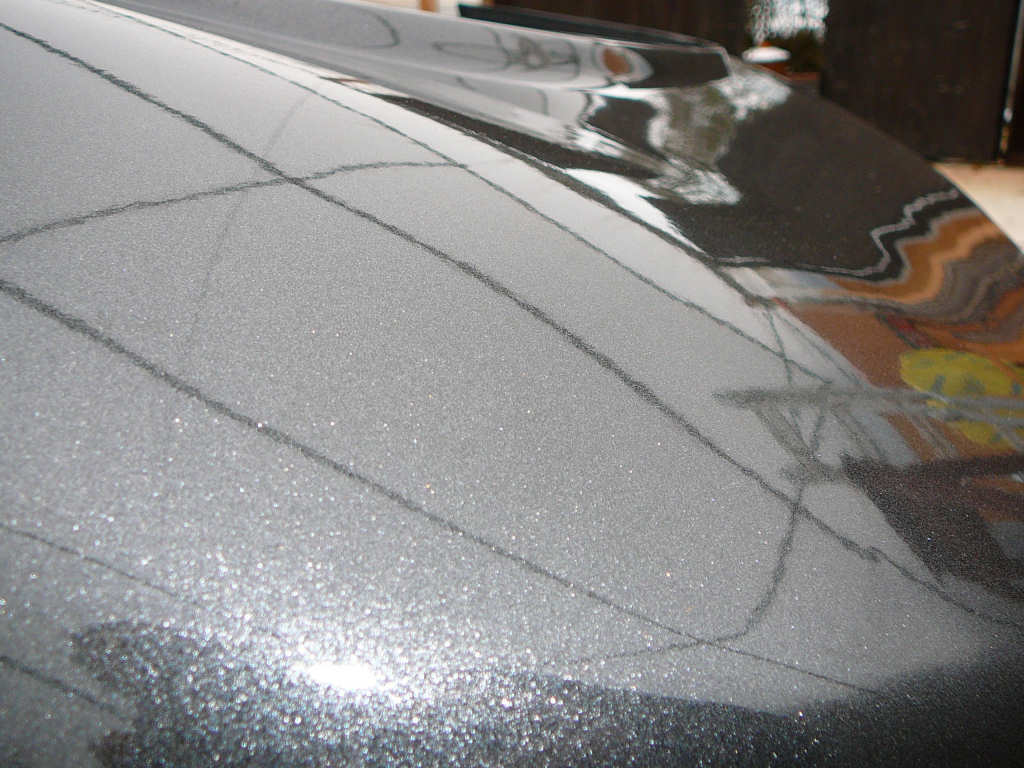
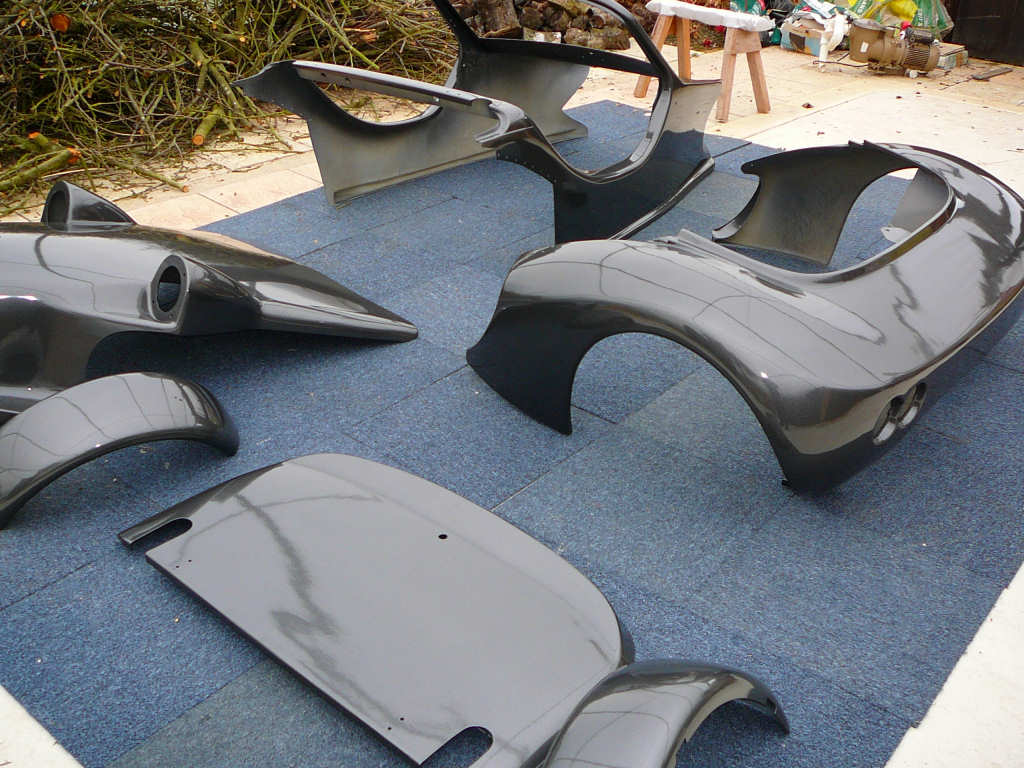
I need to say a big thanks to everyone at Morleys in Milton, Cambridge for all of the extra effort that went into this. After the debacle that was the delivery of the body on the trailer, they've repaired the damaged bit (see earlier) with fibreglass, and it's obvious that quite some time has been spent on it. They also delivered it back to me on Wednesday evening so that it would arrive safely. Total price for the job was £550 which is about a thousand pounds cheaper than many of the other quotes I was getting! Suddenly, all of that sanding effort seems to be worthwhile. The level of finish is far above what I had expected and I'm chuffed to bits with the result. I'll probably cry when I get my first stone chip though...
Of course, I can't wait (no really, I can't wait - the MOT is less than a week away) to get it fitted but I'm leaving the paint to fully harden over the next couple of days before I rush into it and cause some damage. It looks like a busy weekend ahead, especially since the 750MC are racing at Snetterton on Sunday and I'd really like to go...
11 days to SVA, but only 7 to MOT. Where does all the time go?!
![]()
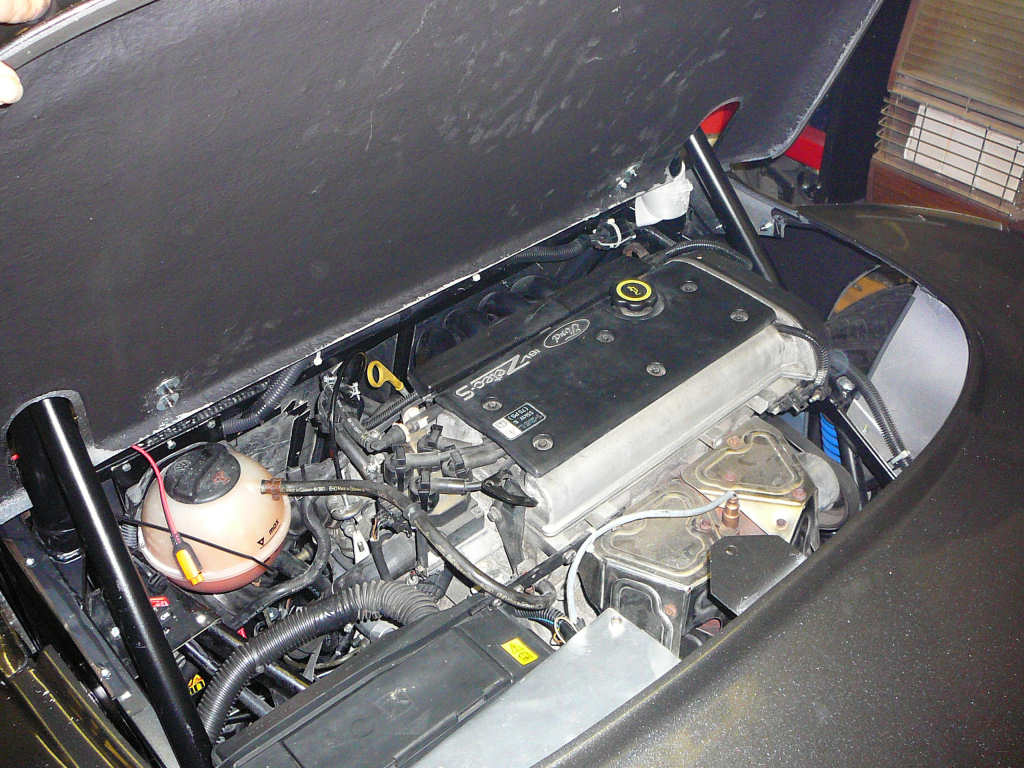
Recent jobs have included fitting the dashboard parts.
I then got round to testing the tacho and speedo. To do this, I jacked the back wheels up and started the engine. A bit of twiddling with the settings and the tacho read 950rpm. Perfect. I then put the car into 1st gear and let the wheels start turning. The speedo showed 5mph which went up to about 20mph when I blipped the throttle. Good. My tyres measure 1790mm circumference and I set the speedo to 1950mm. This should give the required inaccuracy for SVA.
I've noticed quite a lot of petrol fumes coming out of the tank breather, Not suprising really, but a bit smelly so I've fitted a pneumatic restrictor to the breather pipe. This performs pretty much the same task as a filter in this application, but it's primary job is to slow down the speed of the air flow in pneumatic systems, which helps to damp the 'pssst pssst' that these systems generate. Since fitting it, the petrol smell is much reduced and it should help on those hot sunny days!

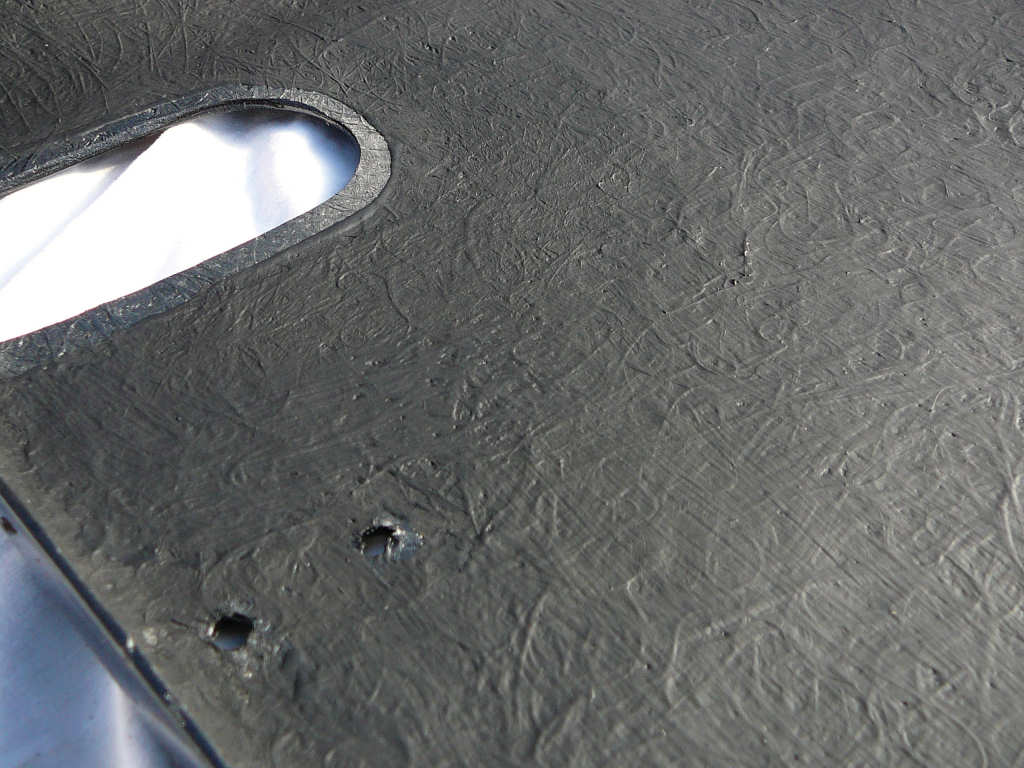
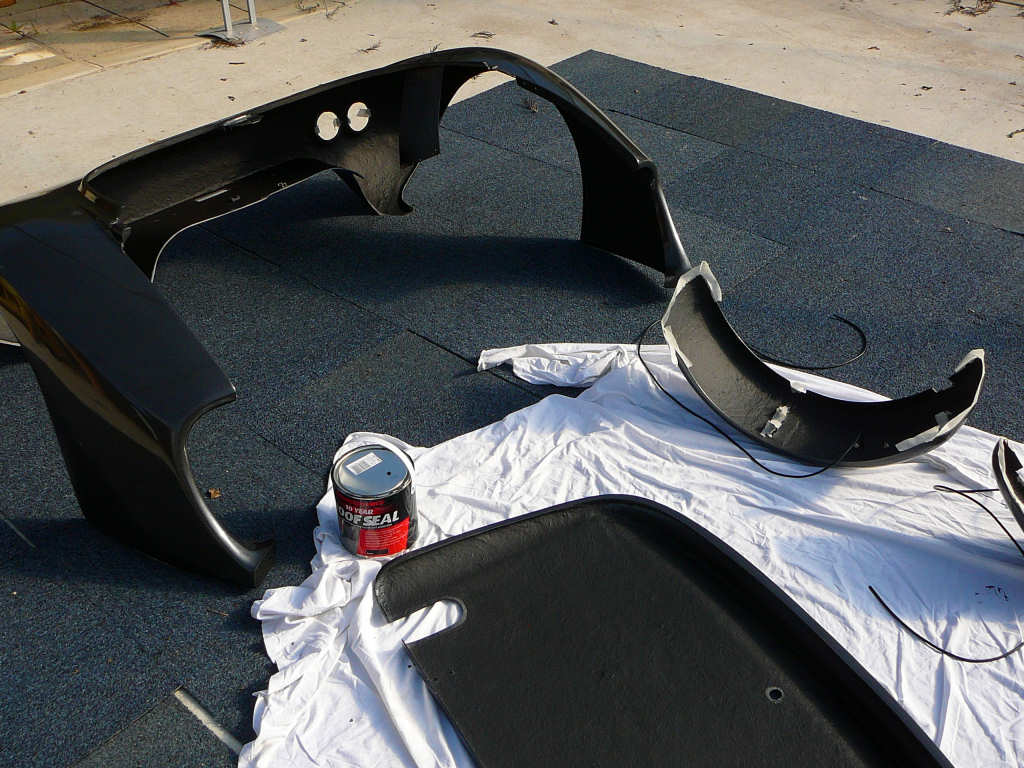
After all this, there was a frantic weekend of undersealing the bodywork (thanks to my wife and housemate for this!) followed by a heady round of bodywork fitting, Here's the result of all of the underseal effort - a 2-3mm thick layer of rubber that should help prevent star cracks appearing.

While these were being painted, I enlisted the help of my wife yet again to get the main tub fitted. Rather nervously, the body was lowered over the chassis and eased into place without any problems. I then drilled and secured the front edge under where the bonnet will be with No8 x 1/2" self tapping flange head screws. No other fixings could be made until the rear tub was fitted, so that was next...
Masking tape was put onto the bodywork where there was any risk of something catching or scraping the finish, and the rear tub was offered into place. Now, this thing is unwieldy. It's big, and a bit flexible, so it took a fair amount of time to get it into the right place and bolted in. In fact, it took all of Sunday morning! A length of wing piping was fitted between the two sections to finish the job off nicely and all the bolts were done up tight.
I also fitted the headlights, side repeaters and the bonnet stay (large version from Car Builder Solutions). This involved screwing the bracket to the central chassis member, and making up an aluminium angle bracket to fit to the underside of the bonnet which was then fibreglassed into place.
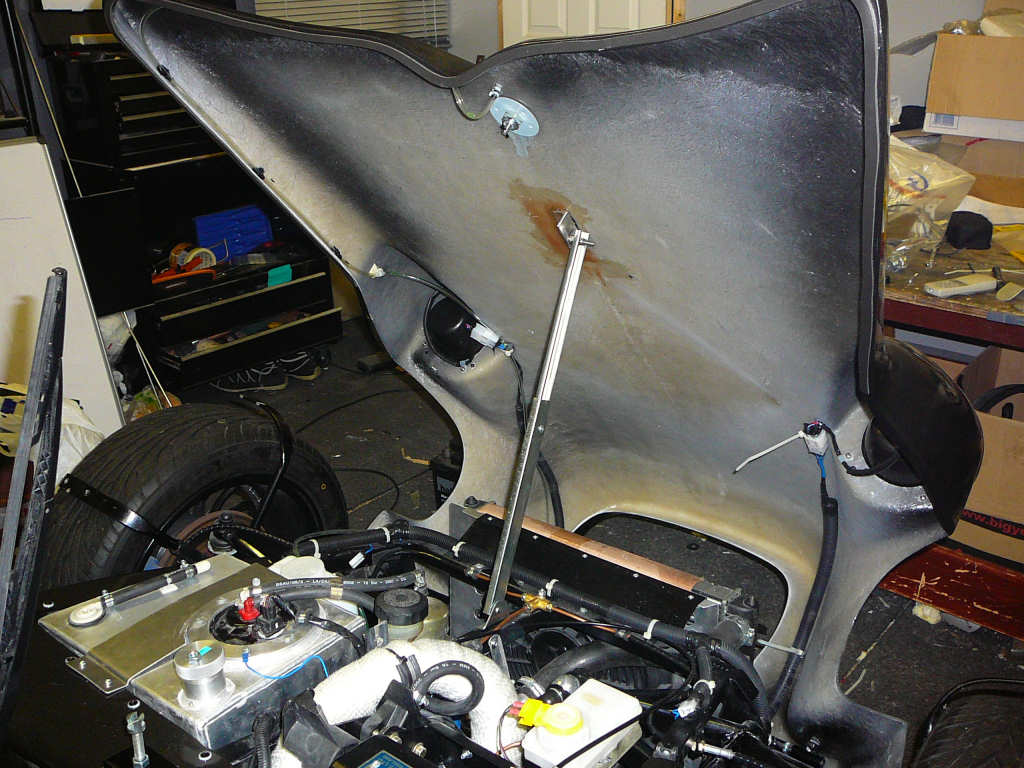
In this photo, you can also see the washer pipe that runs around the left hand edge of the bonnet. I got a face full of water when I pressed the washer button on the stalks, so at least I know they work. Which reminds me, I need to get the windscreen fitted. I've booked Autoglass to come and have a look on Wednesday afternoon...
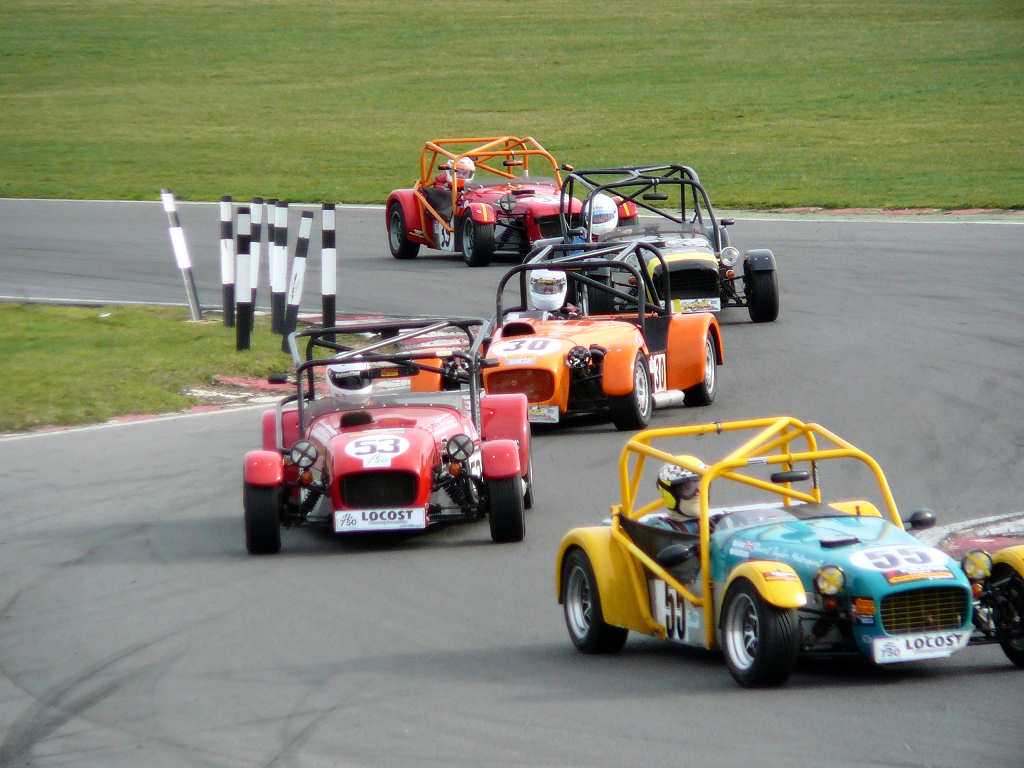
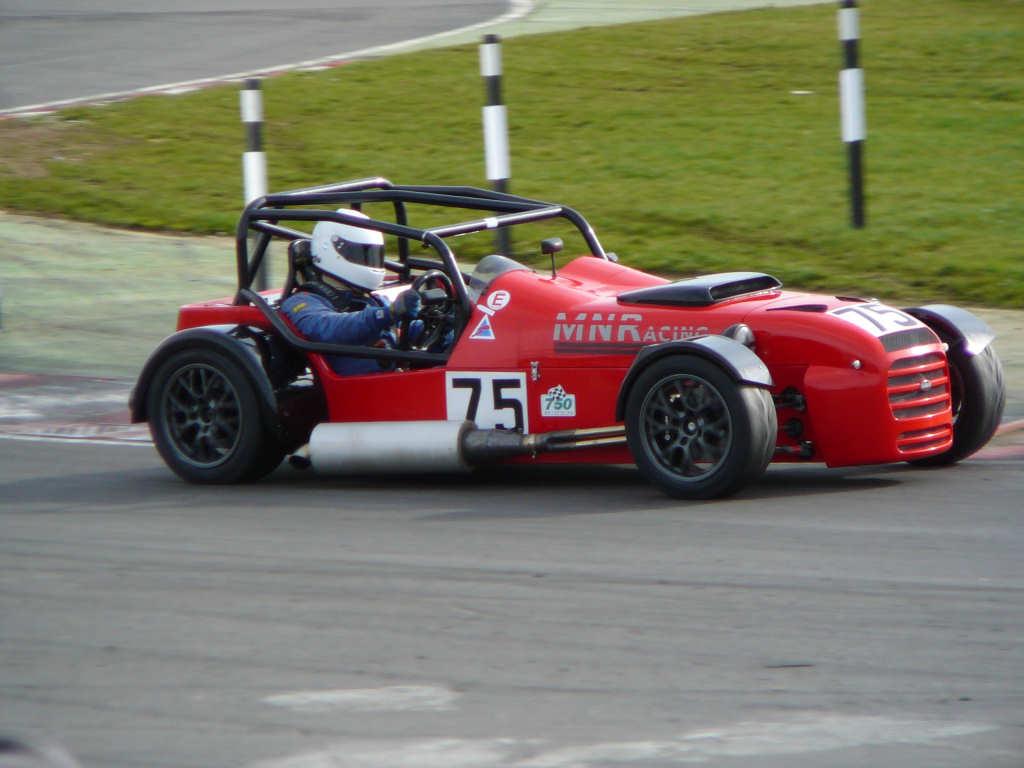
After all that, I did manage to get to Snetterton, albeit only for the afternoon on Sunday, where I watched the new Raw Fulcrum annihilate the rest of the field. The Locosts were entertaining to say the least and it was nice to get out of the workshop for a while and watch someone else doing all the work! The MNR shown below sounded particularly gorgeous as it roared past - then we noticed the number of exhaust headers sticking out from under the bonnet. That'll be a V8 then.
More info on the next rounds and championships can be found here: http://www.750mc.co.uk

Back to the workshop...
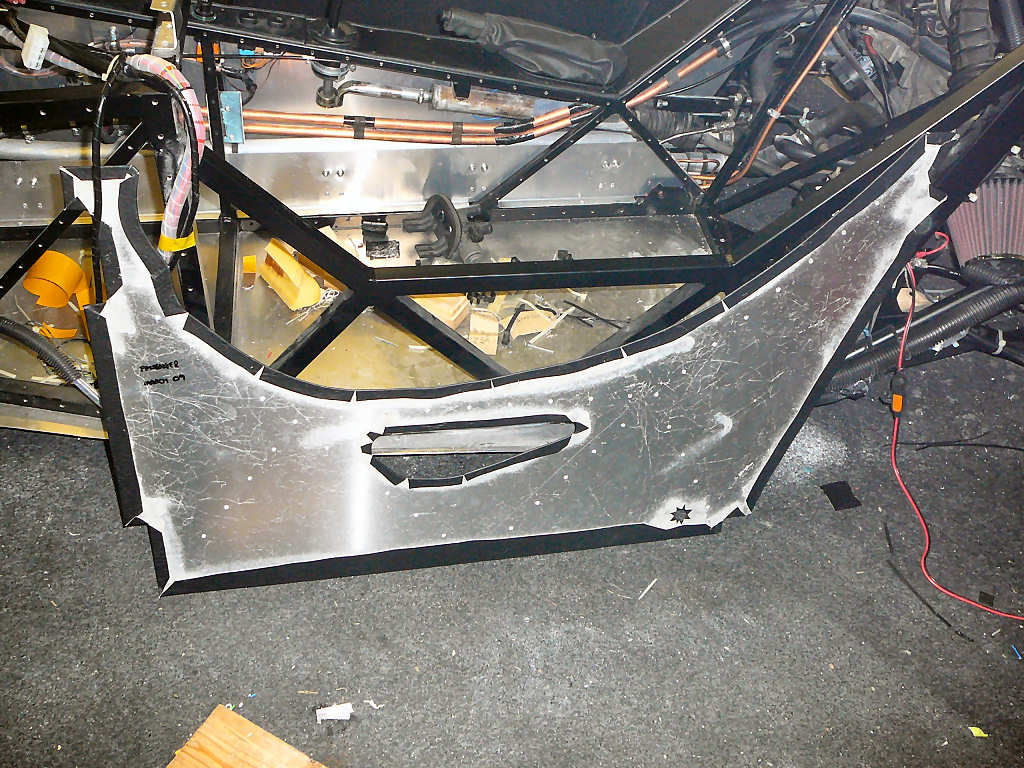
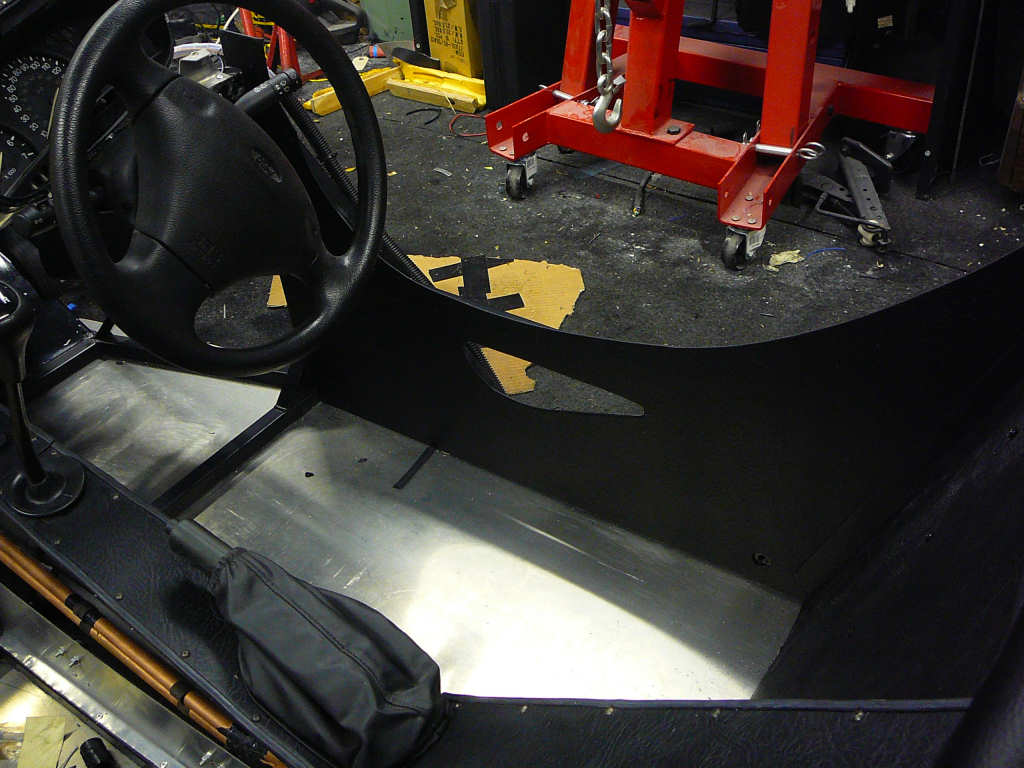
Next task is to start fitting the bits that go onto the bodywork. Now that the bodywork is fitted to the floor, the side panels in the cockpit can be fitted back into place. Again, these are held in with No 8 x 1/2" self tapping flange headed screws. Nearly 200 of them. Before I do that though, I need to do something about the side pockets.
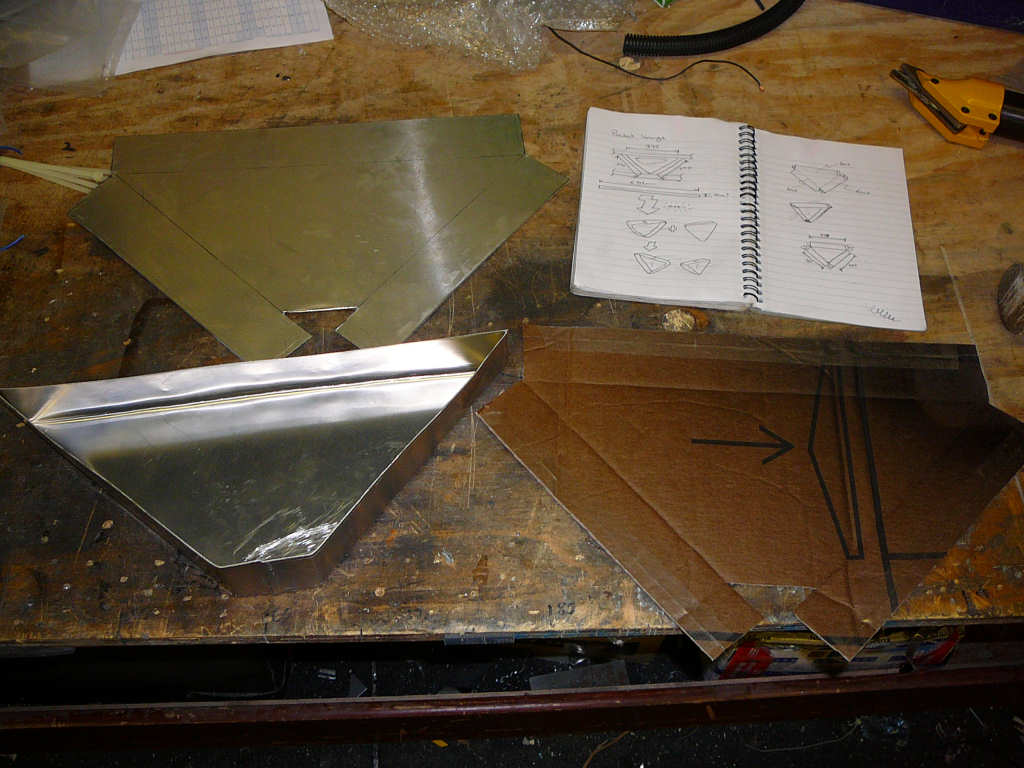
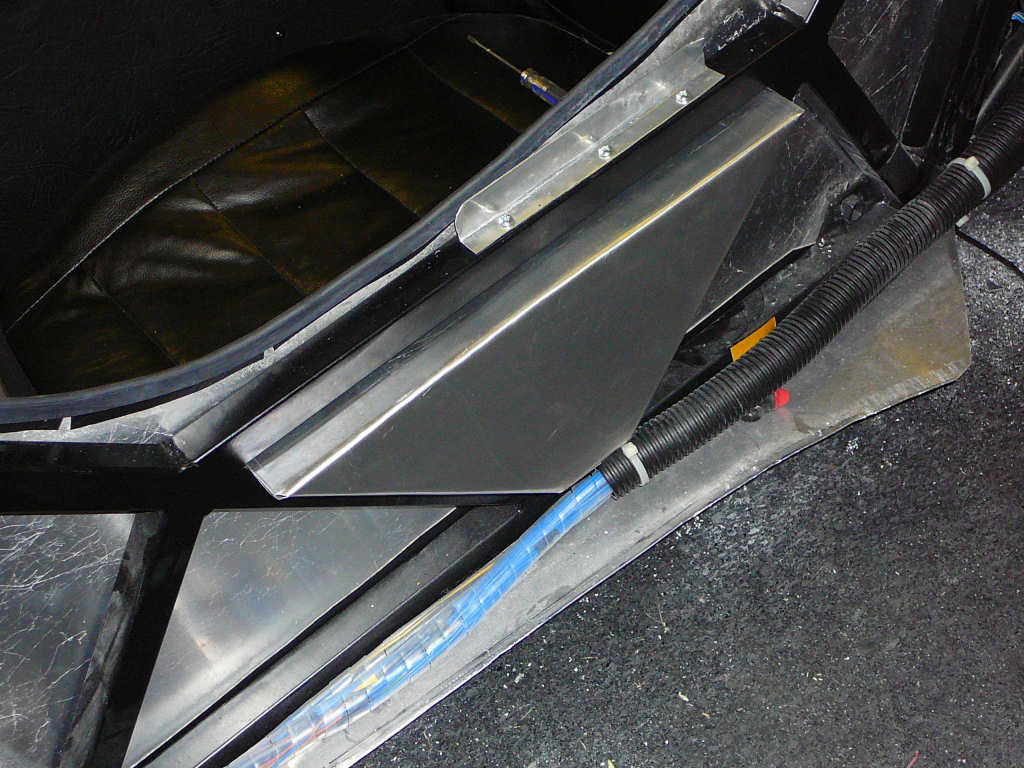
My rather dubious origami slills were tested once again as I made a cardboard template to suit the space available. This was then transferred to a sheet of aluminium, cut out, bent and folded, and covered in black vinyl. To fit these to the body, I bonded them into place just before fitting the side panels.
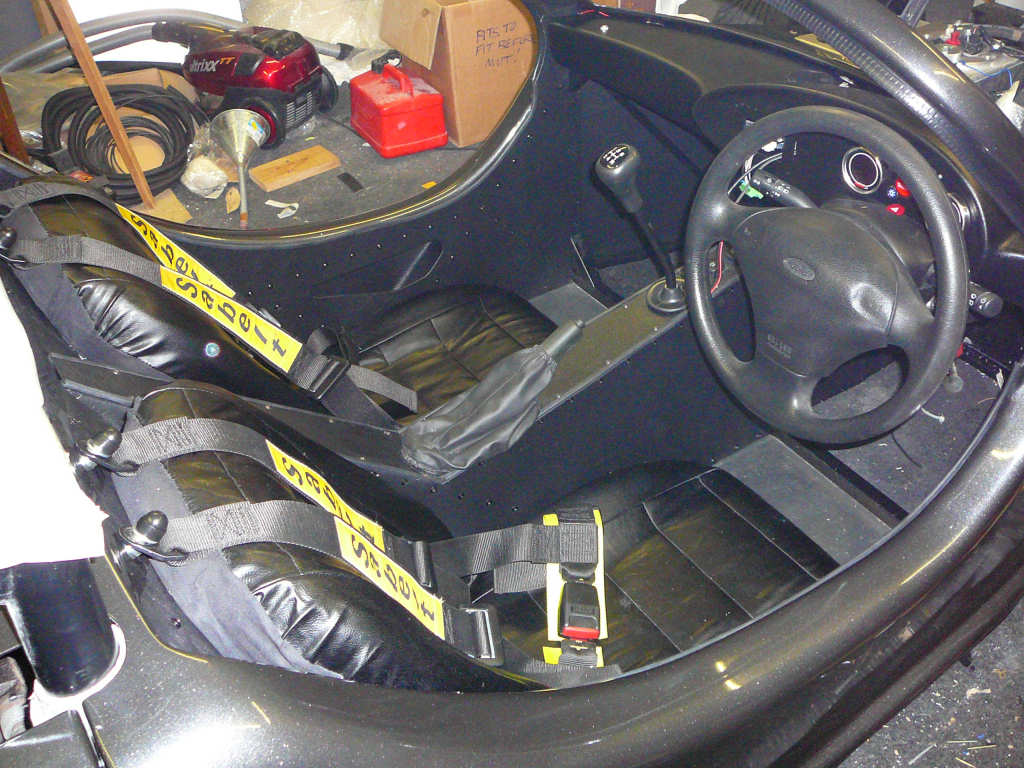
The seats were then fitted along with the harnesses (Am I really getting that close to the end now?!). I need to get some spacers made up to keep the tops of the harnesses away from the fibreglass before i finally torque them up tight.
Then followed one of those jobs that should only take minutes, but ended up taking forever. The wiper motor and cover. The wiper motor itself fitted into place quite easily but the cover - that was a diffferent story. To cut it short though, I ended up chopping out some fairly large chunks of the cover and becoming something of a contortionist in the attempt to fit it. Far too long and several bruised knuckles later, it was in. Good. I don't want to be doing that job again anytime soon!
Right - let's fit the engine cover. The mounting holes needed to be opened up slightly since there was quite a lot of paint around them, but then the Mini boot hinges popped straight in. I haven't painted them just in case Mr SVA needs me to file a bit off a corner of one or something.
I've gone around the entire car and the whole thing looks like a rubber trim and foam rubber showroom now with all manner of shapes and sizes liberally strewn over every conceivable edge. I'm starting to get a bit concerned that Mr SVA may think I'm taking the p*ss a bit with the amount that's gone on!
Final job - fit some lights.
6 days to SVA. Only 3 to MOT!
Oooh - does anyone know if I need to secure the front flexible brake hoses to the upper wishbones?
![]()
Somehow - I'm still not sure exactly how, but somehow - the car was ready in time for the MOT on Friday morning. There were 2 or 3 main jobs that urgently needed doing beforehand, namely fitting the windscreen, fitting the harnesses and sorting out the handbrake compensator.
First job - windscreen. I contacted Autoglass and arranged for them to come over and do the fitting. As it turned out, they didn't have very much experience of kit cars and were a little stumped at first but we soon managed to work out what was needed. One of the problems was that the screen is bonded in and therefore should have a black border around it so that the adhesive is not visible from the front. The fitter who turned up was not overly keen on doing this and he was running out of time so I asked for the requisite materials to be left so I could do it in preparation for another visit the following day to complete the fitting. Later on, I carefully masked the inside of the screen and applied the primer using a peculiar little fluffy ball applicator thingy that they left for me. Luckily, this turned out to be quite an easy job and the primer went on really easily. It's an odd substance to work with as it looks and feels very much like ink rather than paint, and it leaves a totally opaque black finish after one single coat.
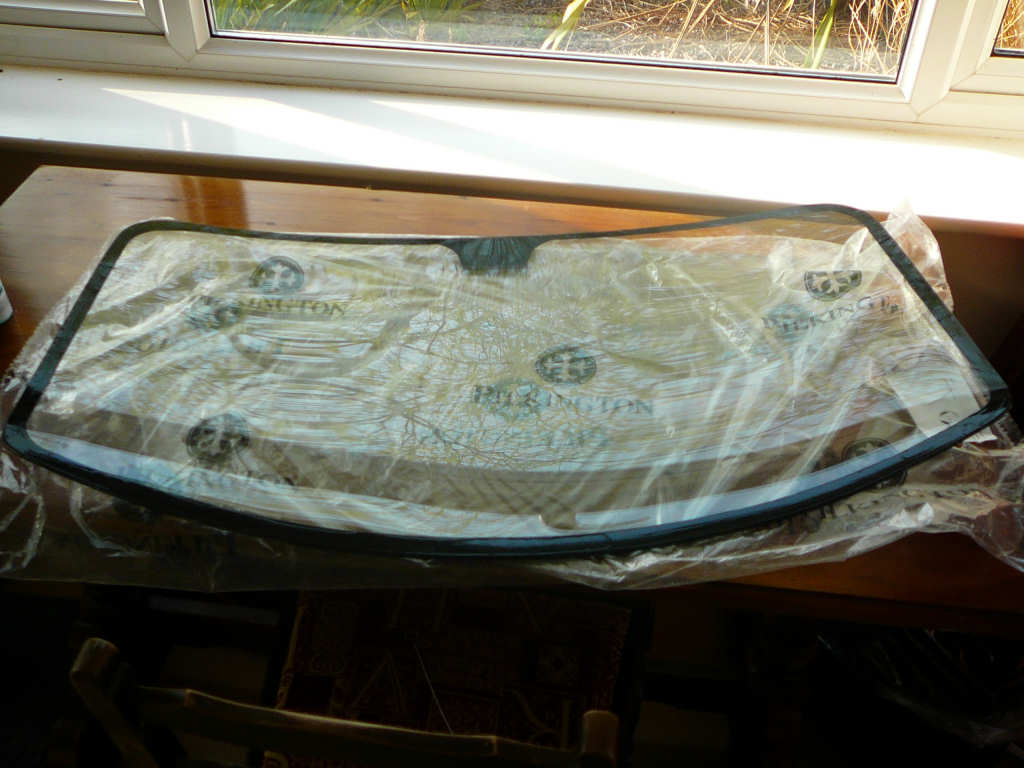
The next day, a different fitter returned to complete the job and was very helpful and chatty. In about 30 minutes, the screen was fitted and taped into place, and the job cost me a total of £92. I also got him to fit the rear view mirror into place since every after-market product I'd ever used was next to useless and I thought they might have some 'proper stuff' to do the job.
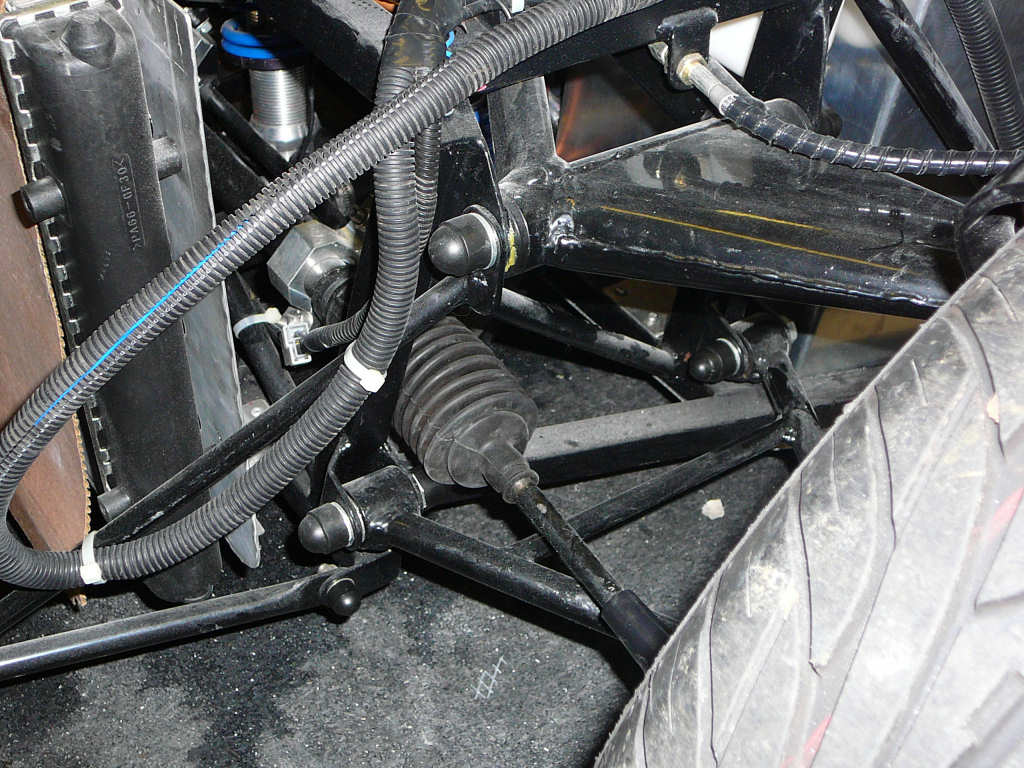
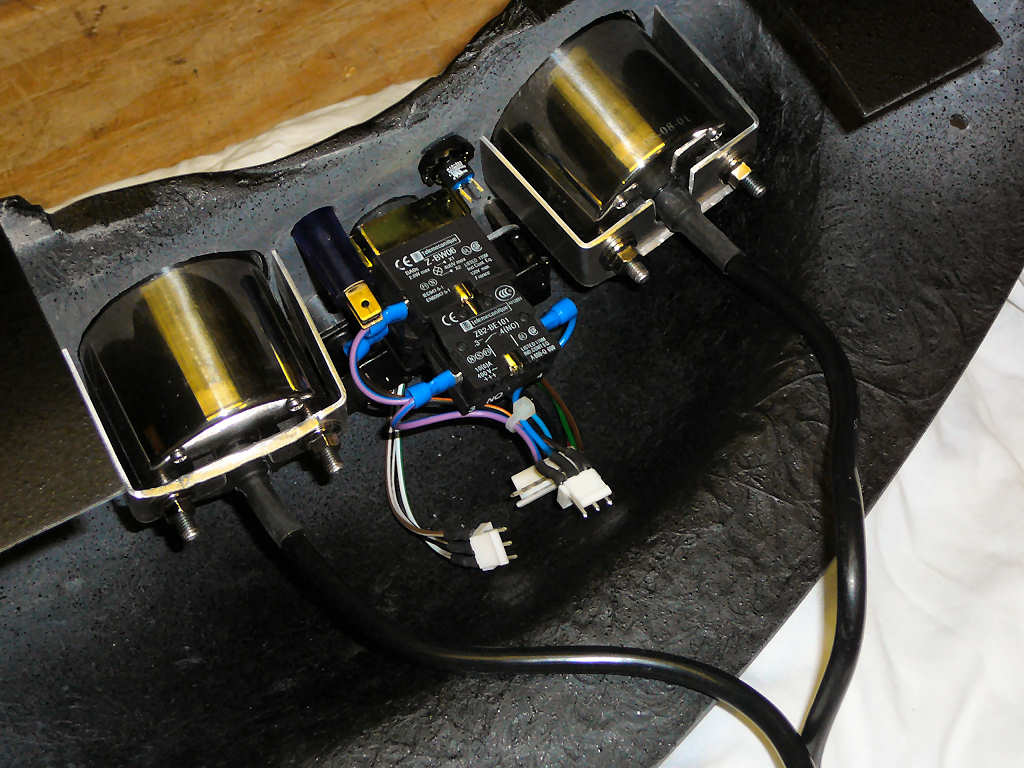
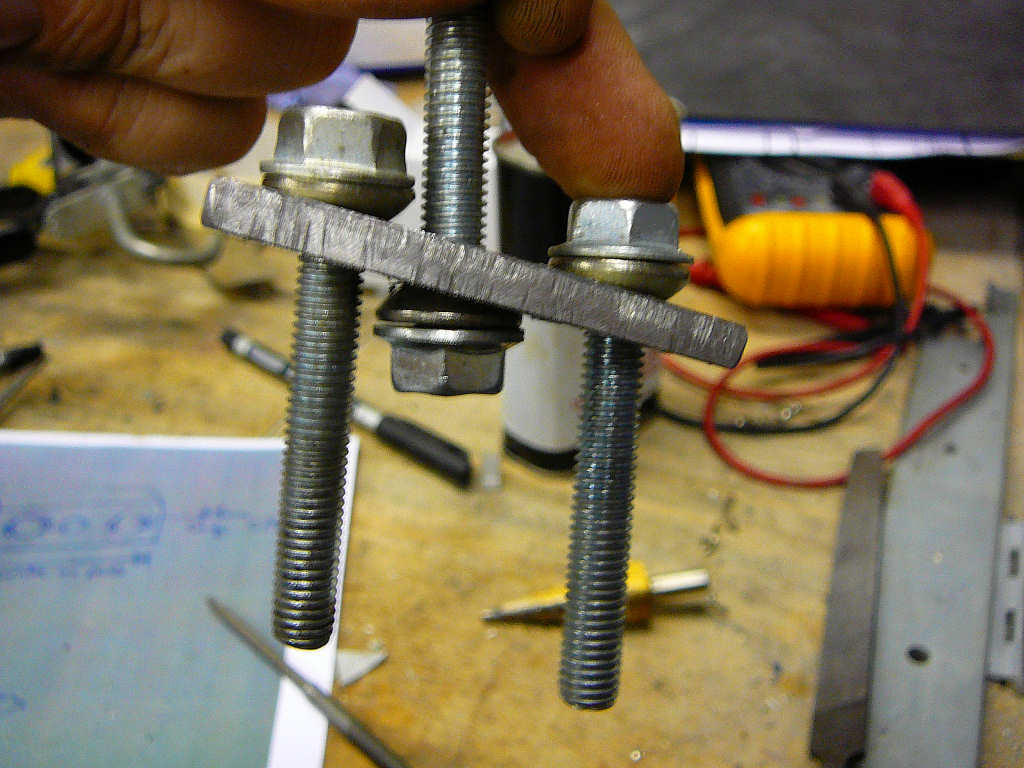
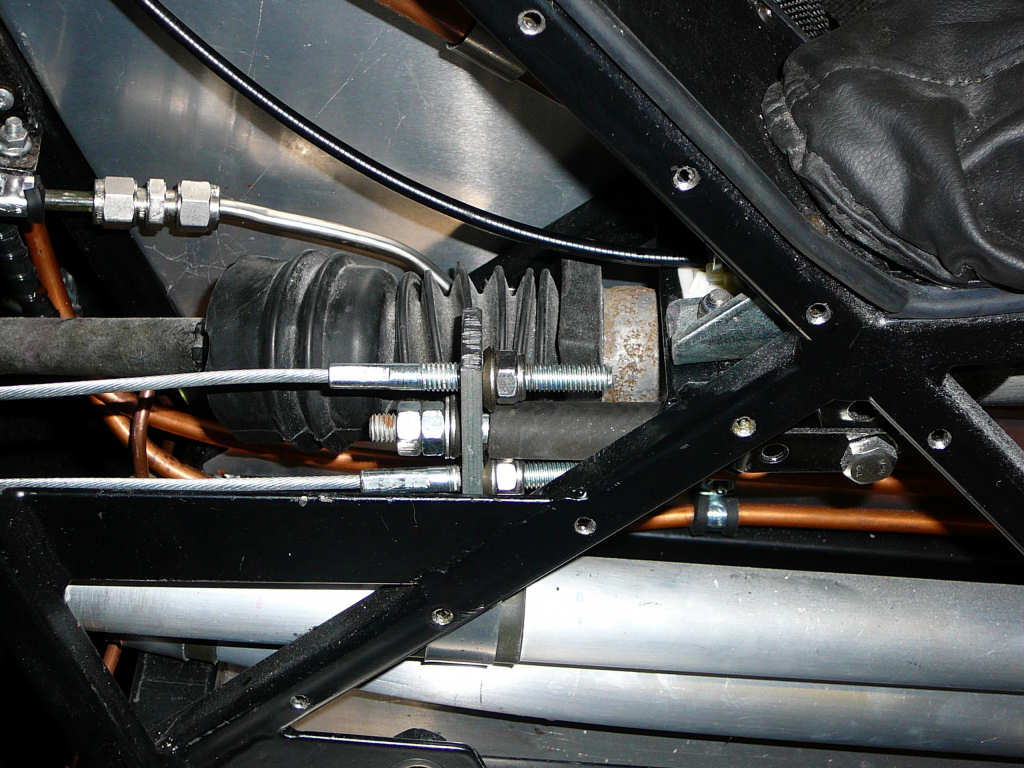
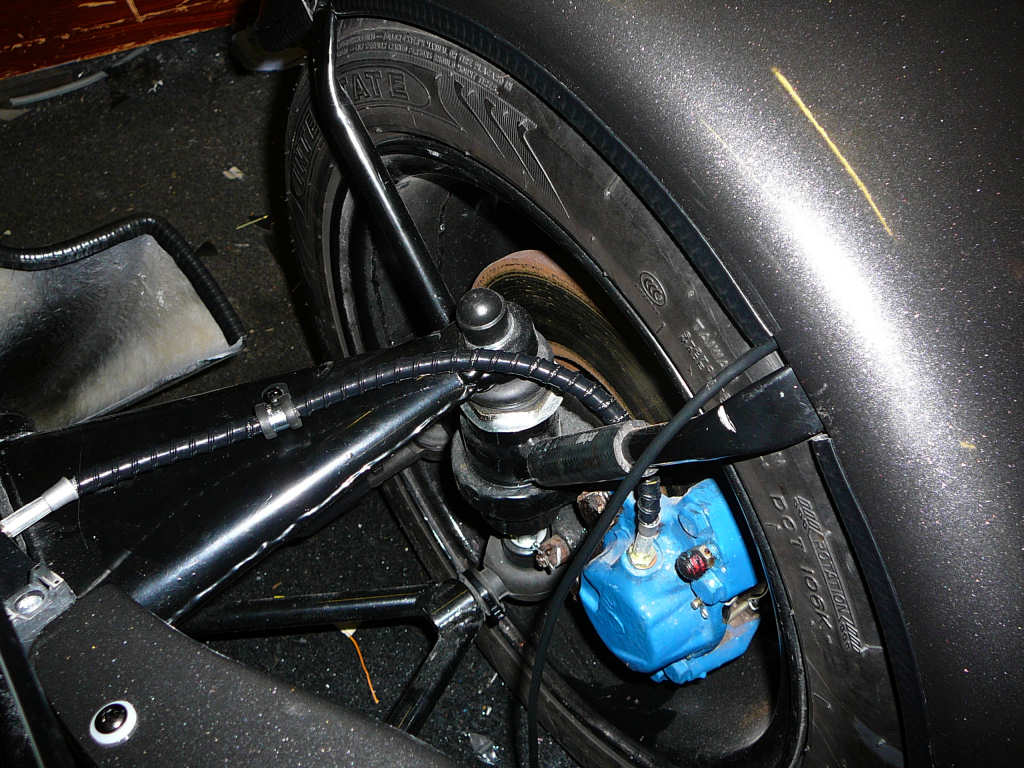
I had another email from fellow Mojo builder Michael earlier this week in which he let me know about the parts that caused SVA problems for him. One problem he had was with a small leak around the end cap of the repackable silencer which played havoc with the emissions, and the other was his handbrake compensator which he sent me a drawing of to show the changes required. Essentially, the age-old problem of enough articulation was the issue and I immediately recognised that mine would almost certainly cause similar issues. Might as well get it sorted now then!
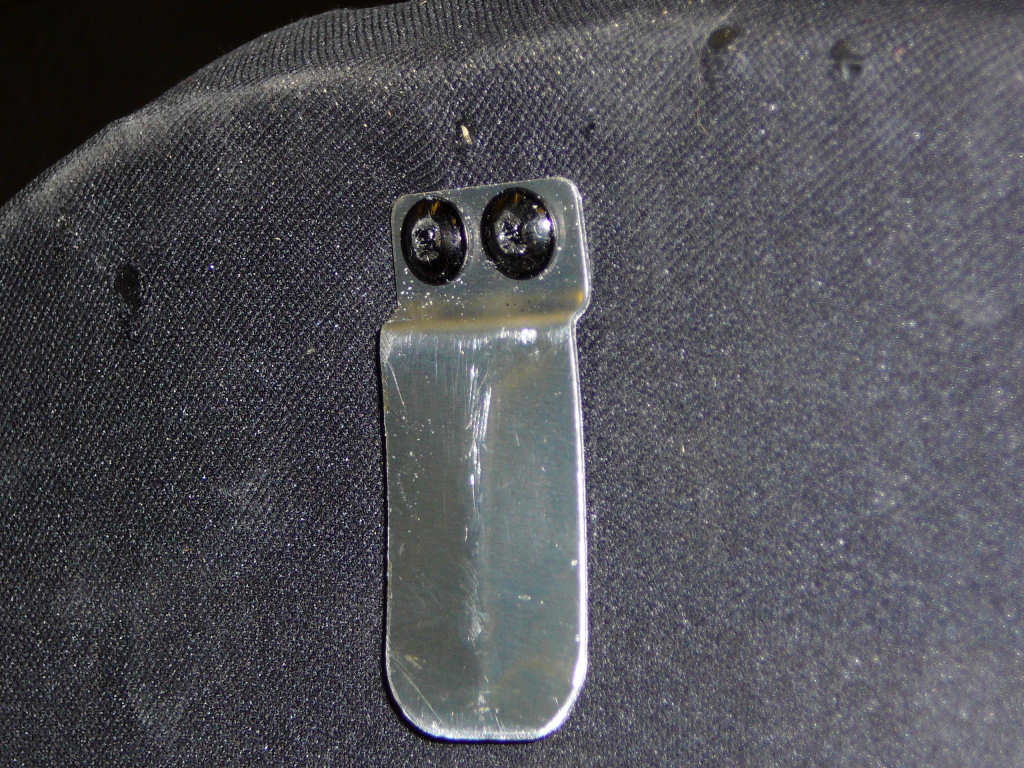
The general idea of the new design is to allow the two cables and the actuator rod to pivot as much as possible in one direction, whilst keeping the movement to a minimum in the other. This requires the pivot points between the three nuts and the plate to be well articulated and this is best achieved by using some dome washers which fit into deeply countersunk slotted holes. First problem - I don't have any dome washers and there's less than 24hours to MOT.
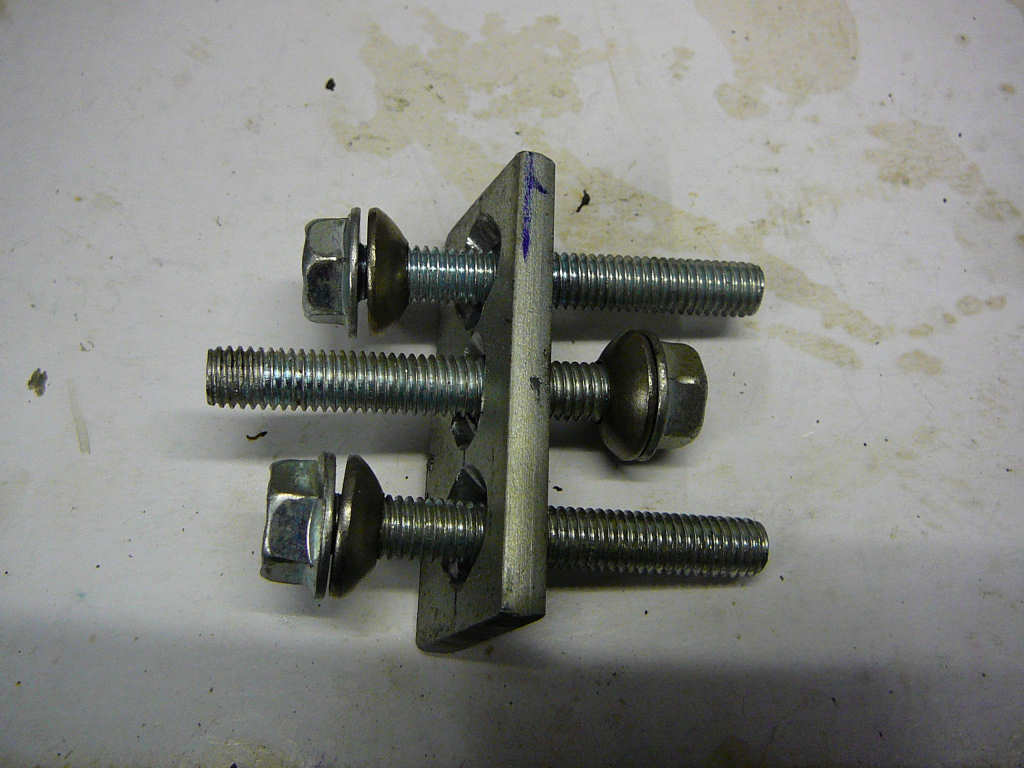
The solution I found was to use the heads from some M12 button head screws I had in my odds 'n' sods box. I drilled the centre out to 8mm to take the handbrake cables and actuator rod, and cut the entire threaded portion off to leave just the head.
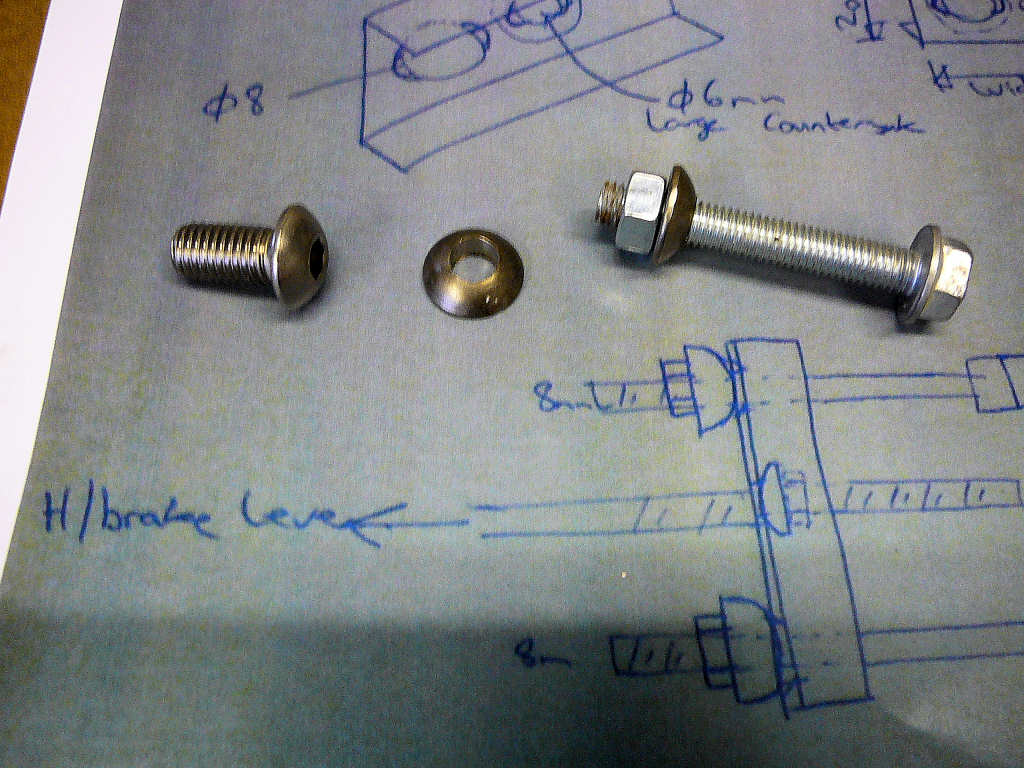
After stripping out the old mechanism, I made a new compensator plate with the required countersunk holes which were then slotted using a file. The pictures below show the general arrangement of the parts and the amount of articulation available. I'll present these pictures at the SVA so I hopefully won't have to remove the 50+ screws to get to this again!
I also ran the engine for an hour or so just to make sure that the cooling fan kicked in and worked correctly, and that there were'nt any leaks anywhere. I had the laptop sitting in the passenger seat monitoring several sensors during this and I noted that the thermostat opens at around 85 degrees and that the fan switches on at 104 degrees. After about 20 seconds of running, the fan has bought the temperature back down to 99 degrees, and the fan then switches off again. After a couple of cycles of this I switched the engine off and put in enough fuel for the morning.
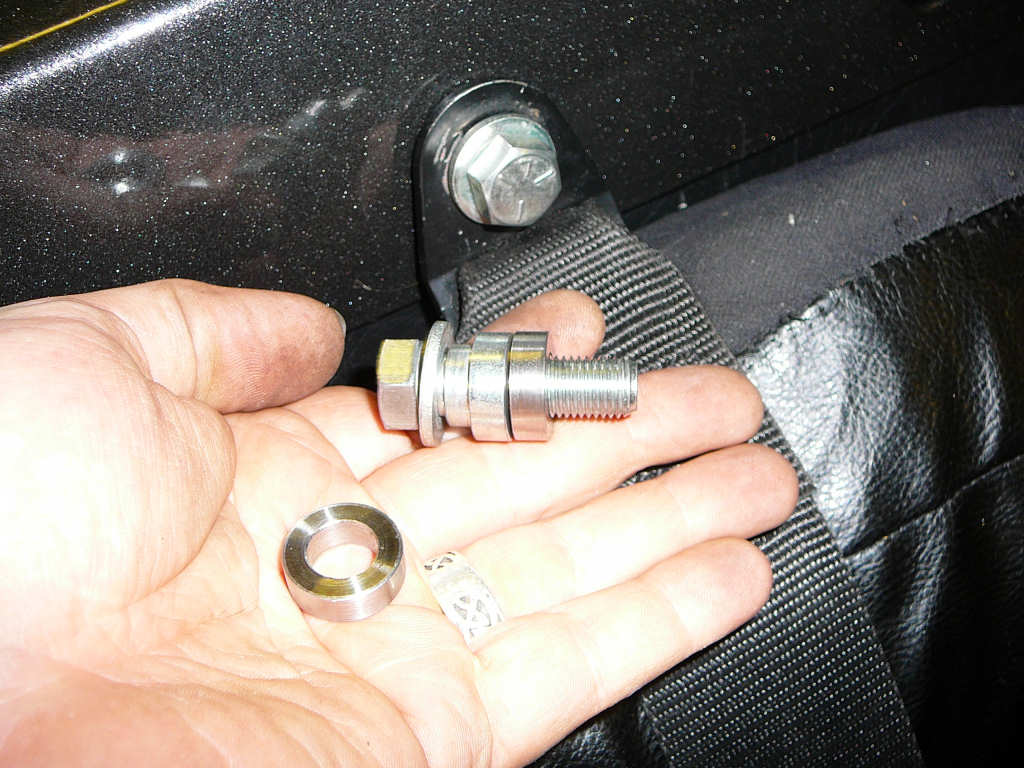
Final job (by now it's about midnight on Thursday - the MOT is in 8 1/2 hours...) was to fit the harnesses. The bottom mounts were absolutely fine but the top ones required some spacing to keep the seatbelt away from the fibreglass of the body. Other builders have packed these out with washers but I once again enlisted Dickie to fabricate something a bit more 'engineered'. In total, these spacers are 6mm thick.
12:30 am. Not even remotely tired. Too much caffiene and nervous energy. I know - I'll fit some more trim, and the stonechip film, and clip the front brake flexi pipes to the upper wishbones, and fit the side mirrors (they'd be useful!)
Eventually, fatigue crept in and I gave up for the night. If it's not ready now then it's too late I decided.
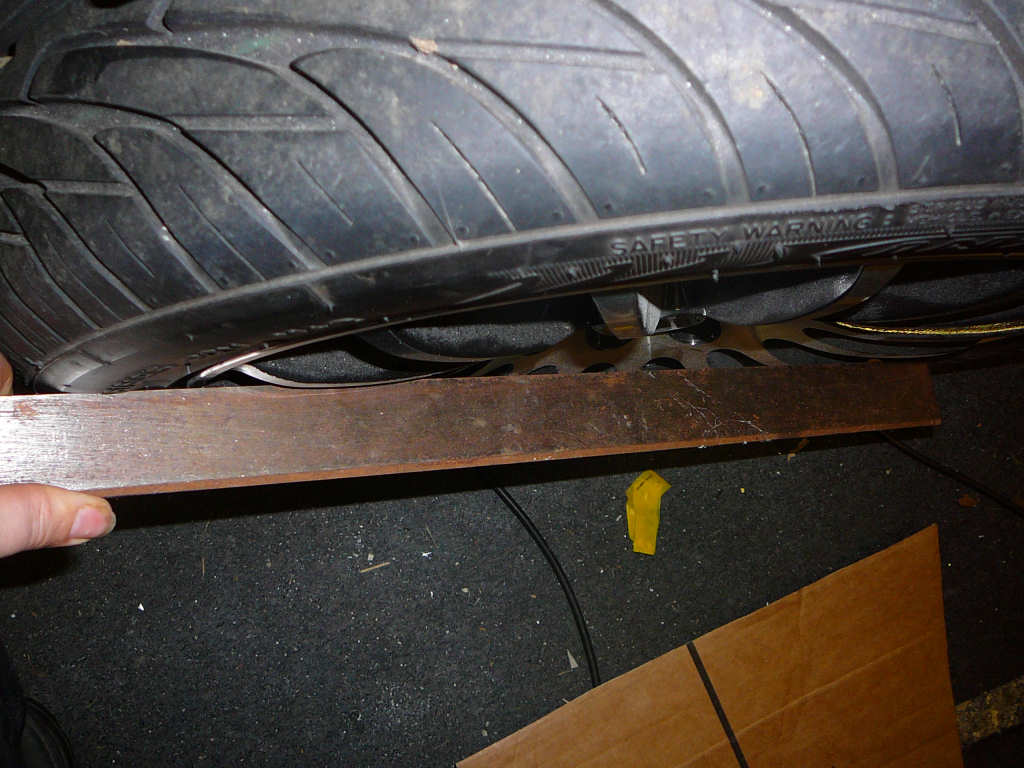
Next day... far too early... I drove the car out of the workshop ready for it's maiden voyage. Thankfully, it's a dry day but a bit cold. The sun is also forecast to make an appearance later. My wife was going to be following along to alert me if anything looked wrong at any point and so that we could compare speedo readings. Now her car is a Toyota Yaris (1.4TD SR) which is a very nice car, but I've always said that it was a bit on the small side. Hmmm... can't really use that argument any more can I?
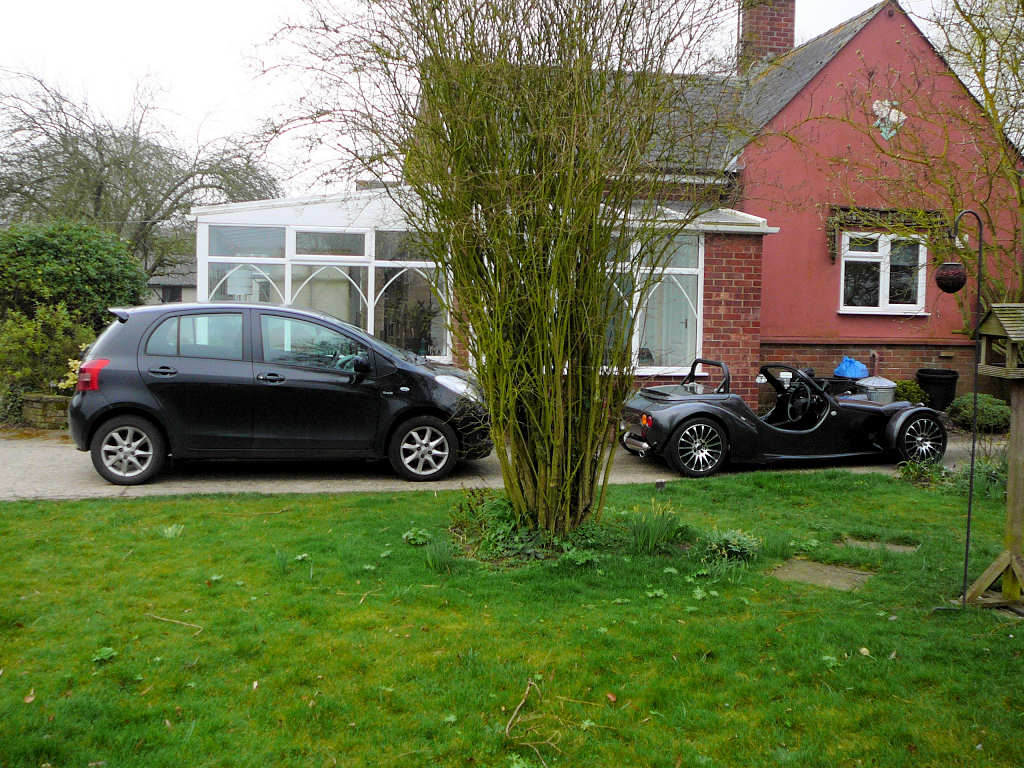
I'm not sure everyone realises how small the Mojo actually is! This photo definitely gives some idea...
The 6 miles journey to the MOT test centre went by as a complete blur although I did become aware of how many heads were turning, and the ridiculous grin I had on my face all the way there! I did notice that the steering was a bit vague and the front end felt a bit 'bouncy' but the brakes worked a bit, and the dials all had numbers on them so that was a good start. I had a GPS system in the car so I could also check the speedo. It said I was doing 30, my speedo said I was doing 38, and the Yaris said 34-35. It'll do for now and I can adjust it at SVA if required.
To cut a long story slightly shorter - this is what happened at the MOT.
- Offside lower front wishbone ball joint a bit loose. That'll explain the bouncy feeling then. Tightened up.
- All lights worked perfectly.
- Wiper, washer, horn all fine.
- No mechanical issues found.
- Brake test 'ok', handbrake 'marginal'.
- Emissions - totally rubbish. I can't remember all of the readings, but 340ppm and a lambda of 1.3something said something was wrong.
- Front toe was all over the shop, so it was adjusted to a 'smidge' of toe in. This was a bit of a pain because the test kit wouldn't fit on the front wheels since the cycle wings were in the way so they had to be taken off.
- I answered the question 'What is it?' about 100 times. Grinning every time.
So overall, not too bad, and thanks to all the guys at FastFit who were very helpful and understanding. One loose bolt is understandable and the toe settings were always a bit of a guess. The car felt completely transformed for the return drive with the steering sharp and precise although there is still absolutely no self centering whatsoever. As for the brakes, well I didn't want to push too hard on the first trip so these are a very very long way from being bedded in. Some harder work on the way to the SVA should help them along.
The emissions is somewhat more concerning but I have put it down to one of three things. Firstly, the lambda sensor may well have got knocked during the 6 months it was in the workshop being moved around, fitted, taken off, knocked over, fitted again etc etc. Also, the ECU has only done 6 miles on the road, all below 40mph, and was sitting idling for about an hour beforehand. By any measure, this is not enough time for the ECU to relearn it's optimum settings and this can take 50 miles or more in some cases. Again, all I can do is drive it and hope it improves but I can't do this legally until the trip to SVA so it's a bit of a catch 22 situation. There's nothing I can do so there's no point worrying about it. Finally, it may bo something to do with the leaks that Michael pointed out in his email so I'll pop the end cap off and seal if back in place with some exhaust compound. I think it'd be prudent to check the rest of the system for leaks while I'm at it.
The return journey may have taken a slightly longer route than the way there and for me, this was my first true experience of driving a kit car. It's fantastic fun! Without doing anything too crazy I started to explore what the Mojo was like to drive and on the whole, it's remarkably civilized and comfortable. A bit windy perhaps, and devastatingly scary when you're sat next to a bus, but a the combination of the sound, the smell and the whole 'touching the road to see if it's wet' thing all come together to make it a truly wonderful experience. I'm actually starting to look forward to the SVA now. So what if I fail? I still get to drive all the way there and back.
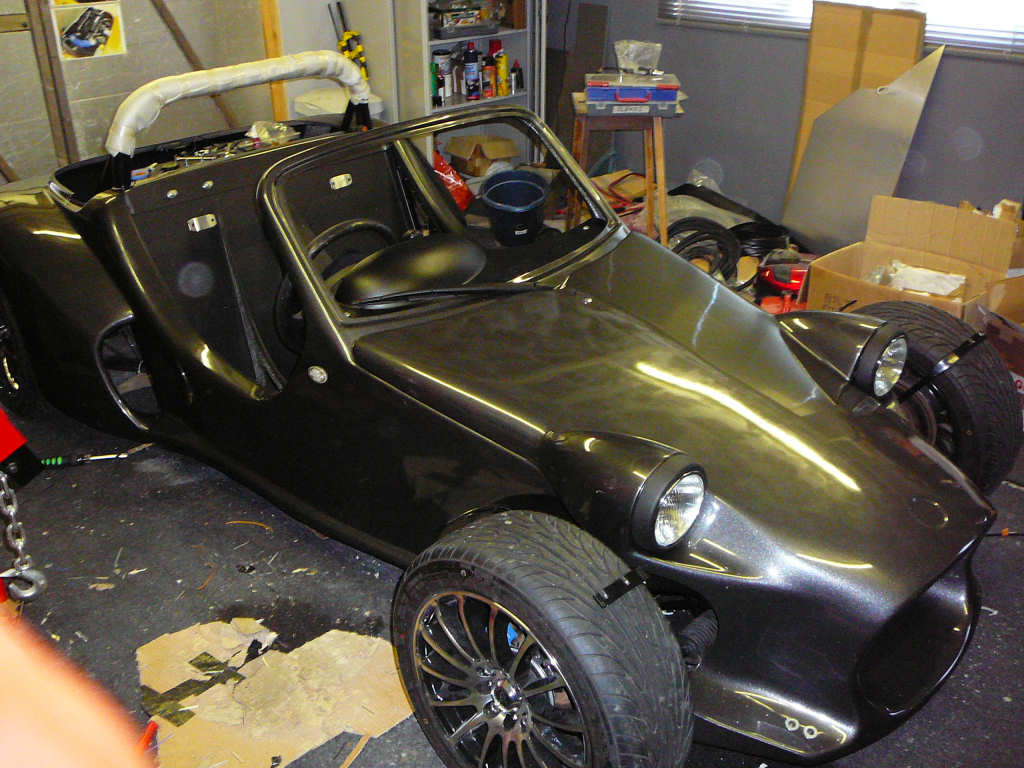
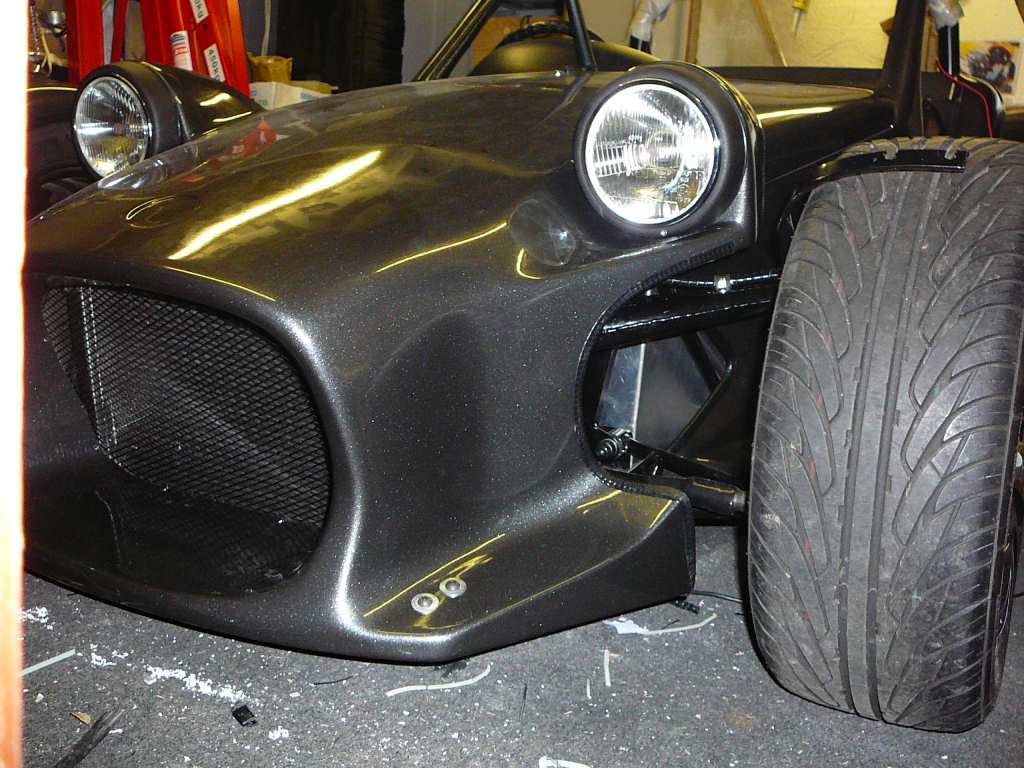
Once back at home, the nerves were allowed to settle down and the focus was turned to the next stage. I also received a 'special little something' in the post that very morning - a set of custom badges for the Mojo.
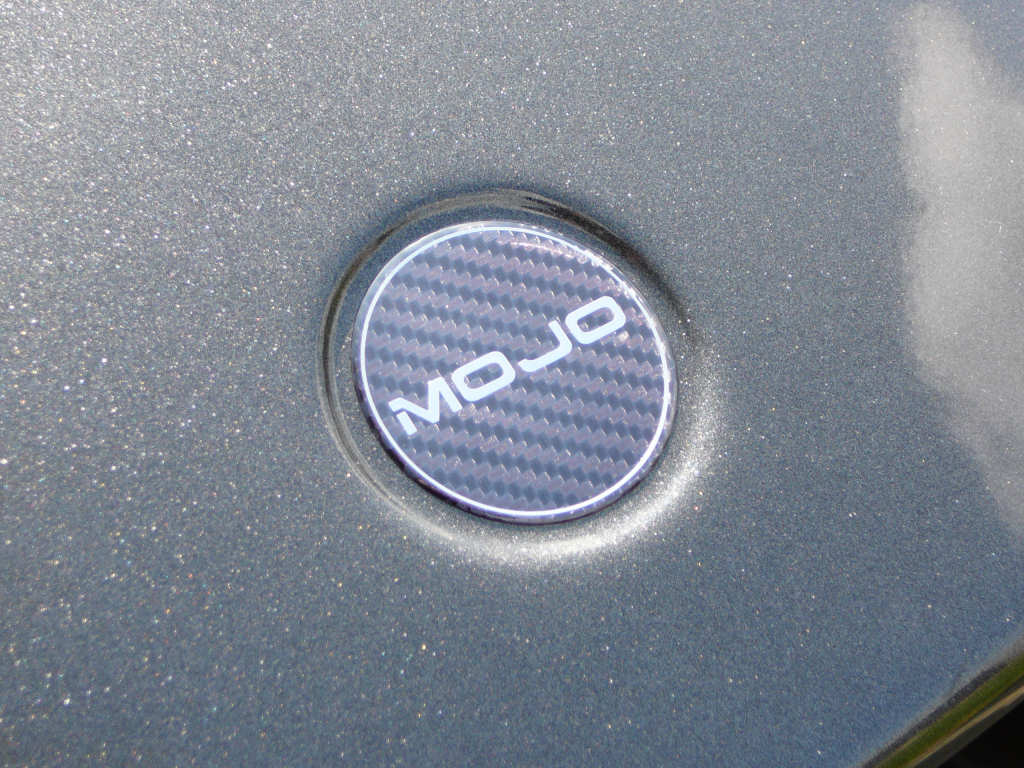
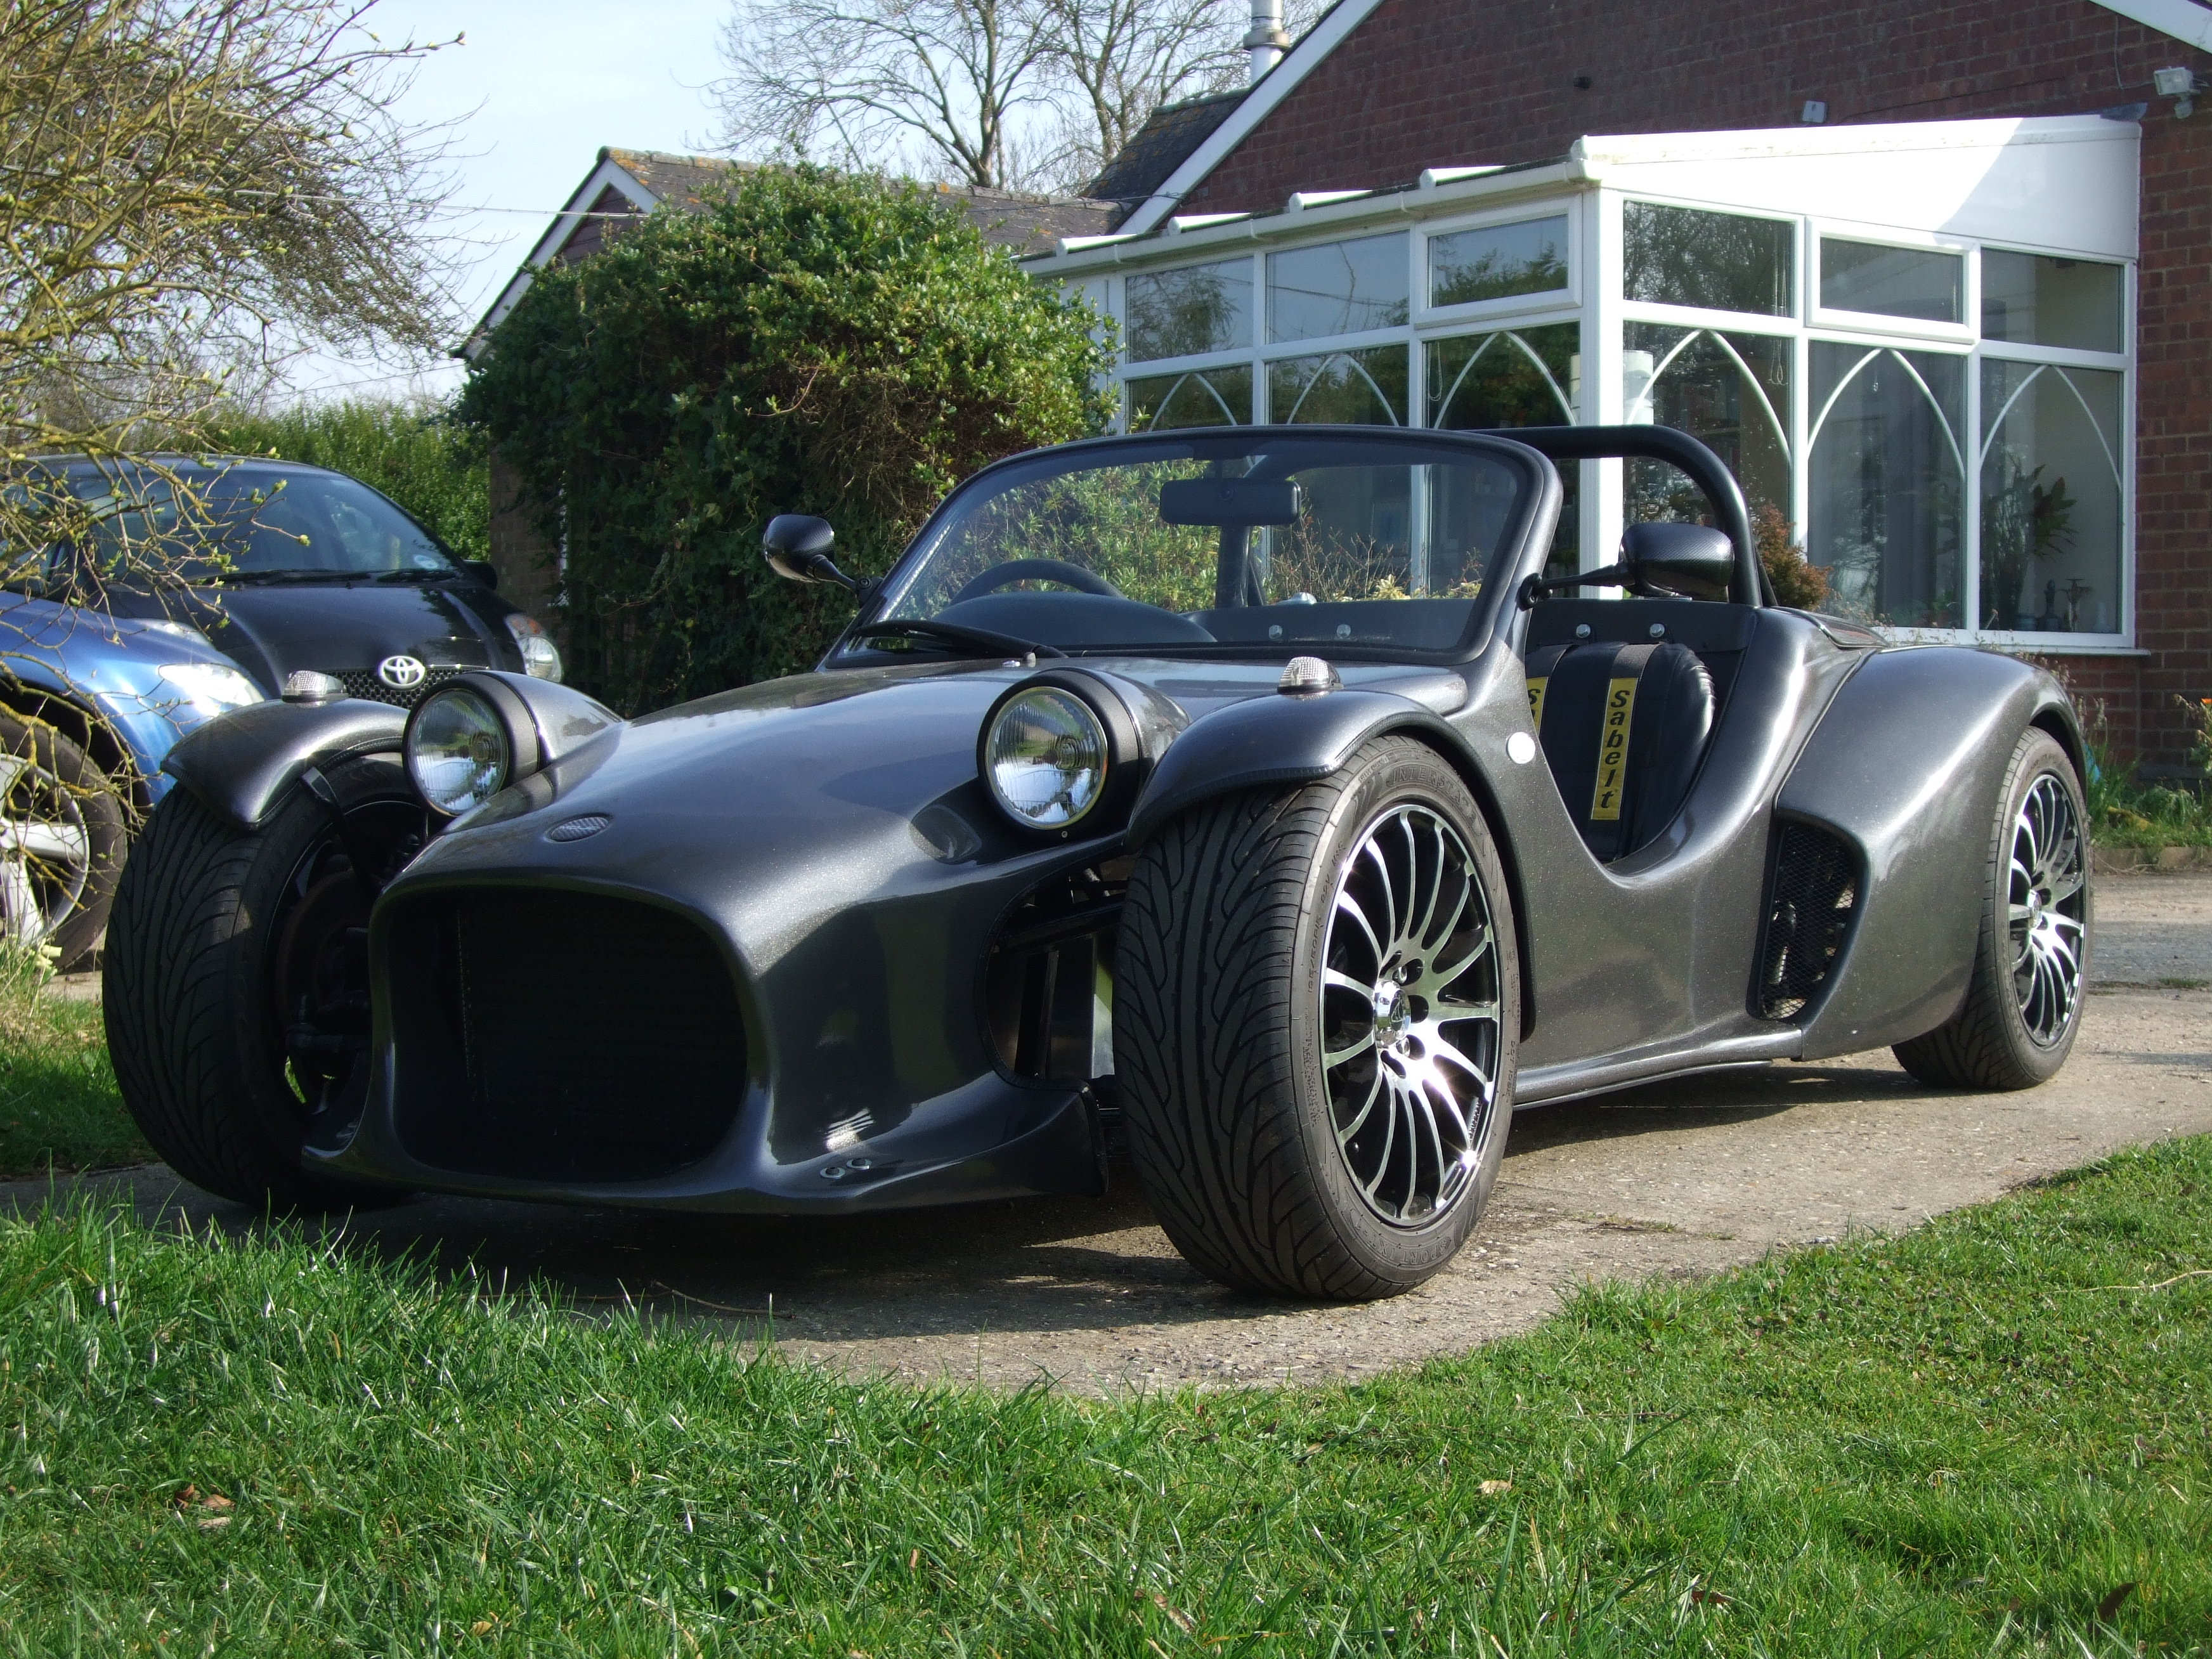
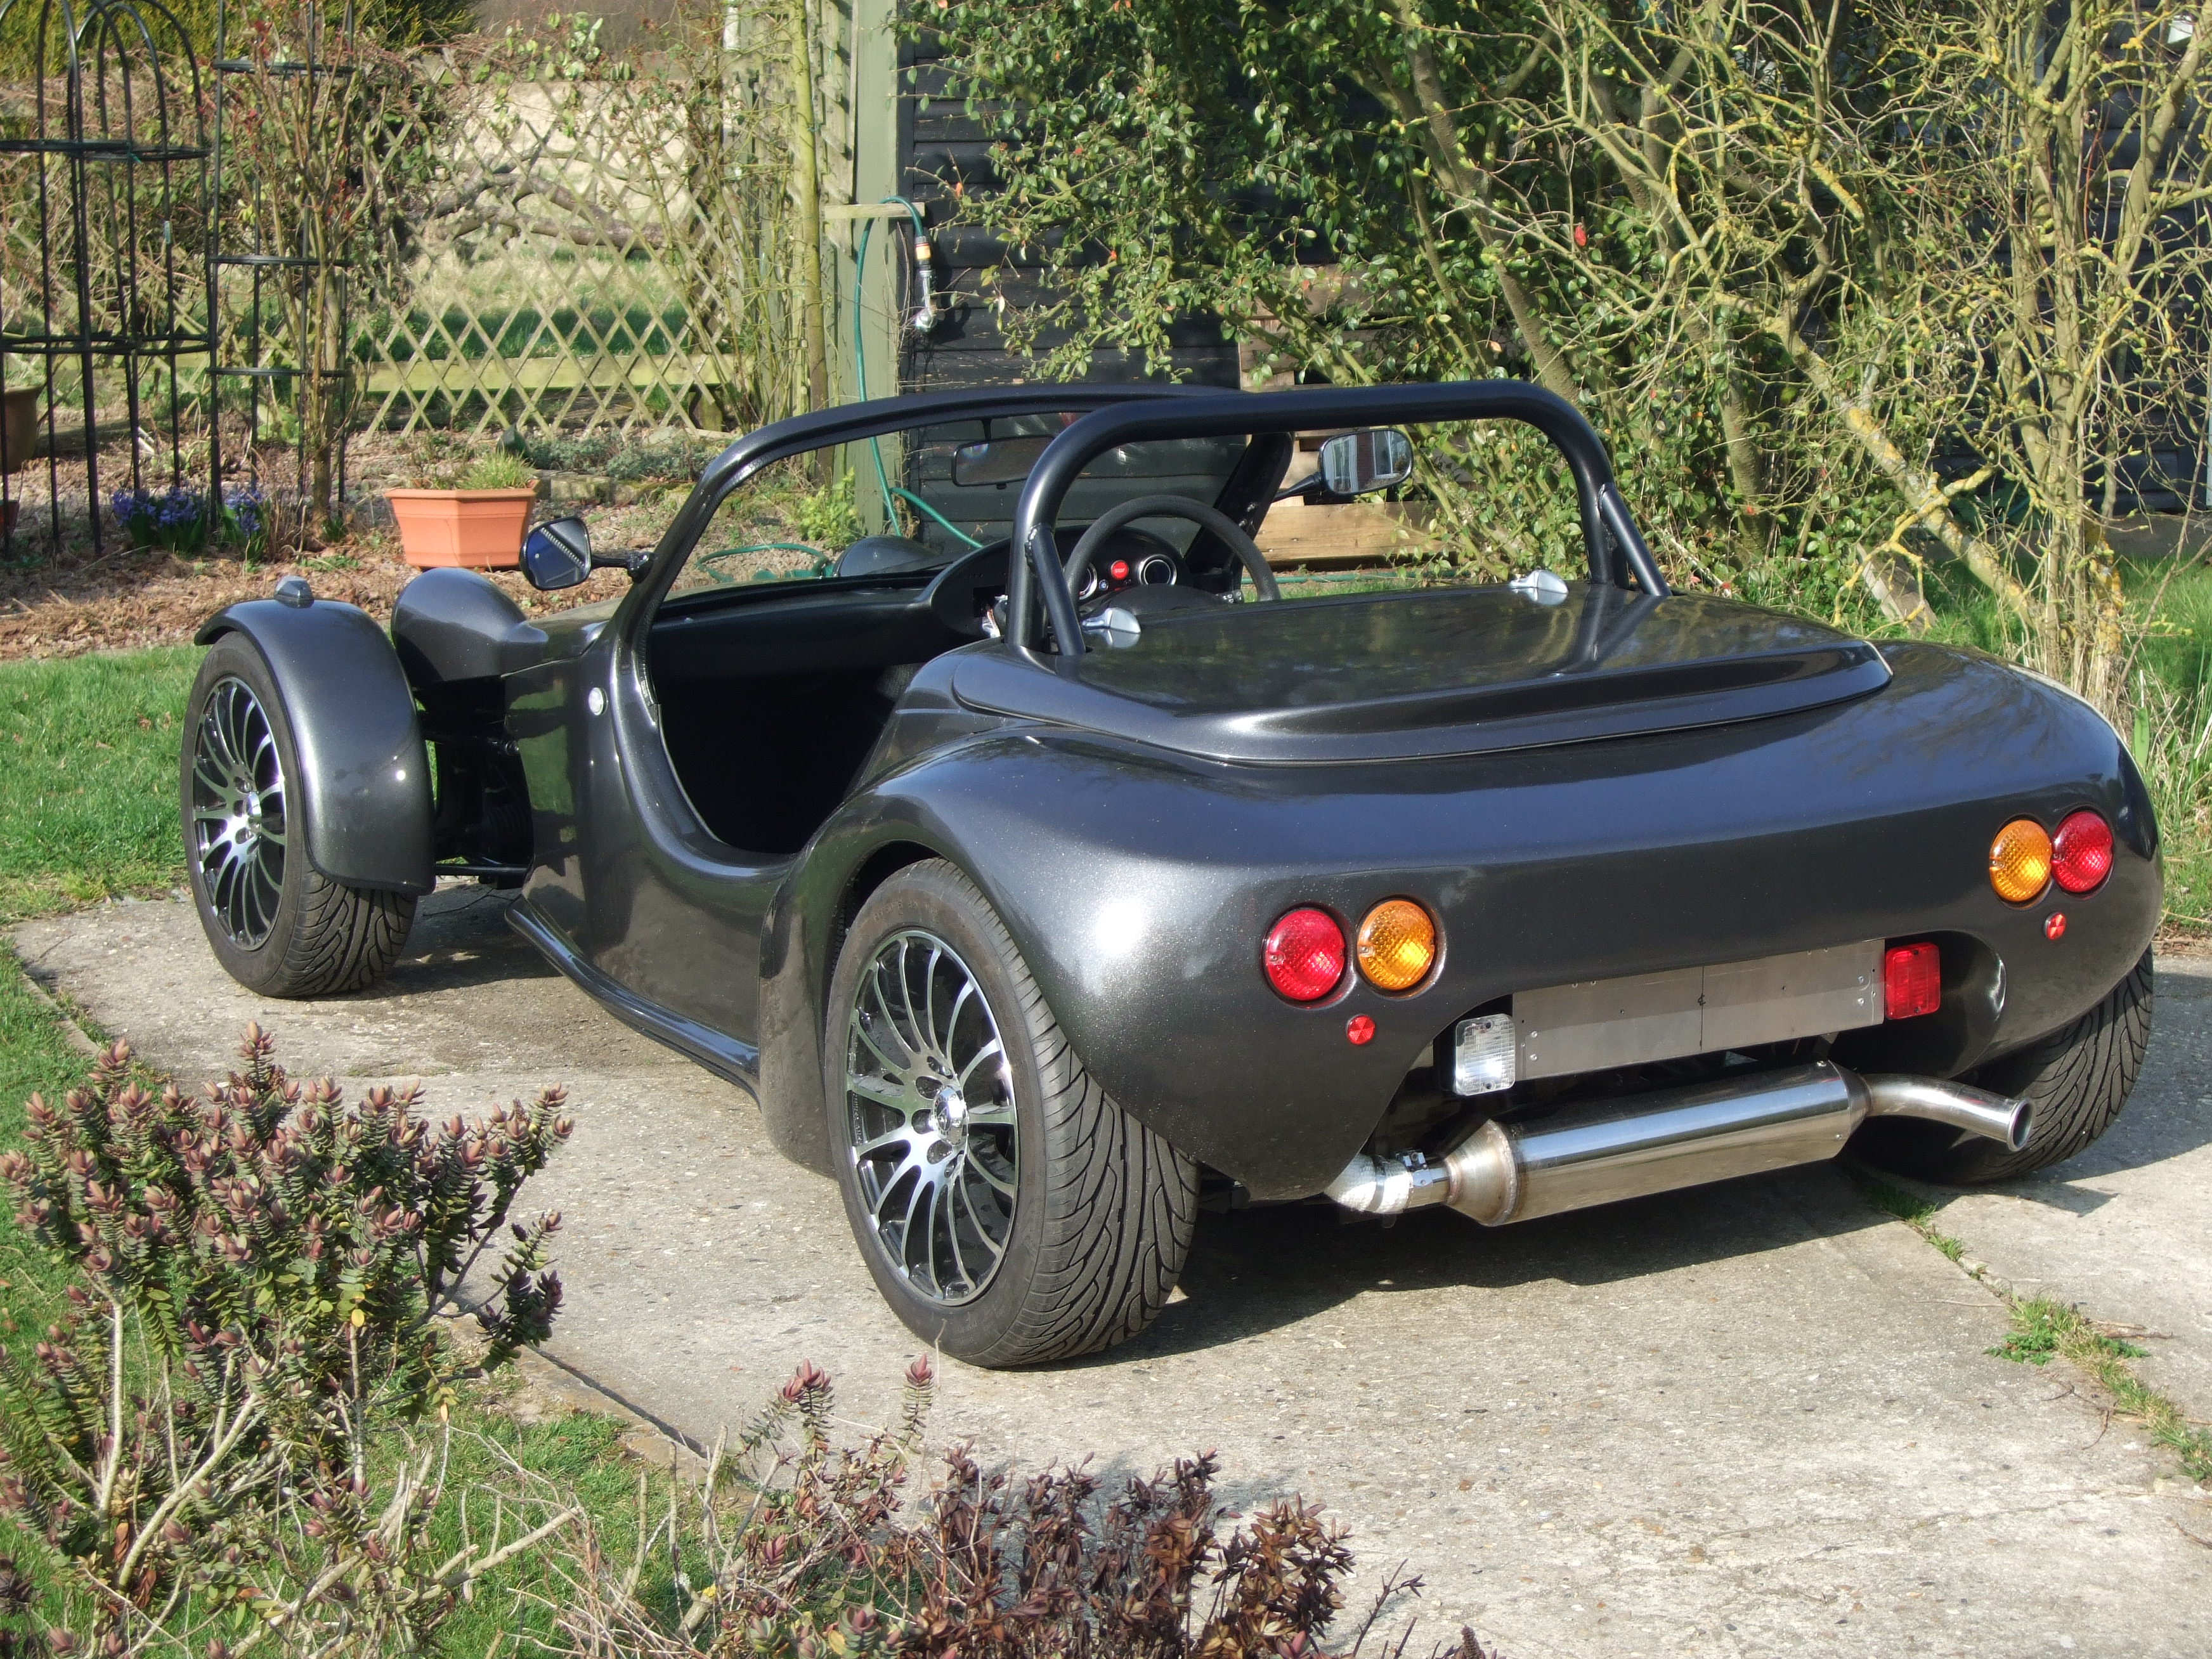
I got 4 of them in total from Domed Badges and I think they really suit the car with their mirror finish chrome lettering on carbon fibre background. I may be willing to sell on a couple of these if anyone else fancies one? Speaking of suiting the car - here's the finished article (so far...)
Reluctantly, I admitted that staring at the car for too long was a bit odd and not very productive and there is still a number of things to do so I spent much of the day clearing out the workshop and the inevitable number of cable tie ends, bits of wire and aluminium, and odd bits of Fiesta that accumulate during a build. Eventually the Mojo was parked back in the nice clean workshop and I called it a day.
Saturday morning, another beautiful day, back to work. There were a couple of bolts that I wanted to change from stainless steel to high tensile 8.8's so I got my housemate to help me and this was done in just a few minutes. Probably none too soon either since they were holding the steering rack in place. In retrospect, stainless bolts should never have been fitted here - I just used them as 'temporary' fixings and forgot about them!
The other main jobs to do was to sort out the windscreen wiper and get the touchscreen controller working to some degree. I tackled the wiper first.
During testing, I felt that the field of view covered by the wiper was a bit small and was a possible problem for SVA. The lower end of the wiper blade also parked itself on top of the windscreen rubber. Something had to be done.
The wiper motor I am using is from a Fiat Fiorino van, and the wiper blade is from the back of a Fiat Stilo. The arm needs to be extended by about 40mm to put it into the best place on the windsceen, so I ended up cutting it in half and extending the arm using a combination of aluminium, filler, Tigerseal and a couple of M4 bolts.
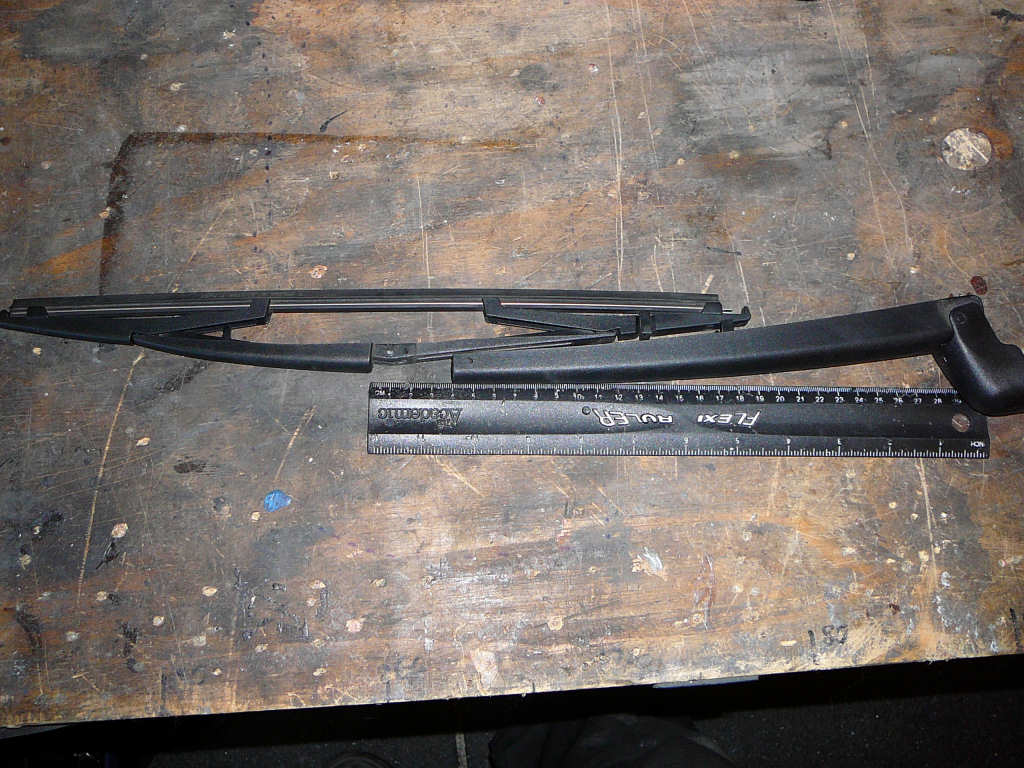

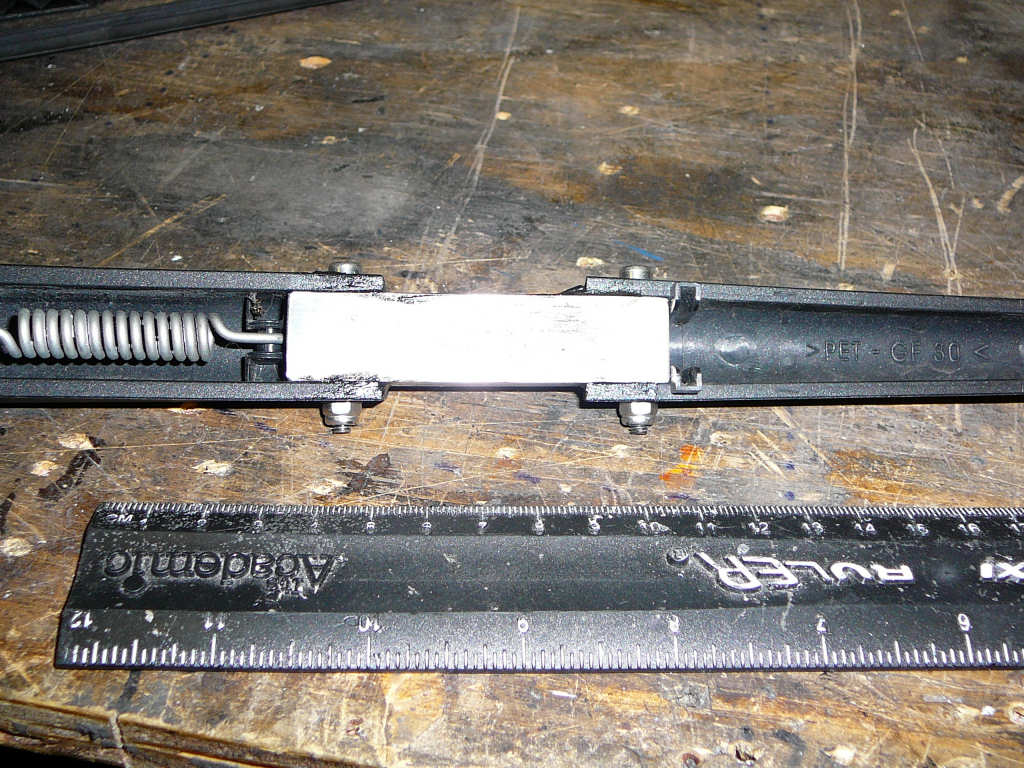

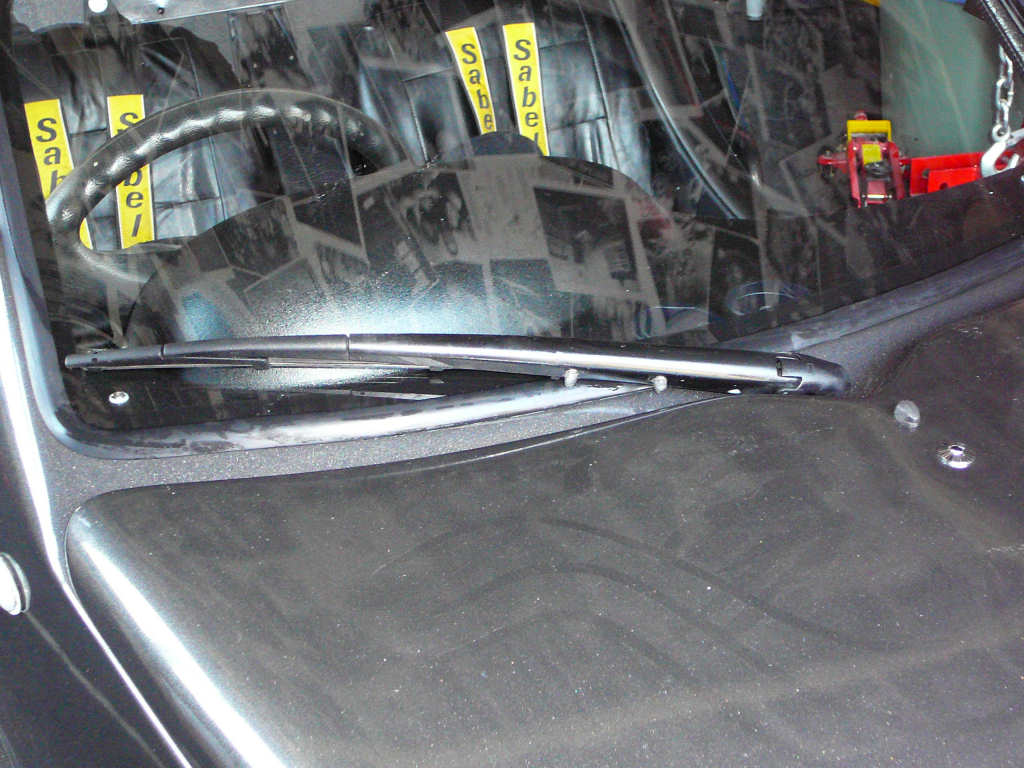
Much better!
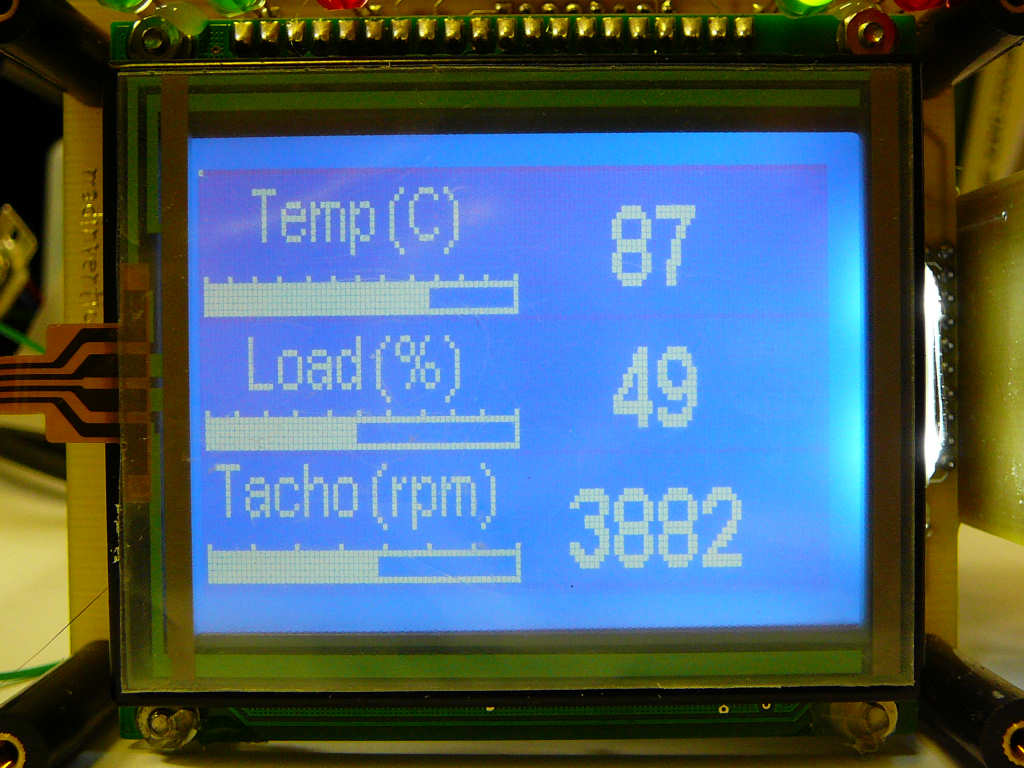
The touchscreen controller has been simplified to get through SVA. All it does it read some values from the ECU and display them on the screen. There are two screens of information, each showing 3 values. The first shows coolant temperature, engine load and the tacho reading while the second shows battery voltage, MPG (calculated) and speed. There are 3 leds that act as shift lights and another couple that will illuminate if the temperature gets too high.This will do for now and all of the fun stuff will be coded later on.
So that's about it for now. I've pretty much done all of the jobs required for SVA and I now just need to go through the SVA manual and check every point I possibly can, and then drive the thing to bed in the brakes and hopefully sort out the emissions.
2 days to go...
![]()
A couple of quick jobs over the weekend before SVA. The first was to take of the Wolfrace alloys and fit the Ford ones. I tried doing this earlier this week and noticed that the Fords had a different offset to the Wolfraces (Fords are ET35) so I needed to add a 3mm spacer to the front wheels to make sure they didn't foul the cycle wing stays. This is in addition to the 5mm ones I've already got fitted there.
I also fitted the touchscreen controller into the dashboard and checked it all fired up correctly. It was a bit of a fiddle getting it behind the dashboard now that everything is in place, but it all went in ok eventually. Phew.
I also bent the fuel sender arm around a bit to make the fuel level gauge read a bit more sensibly.
I've checked the car from end to end and taken photos of every part that will be difficult for Mr SVA to check. I've come across a few things that I think will cause me to fail, and I'm predicting 8 points in total:
- Brake efficiency
- Handbrake efficiency
- Emissions
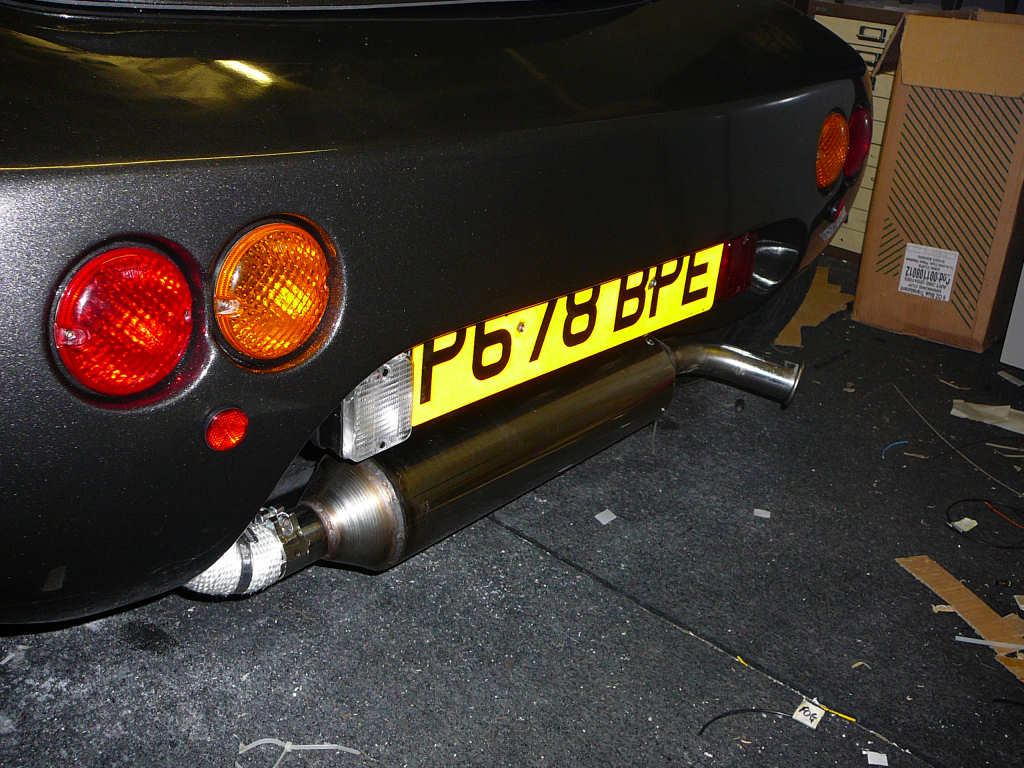
- Rear reflectors not marked E1a
- Rear indicators marked E11, not E12
- Front indicators marked E9, not E11
- Possible sharp edge on the wing mirrors
- Steering self centering
There may well be a couple of extra things that I haven't noticed, or an assumption I've made may be wrong, but I think this list should just about cover it. We'll know for sure in about 24 hours! Place yuor bets now...
So that's about it I think. Not enough time to get any replacement parts any more. Not any more jobs to do really. Just some brake bedding and ECU training to do in the morning on the way to Norwich and then it's all down to a man with a clipboard to tell me how I've done.
Keep your fingers crossed for me - I'll post an update tomorrow...
![]()
SVA day today. Arrived nice and early with my wife in her Yaris as the support vehicle and a boot full of tools, paperwork, bits of trim, etc etc.
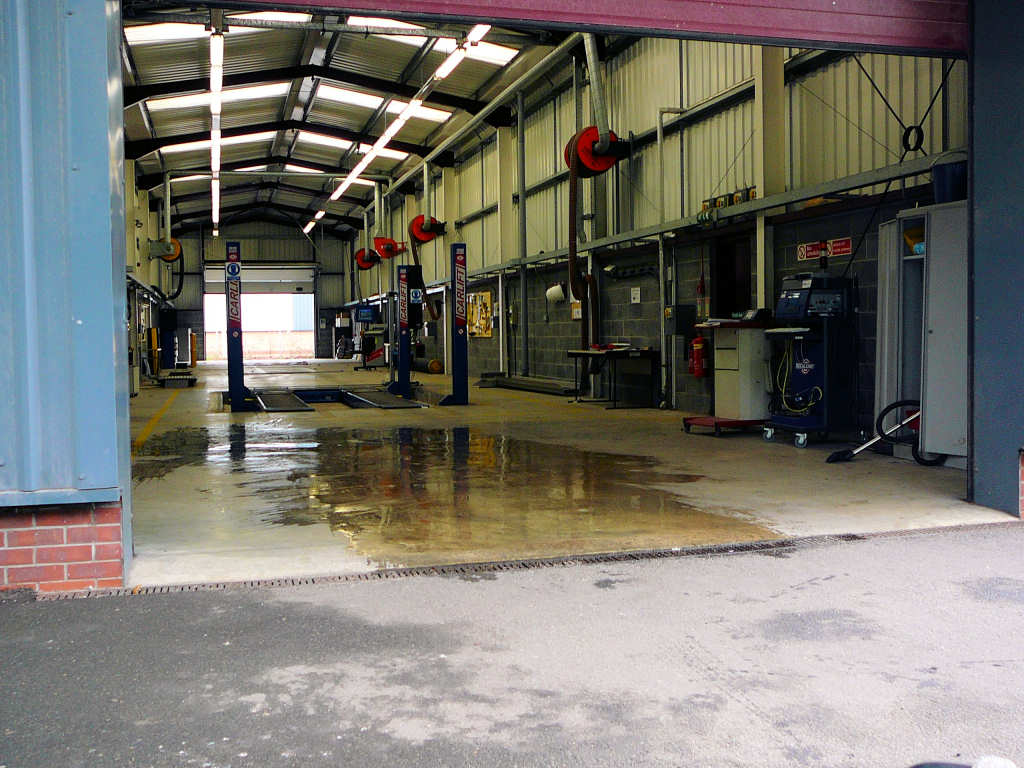
First test - emissions. These failed on Friday at the MOT so I was a bit nervous to say the least, and this wasn't helped since the machine refused to work. "We'll come back to that later" Les (the tester) said. Gulp.
Test 2 - Les had a good snoot around the engine bay and under the bonnet, and then got me to put the car up on the ramps. I've got to say - he's got an amazing poker face. It was impossible to guess what he was thinking! Whilst up on the ramps, I had to operate the brakes, handbrake, check the steering from lock to lock and a few other bits and bobs. There was the anticipated clanking from the underside as various parts got poked and prodded. I was then called down to have a look at a slight coolant leak and given the oppurtunity to tighten a jubilee clip.
Test 3 - lights. No problems here, just a slight adjustment of the dipped beam required.
Test 4 - Brakes. It should've been the noise test next but he said that from experience, there wouldn't be any problem so there was no point checking. Ok - I won't argue! First, the car was weighed and came in at 523Kg - not bad! Les then jumped in the car and checked all the brakes on the rollers whilst wearing his magic foot pressure gauge thingy. By now he was getting a bit chattier and explained what he was doing at every point, but all I can actually remember was a load of numbers popping up on the screen and some notes being made on his clipboard. I just crossed my fingers and waited. On the way to the test centre, I'd been giving the brakes a bit of a workout to bed the new discs and pads in so I was hopeful that this would be ok. At the end of the test I was told that I had a braking efficiency of 106% which sounded good to me. I'll wait for the number crunching later.
Test 5 - speedo calibration. I suddenly noticed how close we were to the end of the workshop area now and so far I'd only had to tighten a jubilee clip! The speedo was reading over by quite a way, but well within the test limits. I got a printout of the speeds so I can adjust the speedo more accurately later.
And that was it! Les took the car outside for a spin around the block to check the self centering (oh dear...) and check the mirrors etc. He came back with his usual poker face so I had to ask how bad it was... "No problems" he said! I can't believe that I got through self centering - I couldn't feel anything when I checked it. Again - I'm not going to argue.
Then he reminded me we needed to do the emissions again. So, back into the test lane and out with the backup machine. Fail. Dammit! After some tinkering and a bit of a kick, Les got the other machine working and we did the test again. Holding 2750rpm for a total of around 10 minutes made the engine a bit hot to say the least! Les seemed to be doing everything possible to get through this part of the test and I am grateful for his perseverance. Finally, he asked me to jump out and I noticed the words 'FAIL, FAIL and PASS' on the display. Dammit again! Then he showed me the printout. HC needs to be below 200ppm, I was showing 14. CO2 needs to be below 0.3%, I was showing 0.1%. Lambda needs to be between 0.97 and 1.03, I was reading 1.039. These limits are applicable to most kit cars, but the limits for a Fiesta are 0.95 to 1.09 so if it was still a Fiesta, it would've passed! For this reason, along with the fact that there is absolutely nothing that can be adjusted to improve the reading, Les said that this would be passable! Phew.
I then reversed out of the test lane and was a greeted by a large puddle of pink coolant on the floor. I guess thats what you get holding those revs for so long! The test was described as 'a bit brutal' by Les. I popped the car back up on the ramp and that damned jubilee clip was leaking again. Nevermind, I topped up the water level and loosened the pressure cap a little so I could get home. "I'll change the clips for the retest" I though to myself.
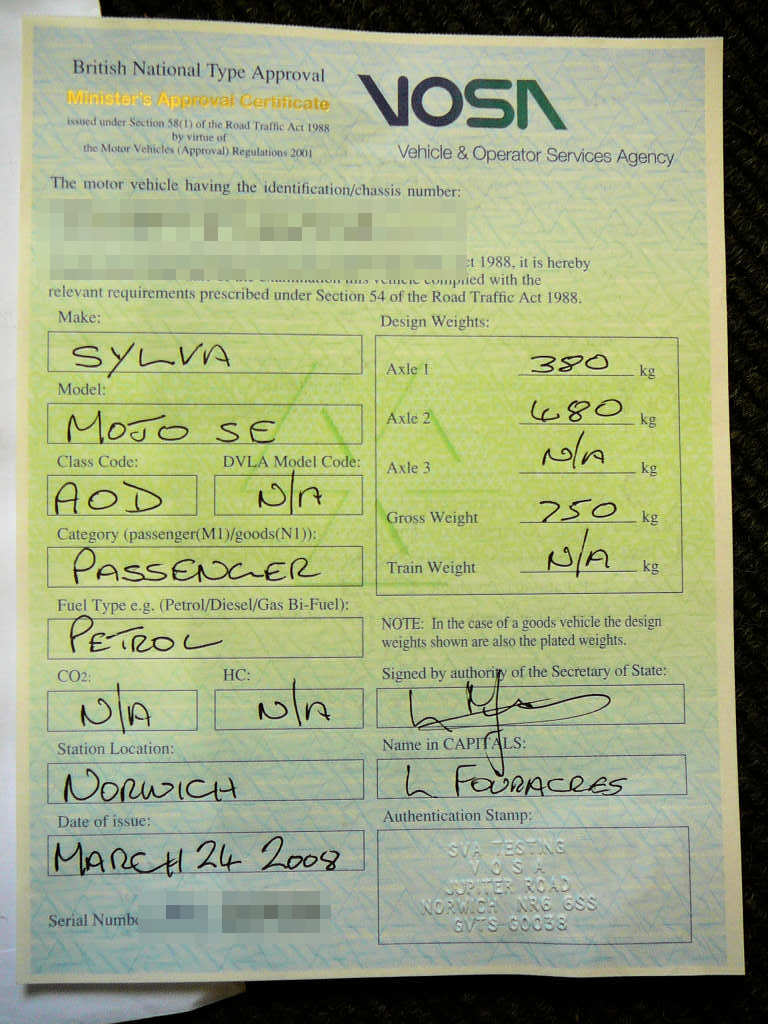
Les then disappeared into the office to process the figures and I sat and waited in the waiting room feeling like a 9 year old at the dentist - a bit nervous! Eventually, he returned and started handing me printouts of various parts of the test and explaining the laden weights etc, and then he gave me my MAC certificate. I had passed. First time. Passed! Quite simply, I was shocked and feeling a bit numbed! Never even mentioned the handbrake compensator or the wrong lights being fitted!
The journey back was a mix of emotions - I had the euphoria of having passed the SVA test, mixed with the realisation that the build was now over. Also, I didn't realise that I could ever be as cold as I felt every time the wind howled across an adjacent field and slammed rain into the side of my head and then took away any remnant of warmth that had accumulated. Even though I was dressed like the Michelin man and I had the heater going full pelt, I felt like an icicle. An icicle with a huge grin on his face though! So what if it's cold - I'm driving down the A140 in my Mojo and loving every single soaking wet freezing cold second of it! Even getting pulled over by the Police didn't dampen my spirits - I saw the Police car sitting behind my wife who seemed to be in the widest Yaris in the world but eventually he managed to get past and put his disco lights on. By the time I'd found somewhere to pull over and he had got out of his car I was standing there ready with the insurance documents, and the letter from VOSA. He checked the VIN number against the paperwork and said 'lovely car Sir' before sending me merrily on my way.
This next bit is going to sound a bit gushy like a rather awkward Oscar winner's speech, but it needs to be said. I need to say a huge thankyou to everyone who has been helping me during this build (in no particular order...)
- My wife and housemates for their seemingly endless tolerance of my hours spent in the workshop, for the constant supply of coffee and help when things were too heavy or I was just too tired.
- My Gran and Grandad who sadly passed away last year. In many ways, this build was in memory of them both and I only wish they were here to see it.
- Dickie and Pete for all their engineering input and making a number of the custom parts required
- Neil Everett whose website and emails were a source of inspiration and information at all points, and whose Mojo was the deciding factor in my early decisions.
- Michael B for his diligent watching eye on my build via this website and constructive criticism whenever something was seen to be wrong.
- Tom Clarke for the photos of his Mojo SE on Picasa - often referred to when I needed to see how someone else had completed a certain part of the build.
- Ali Clarke at Stingray for the constant supply of parts, for bringing Steve Knee's Mojo to Newark for me to poke around, and for always being available to answer my newbie questions early on in the build.
- Matt Beardshaw for taking the Mojo project on and always being on the end of an email when required.
- Finally, the man himself, Jeremy Phililps for always being available when help was needed and for designing such a brilliant kit that someone with no previous experience could build in a shed and get through the test first time. Not only is it simple to build, but it's a beautiful design, great fun to drive, and a wonderful piece of engineering which is testament to his skills and experince.
Moving on, I popped into the DVLA office this afternoon to get on with the next step of the process. Unfortunately, they noticed that the SVA certificate was wrongly dated March 24th 2008(!) so I now need to get a replacement issued. They also insist on inspecting the car so I now need to book another day off work and find someone with a car transporter. Oh well... soon I'll be on the road! Hope the weather warms up though...
![]()