


![]()
Well it's about time for an update I guess!
First off, it looks like the Mojo bug has bitten once again. Shortly after taking my Mojo into work, my work colleagues Linda and Richard made a firm decision to join in the kit car fun (this may or may not have had something to do with the lunchtime blats around Suffolk that occurred - ahem). Initially, Linda looked at a Robin Hood that was up for sale as they don't really have the time, space or funds to build from scratch, but the RH didn't really fit the bill so the hunt for another Mojo started.
Within a few days, they had located a red Mojo 2 on Pistonheads that belonged to James Clements. It was the right price, the right spec, and the right car, but it was all the way down in the west country! Nevertheless, they sorted out the paperwork in advance and shot down on the next Saturday to collect it .
Here it is parked up outside our offices alongside my Mojo.
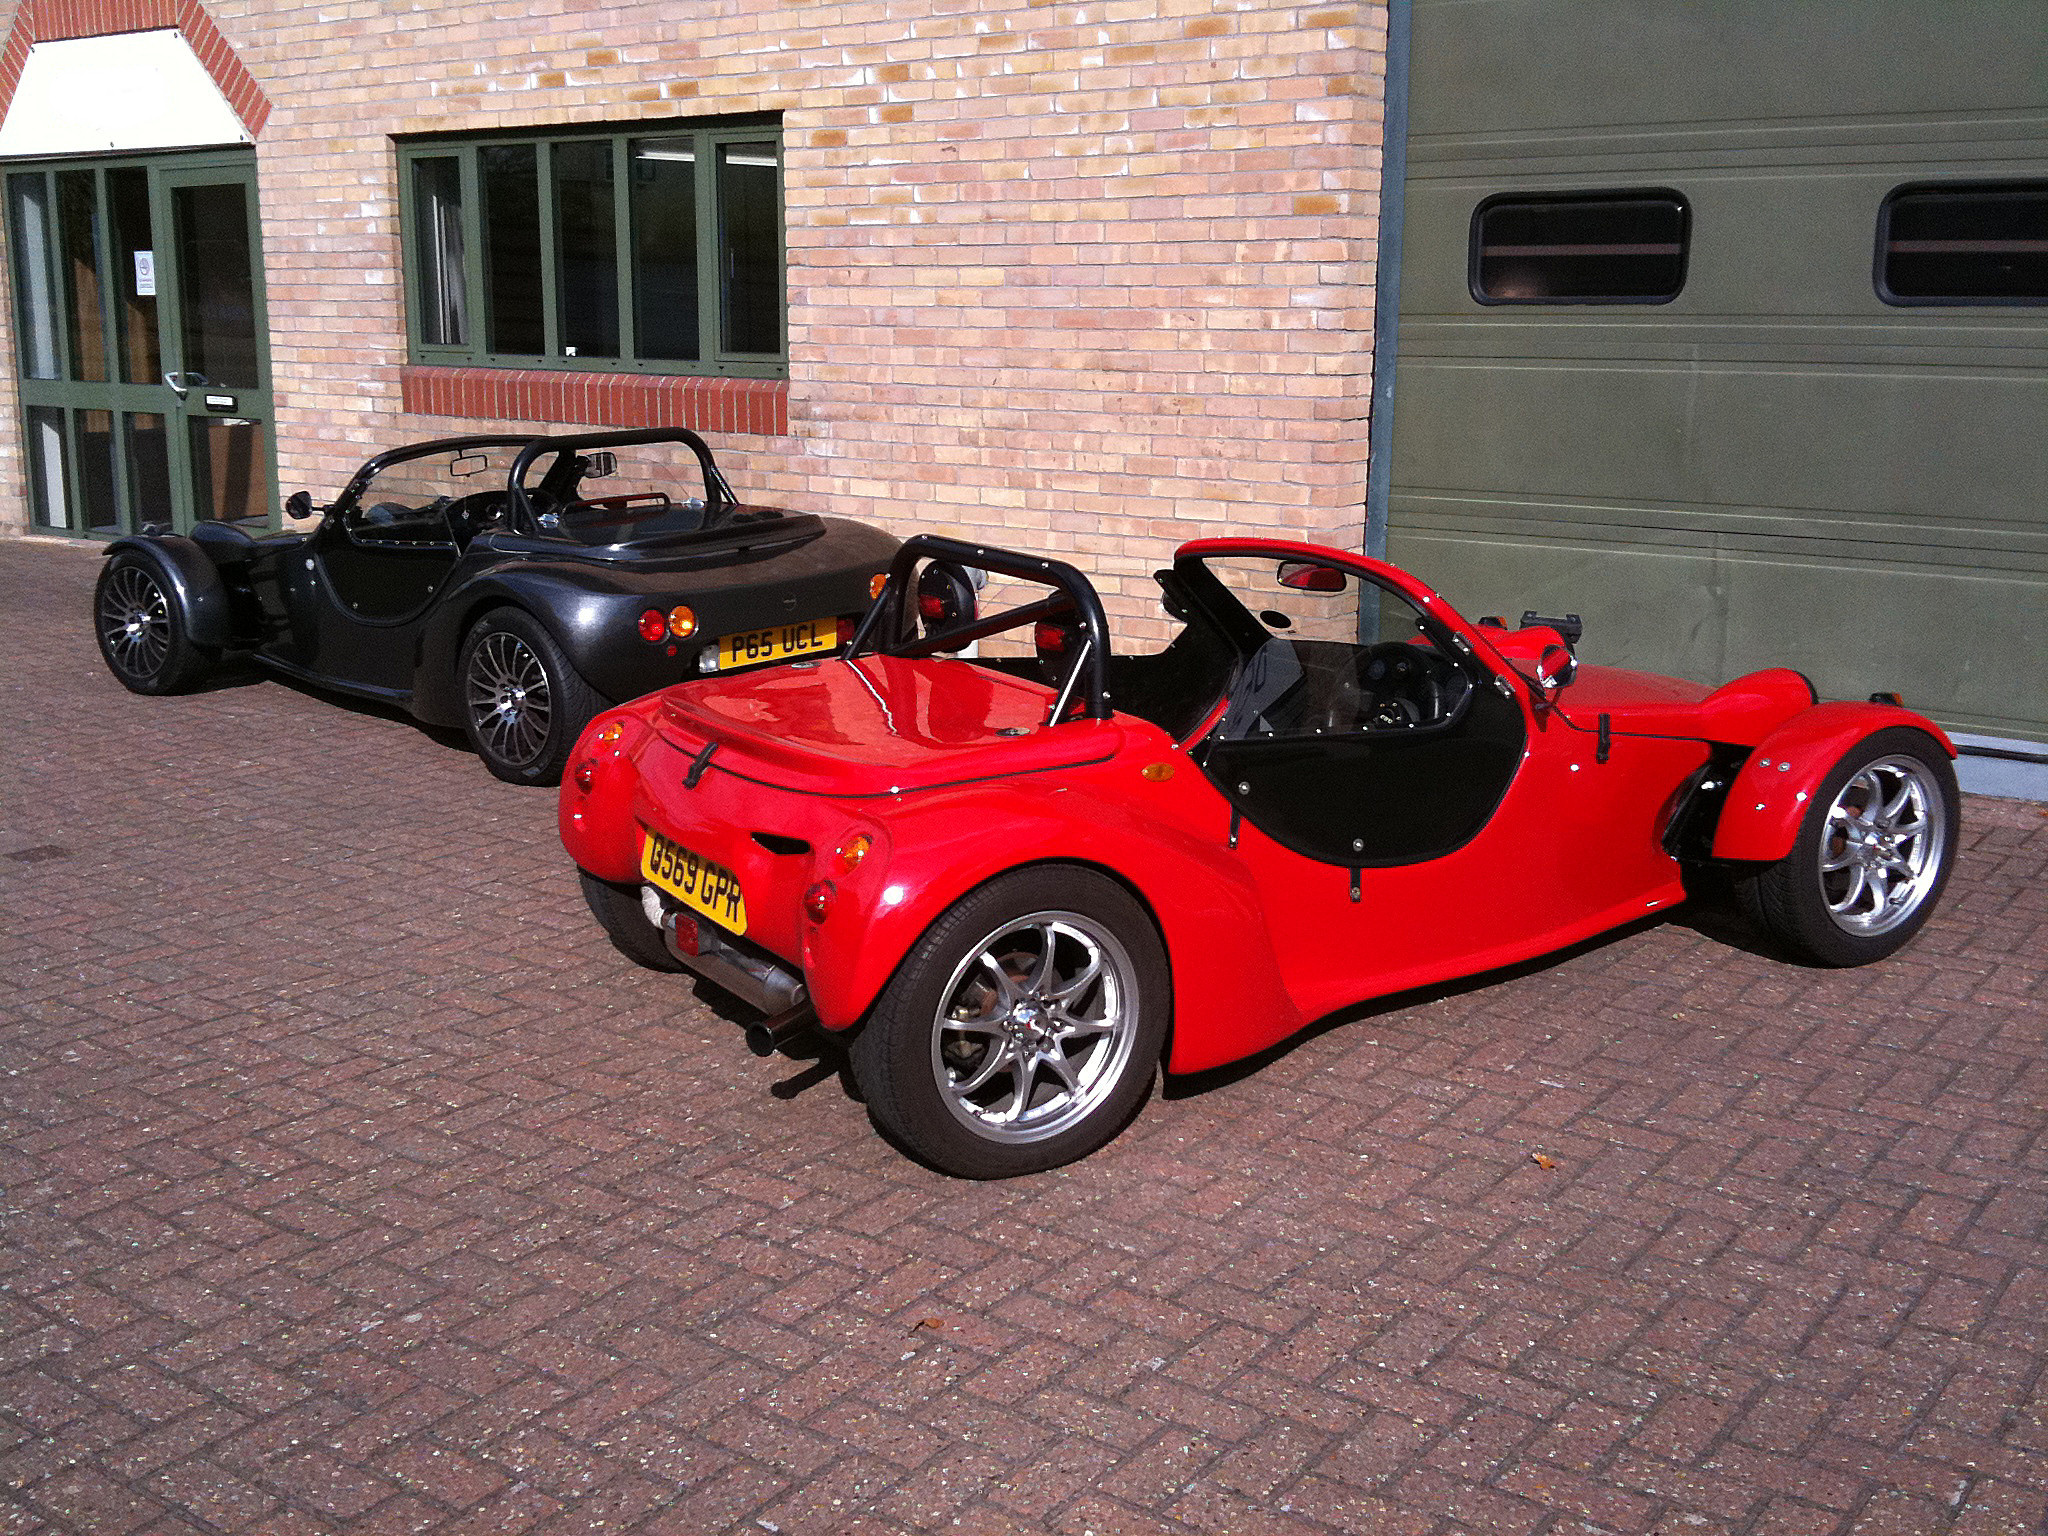
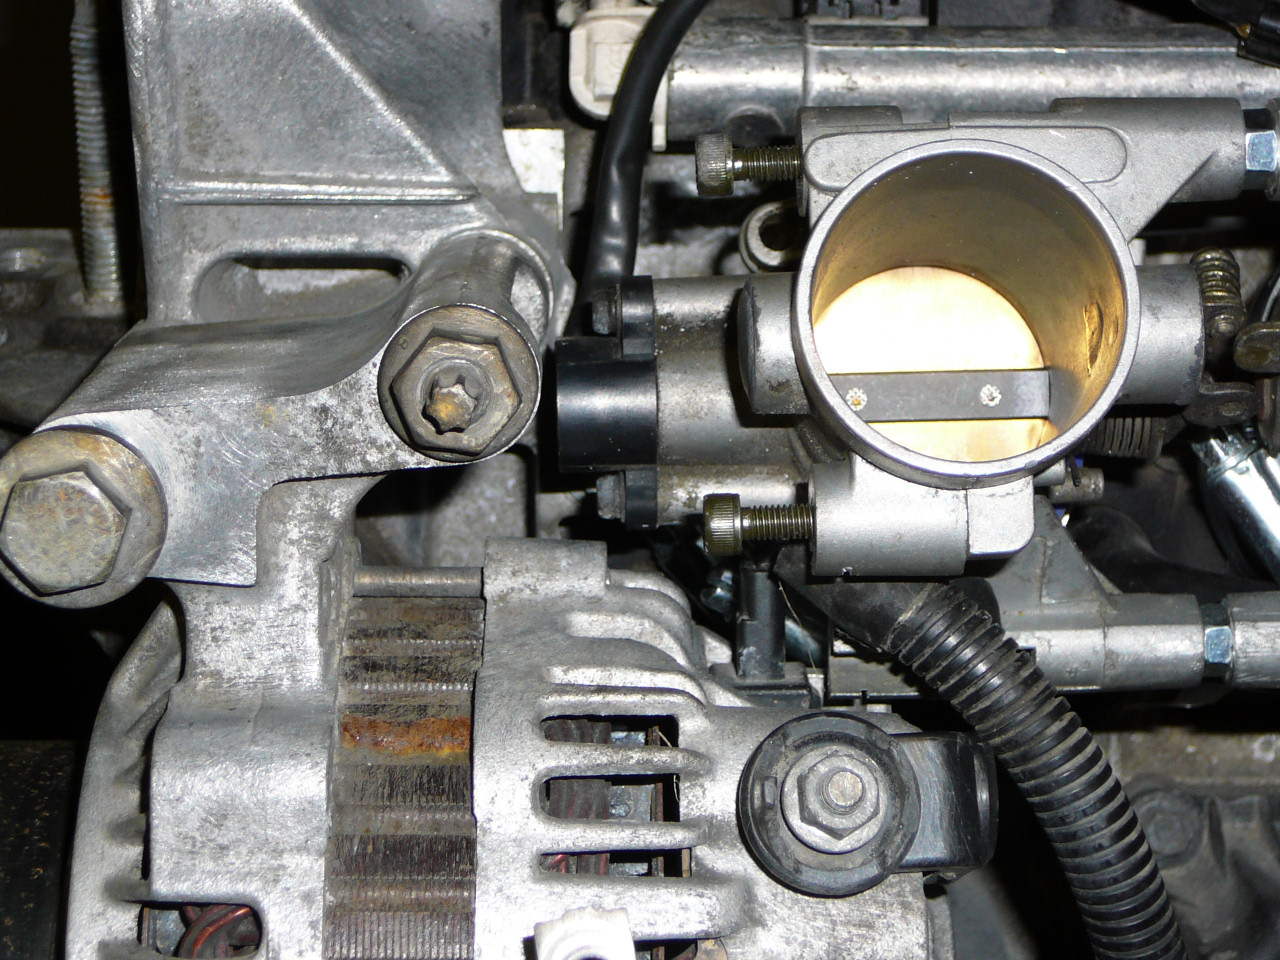
A few changes were required to improve certain areas and the main one was the suspension setup. Initially, the front was riding about 1-2" higher than the rear which is not good as it has a tendency to make the steering go very light at speed. An hour or two with a C spanner and this was resolved to set the car to the correct ride heights which has transformed the handling. There was also an issue with the alternator bracket which has been fixed up for now although a permanent solution still needs to be engineered.
The specs are:
- 2004 Mojo 2
- 2 litre CVH engine
- Pumaspeed head
- Kent cams
- Larger valves
- 130-140BHP
And it goes like stink!
This Mojo also came with full wet weather gear so I've taken the oppurtunity to take a template from their roof so that I can start to make something suitable for mine. I've been discussing this with several other builders at the East Anglian Kit Car Club meetings recently (yes, that's me in the silly mask, and yes, I need a heater!), and I've got a whole load of ideas of what can be done. In particular I'd like to thank Martin Pidd for taking the time to show me his setup which uses a length of awning rail to hold the leading edge of the roof in place instead of the stud poppers seen on so many others. This looks like a really good way to tackle this part so I've managed to acquire some aluminium awning rail, and I've used Martin's suggestion of Point North fabrics for all the other materials. All the bits have now arrived so it'll be time to break out the sewing machine sometime soon and start fabricating. Watch this space!
Stop press! I've got my pictures in this months Complete Kit Car magazine! I sent a few photos in when they were doing a feature about Mojos recently but I was a little too late for inclusion. However, I got an email from the editors saying that they were going to include me in a new section where anyone can get their car in print and show it off to the world.
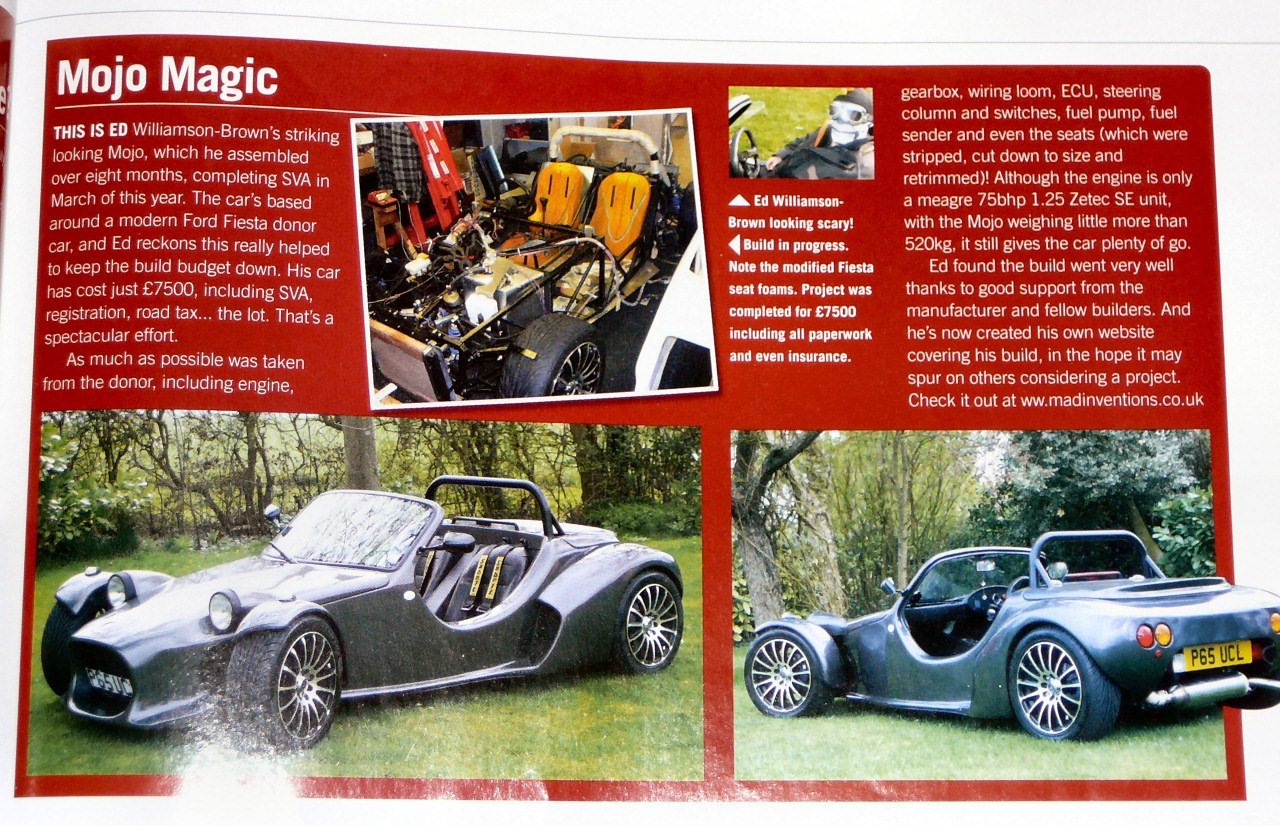
I must admit that although I'm dead chuffed to be included in the mag, the 'meagre 75bhp' comment did make me aware that a bit more power wouldn't be a bad thing. Also, I simply can't have Linda and Richard having more power than me so I've decided that an engine upgrade is in order. Oh dear...
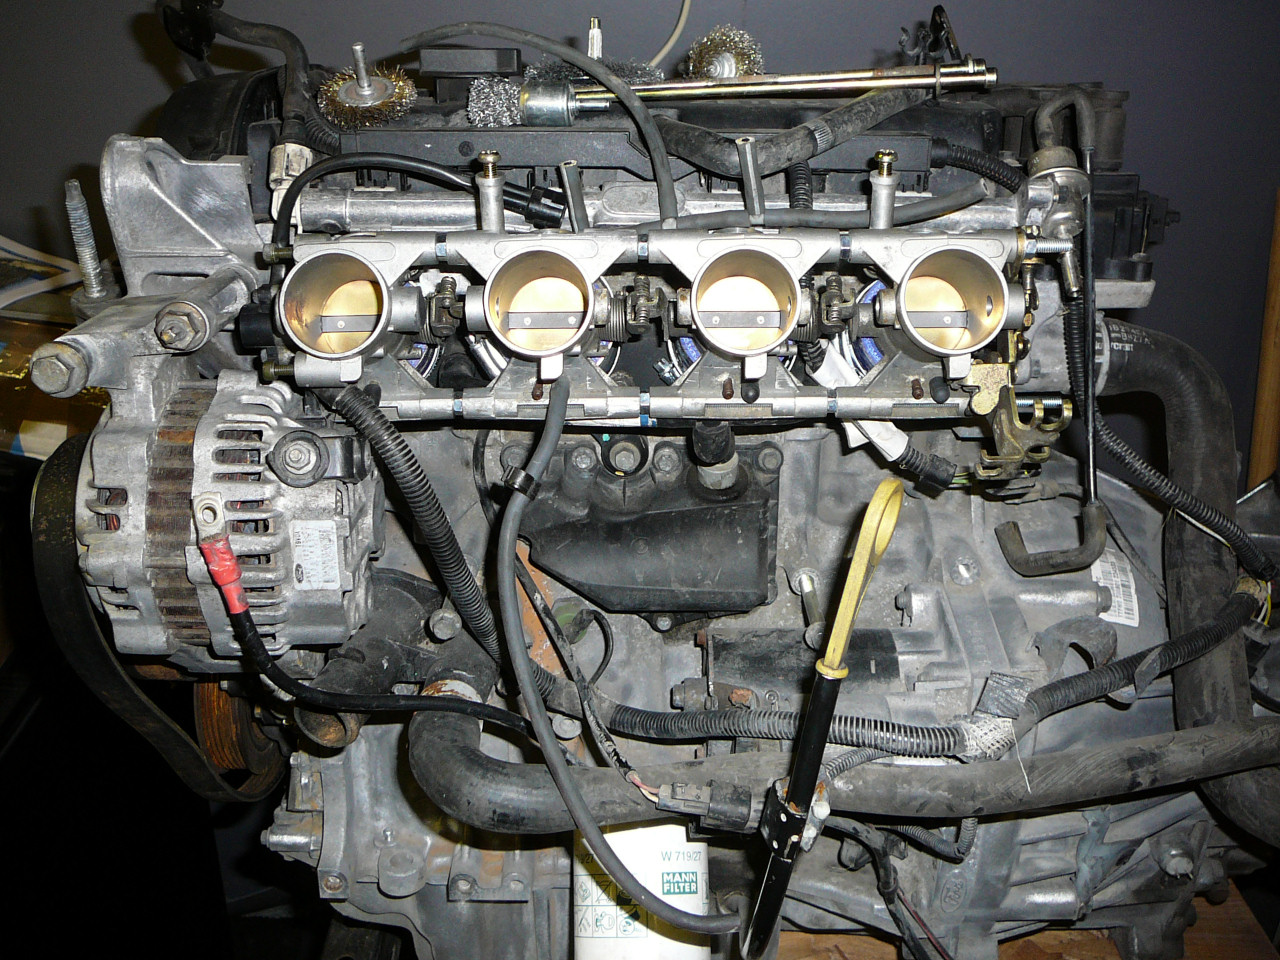
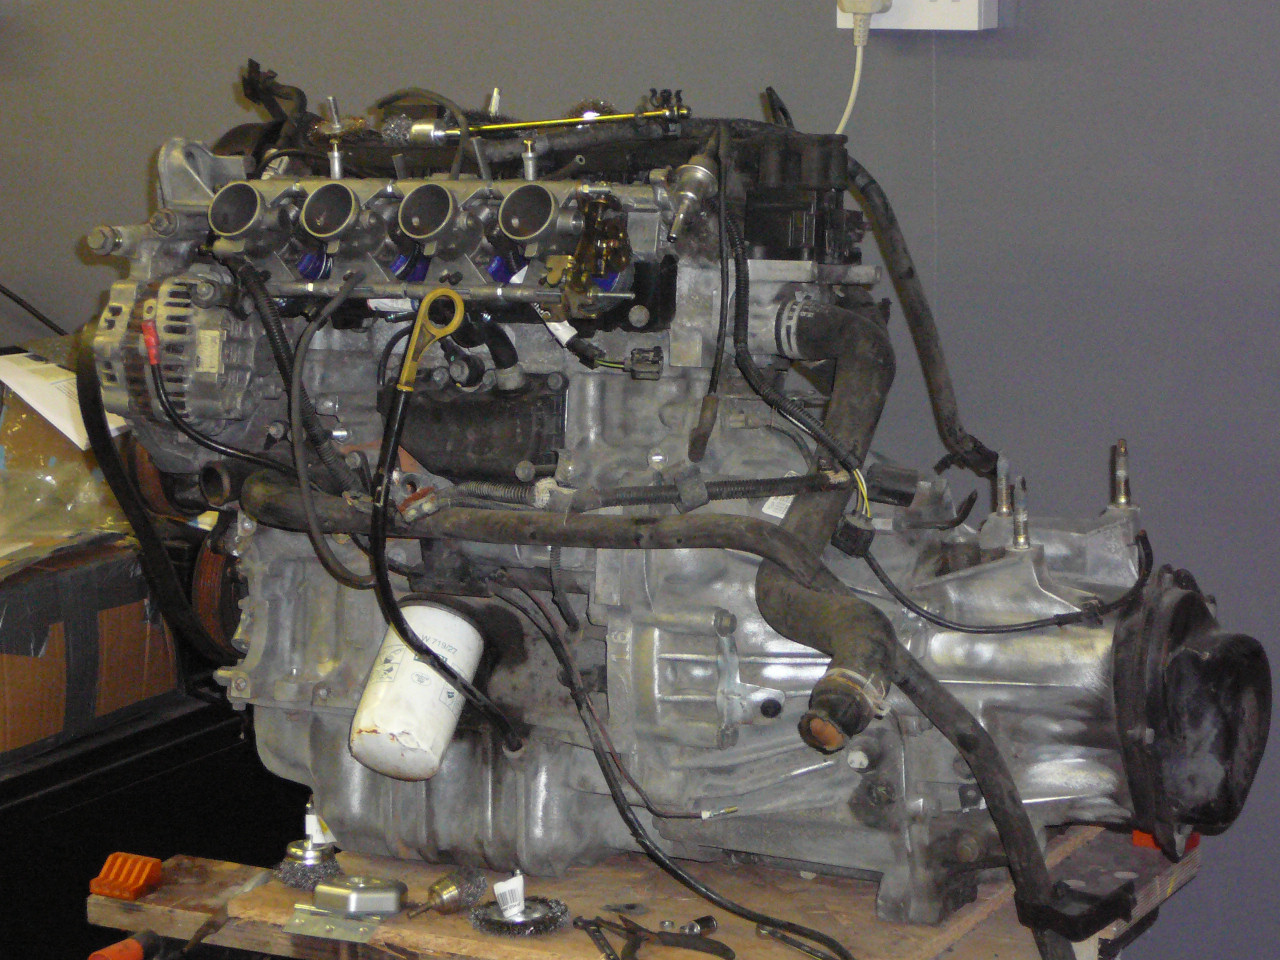
So I've got hold of a Zetec SE 1600 engine from a 2001 Fiesta with just 34K on the clock, along with it's gearbox for £300. It turns over by hand but I haven't had it running just yet. The plan is to spend a little time on this engine sorting it out with some low(ish) cost performance enhancements such as throttle bodies, a light porting and a Megasquirt ECU. I'm hoping for around 110-120BHP from this setup and it'll be a good starting point for cam and exhaust upgrades later when the cash becomes available.
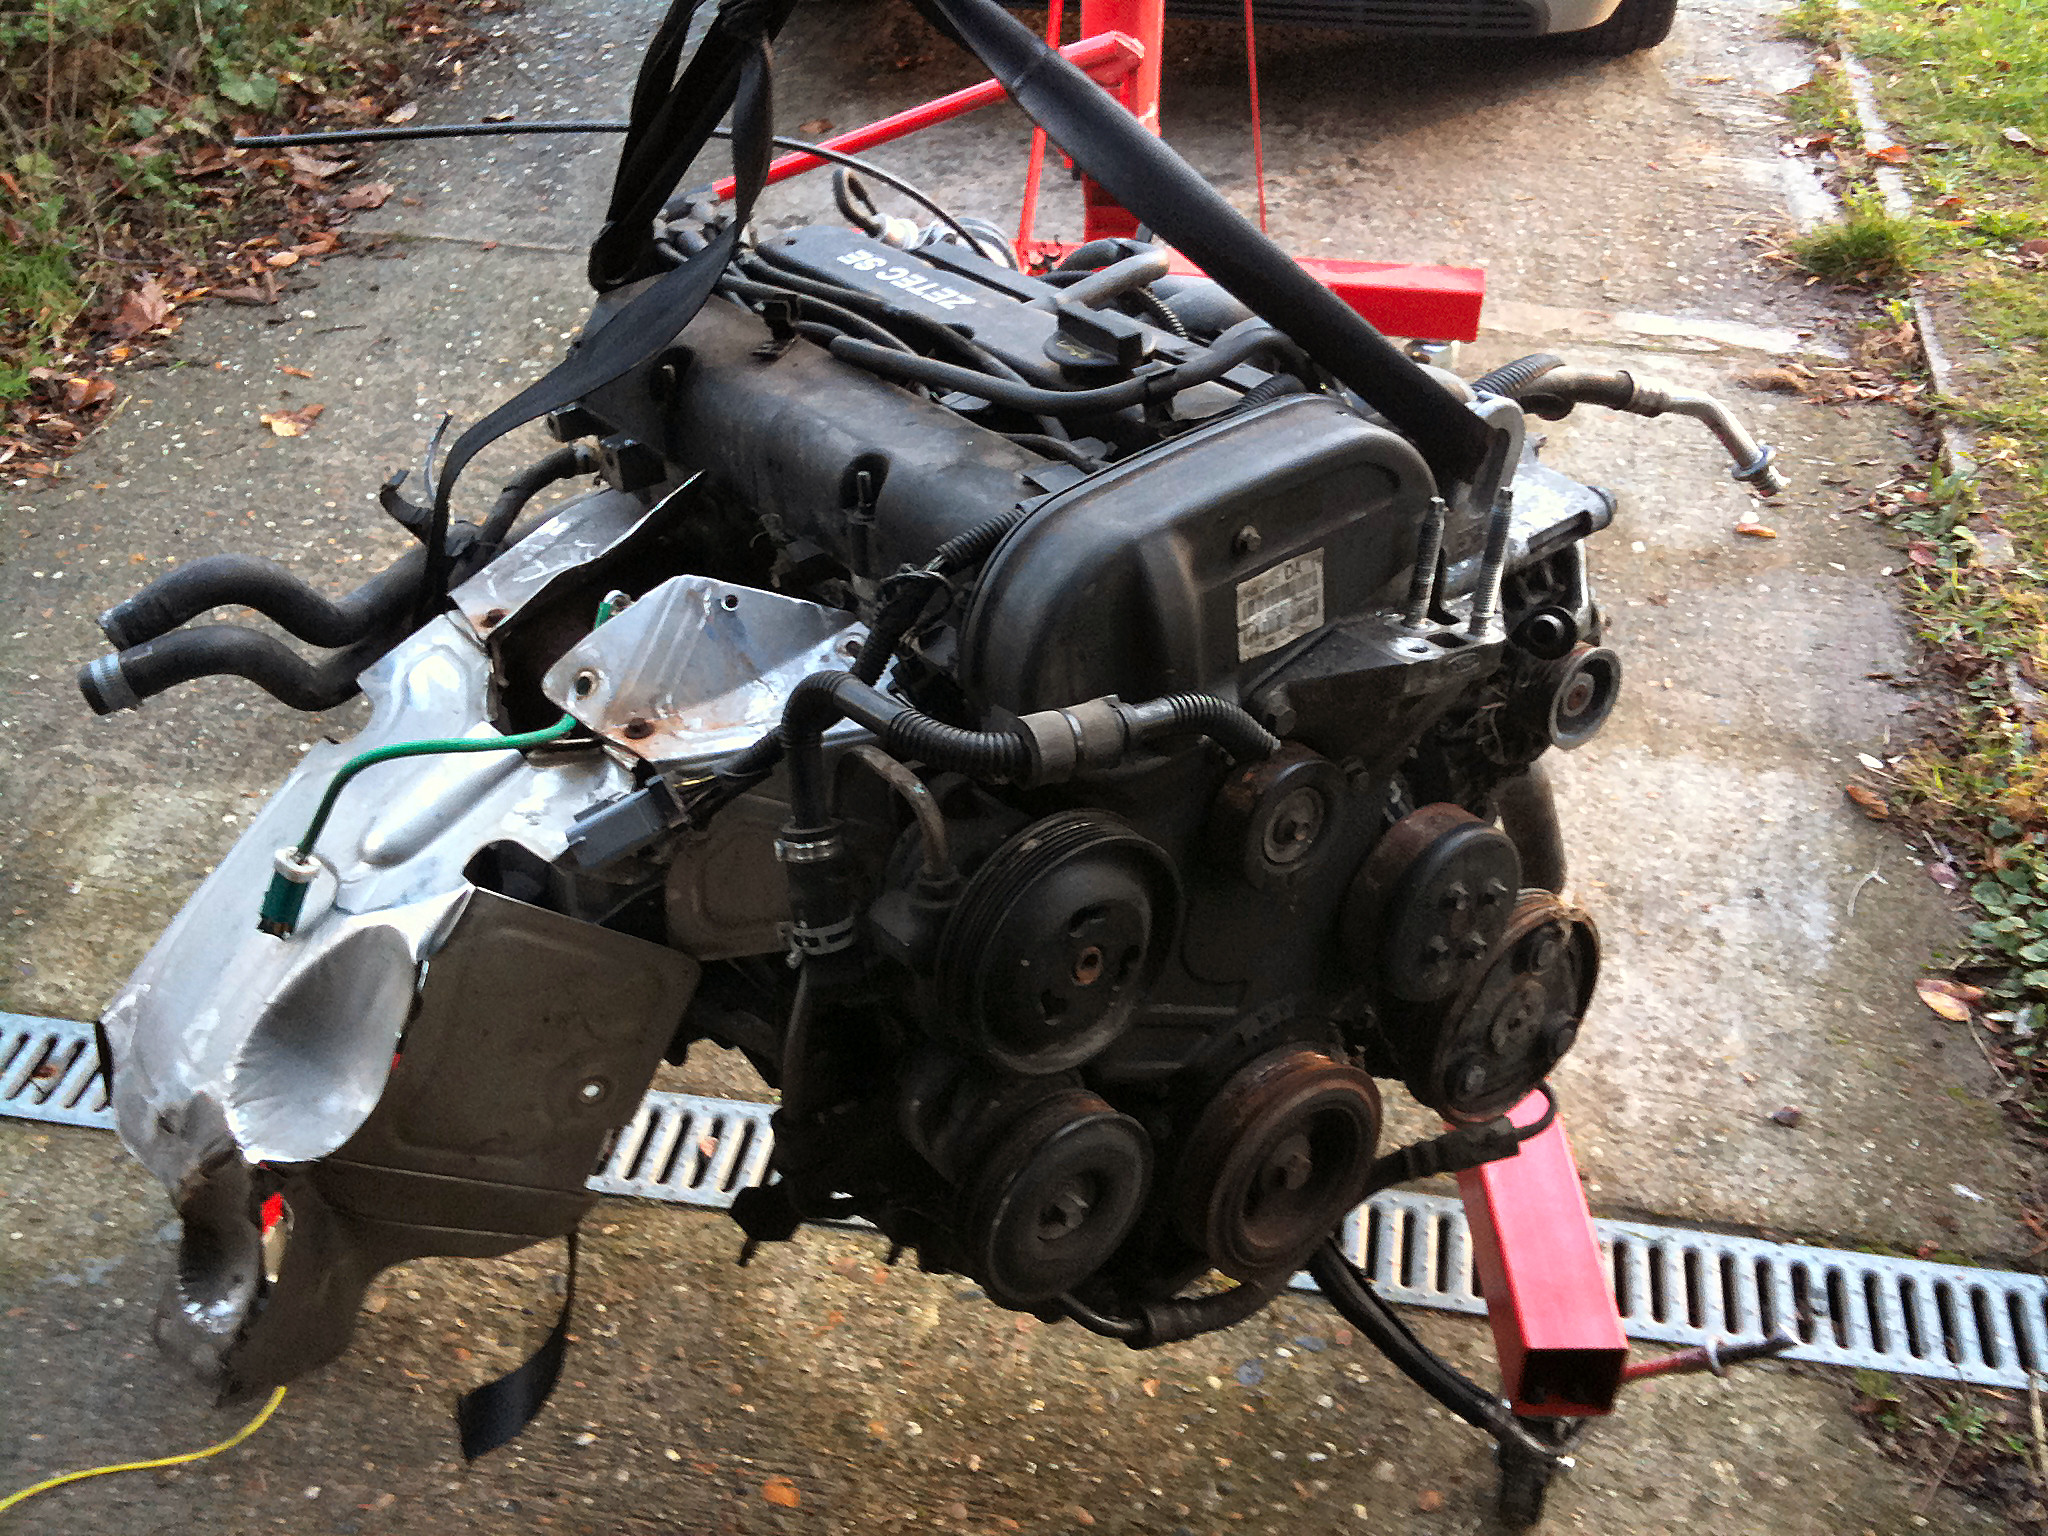
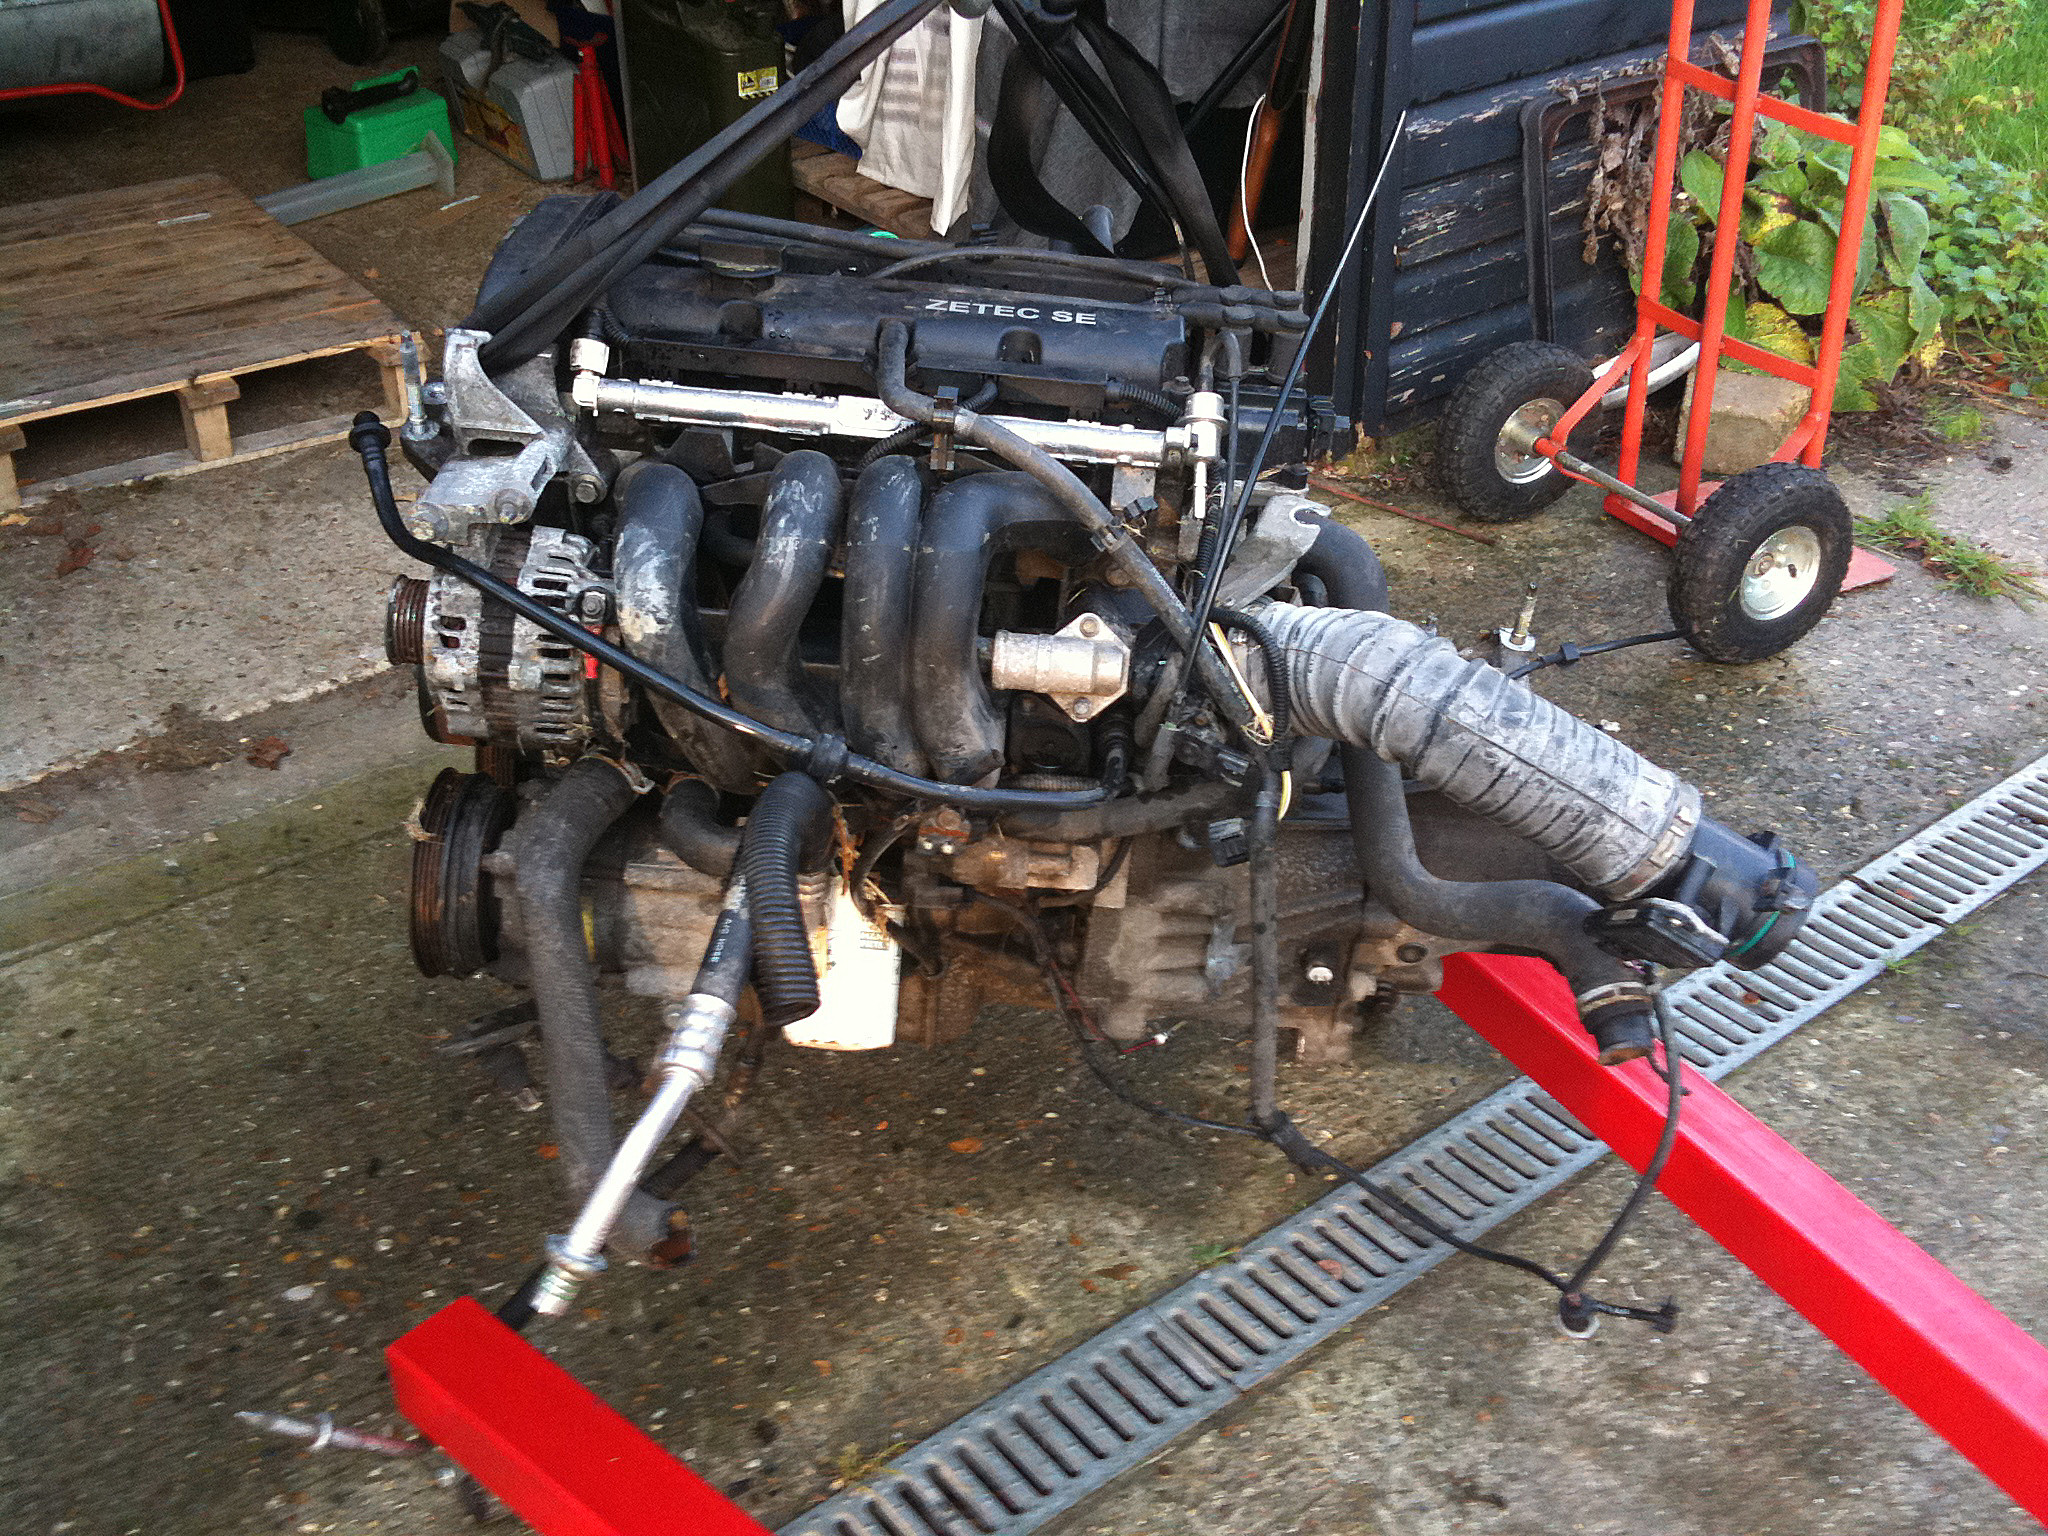
As you can see, it's fairly complete so there's a fair bit of work to do to get it trimmed down to fit the Mojo. The first job was to remove the A/C and ABS pumps which has saved a fair few Kg's already. I'll have to clear a space in the workshop so I can get this in and really start working on it.
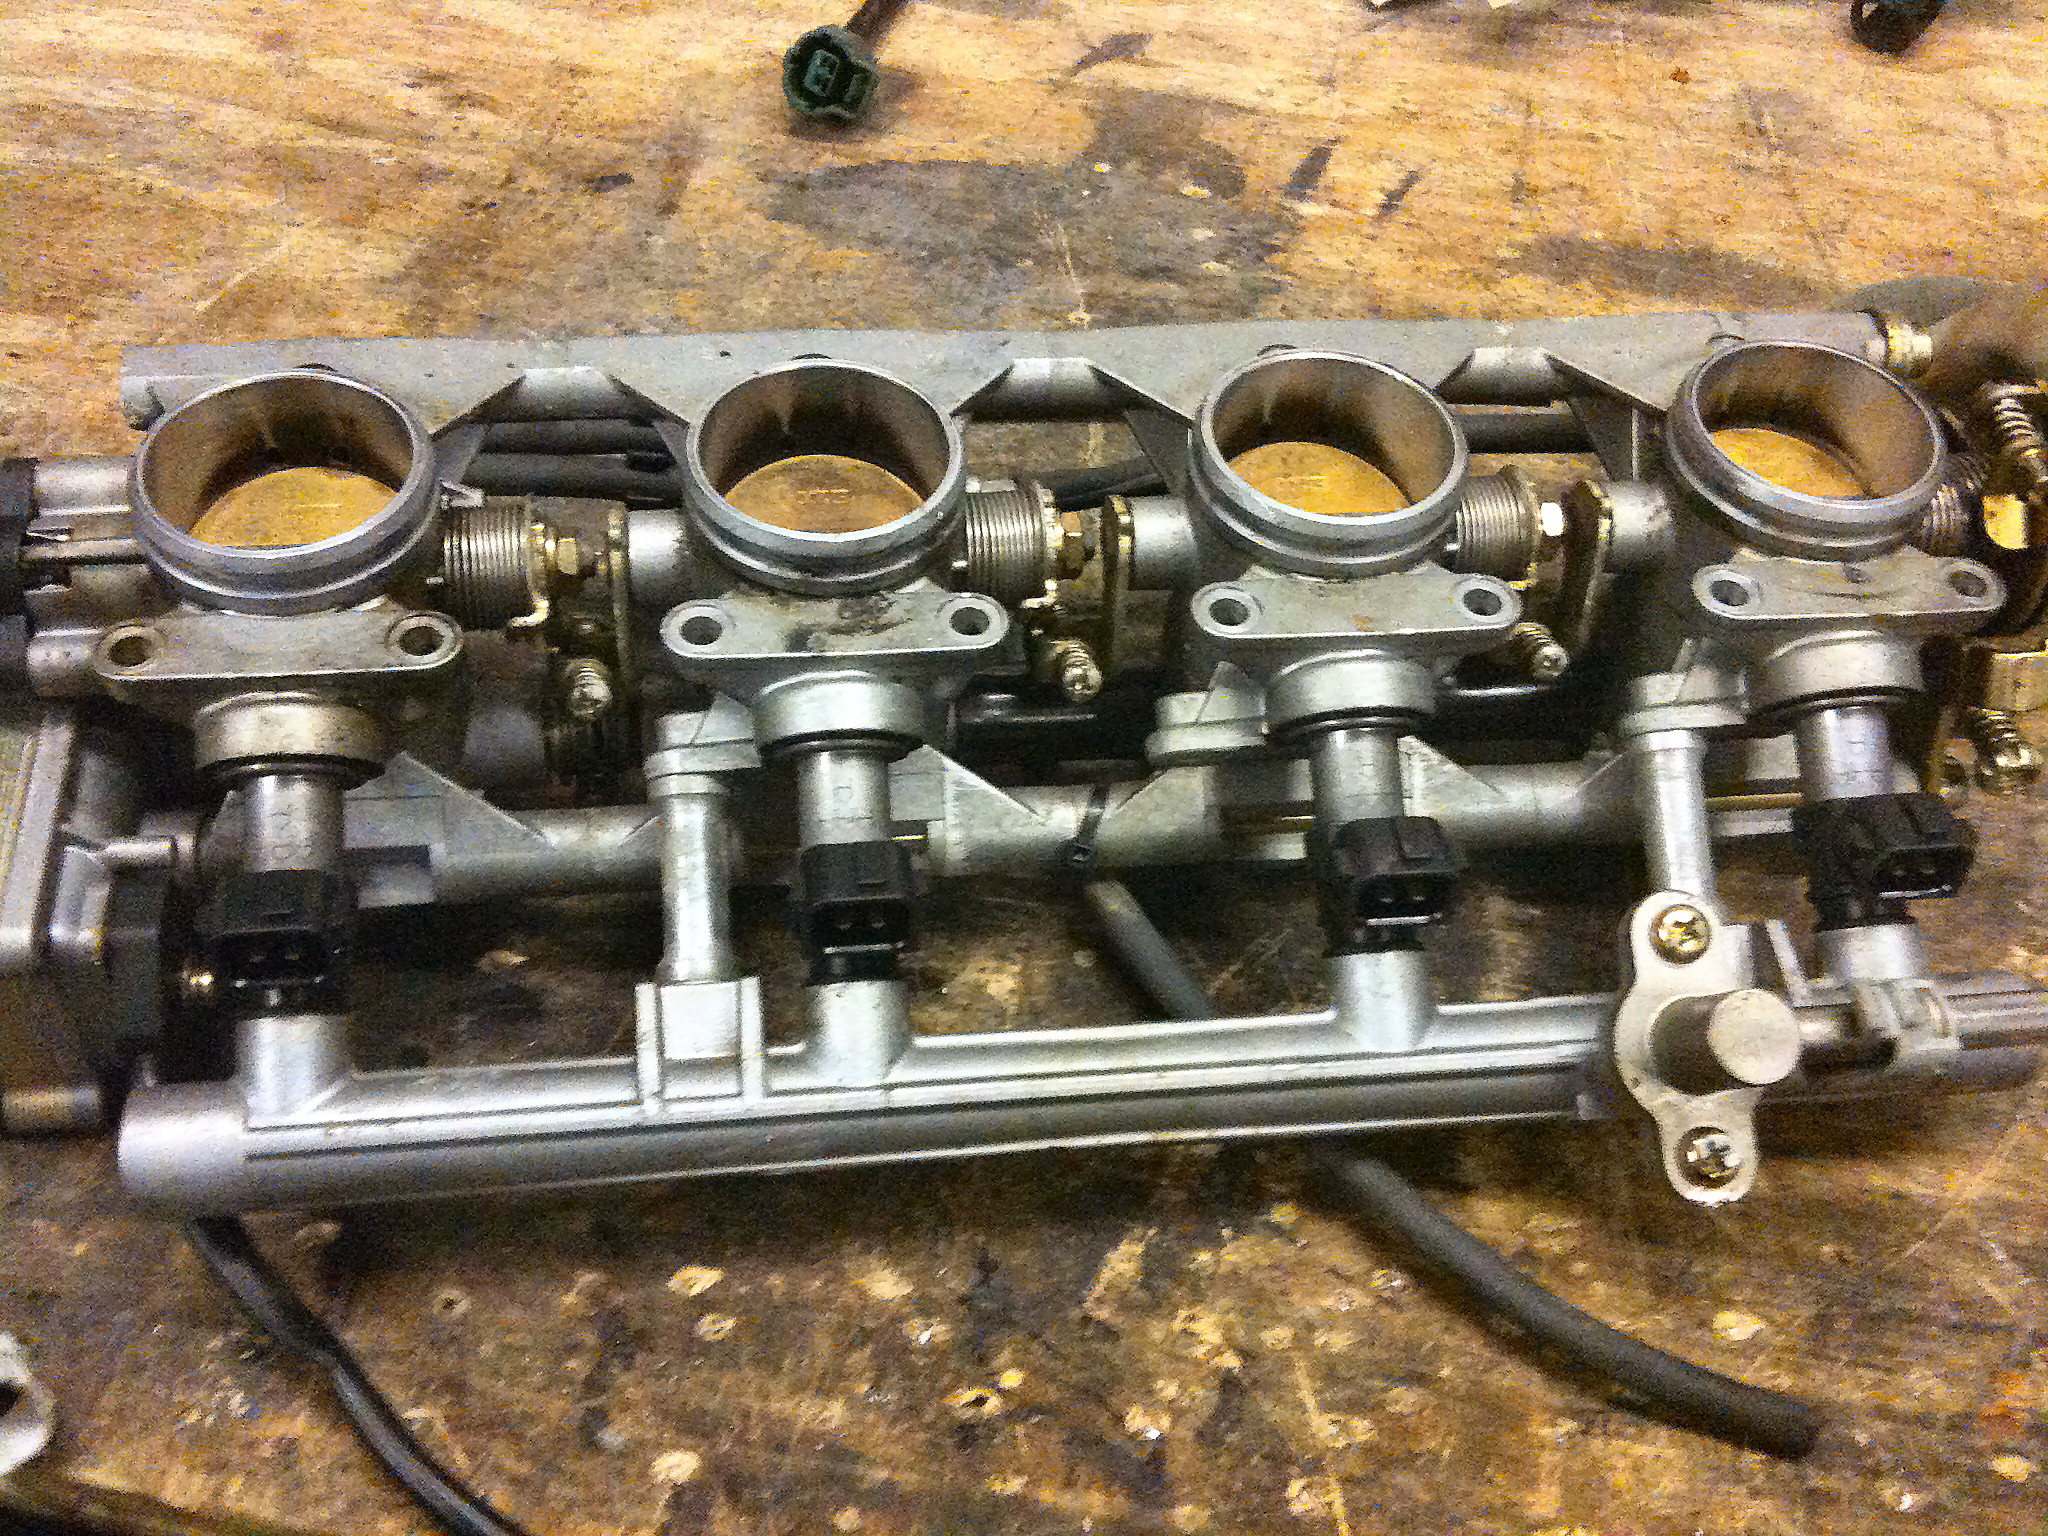
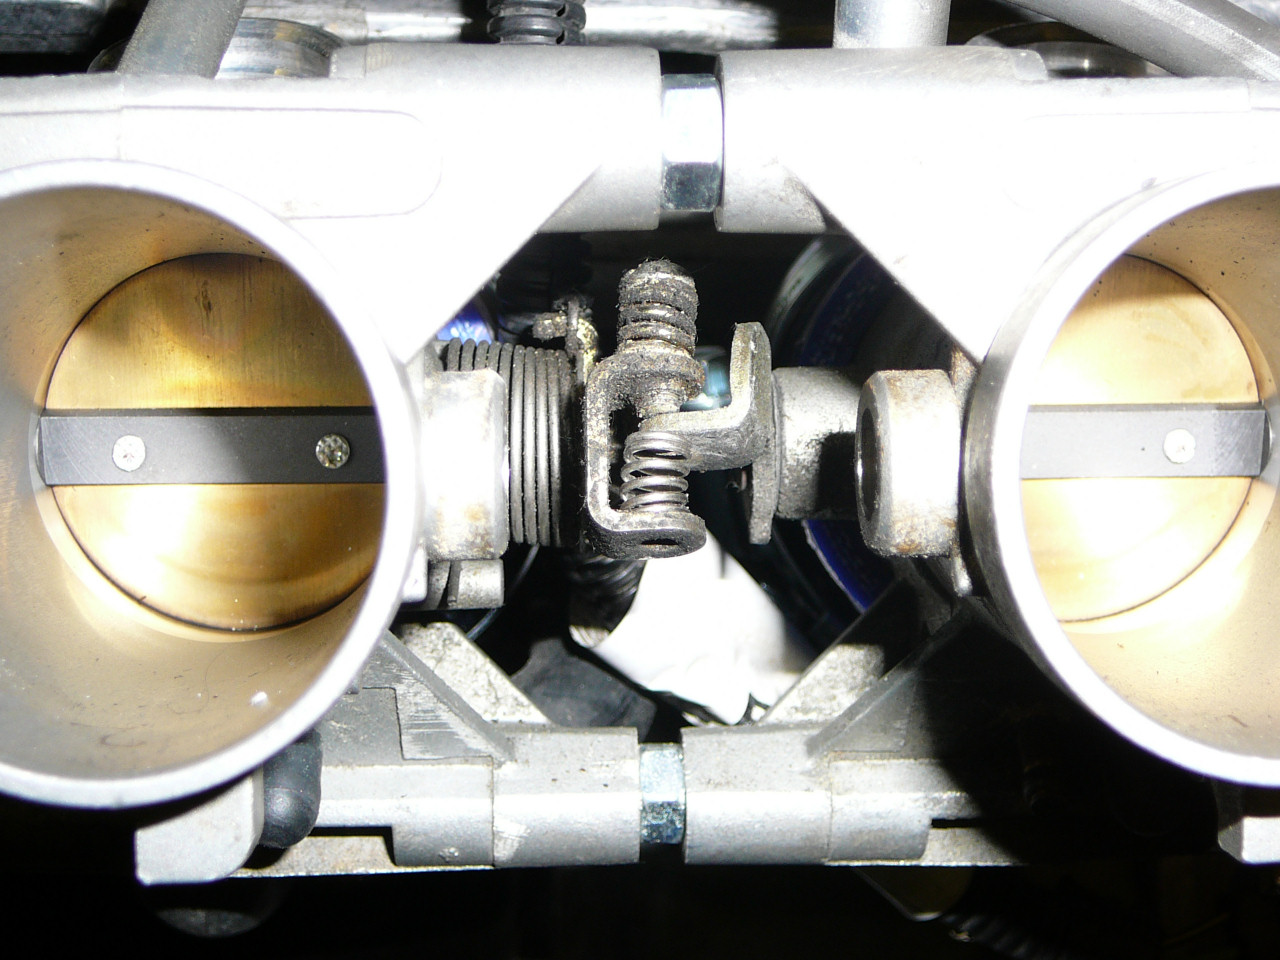
I've also got hold of a set of GSXR600 throttle bodies from eBay which arrived today. These are the individual throttle bodies (K1/K2) so they're easy to separate and respace to suit the Zetec inlet manifold spacing. I'll remove the secondary butterflies (silver ones) and the injectors as I'll retain the Ford injectors for now.

I will need to make some form of inlet manifold to fit these onto the head which will need to be quite small as there is only around 170mm of space from the head to the chassis rails behind the seats. I could get someone like Bogg Bros to make a custom manifold, but I'll see if I can make something up myself first and save a few pennies.
So, the first course of action is to see if I can reuse the Ford parts... so we'll start by removing the inlet manifold.
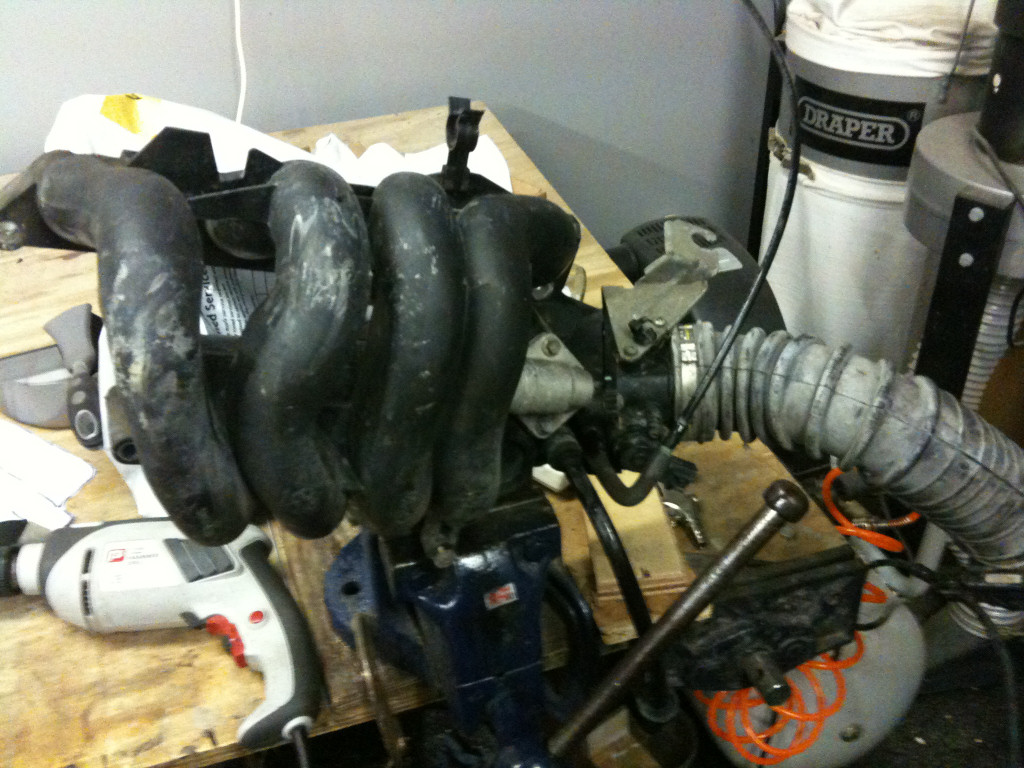
The next step is chop off the bits we don't need...
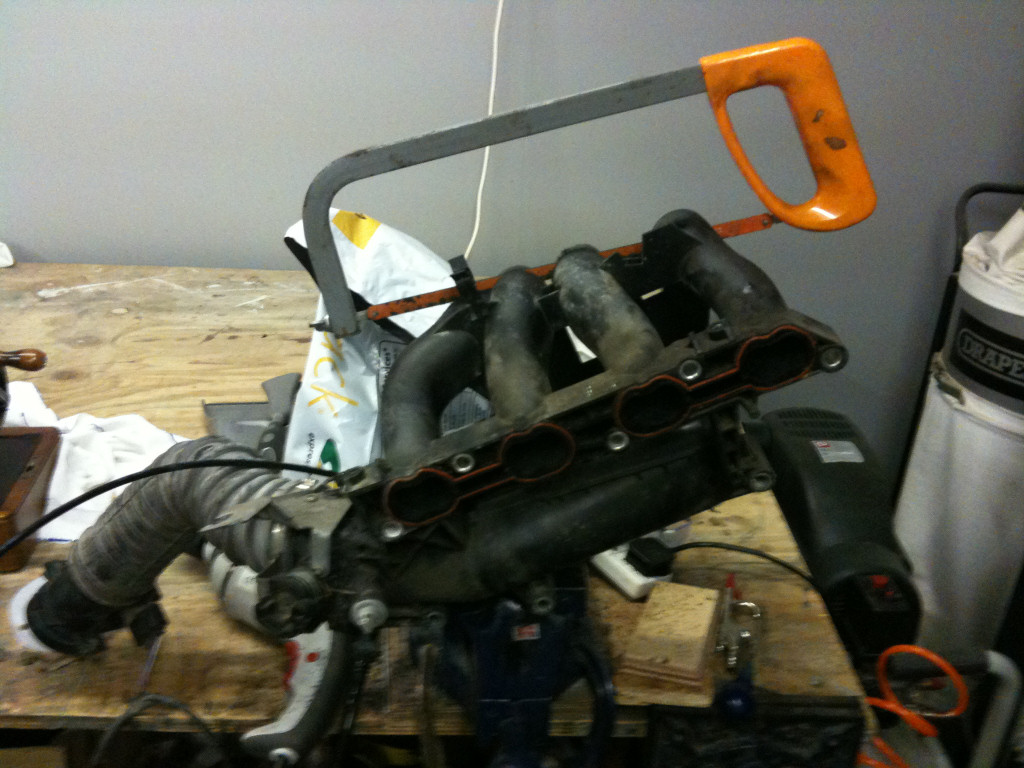
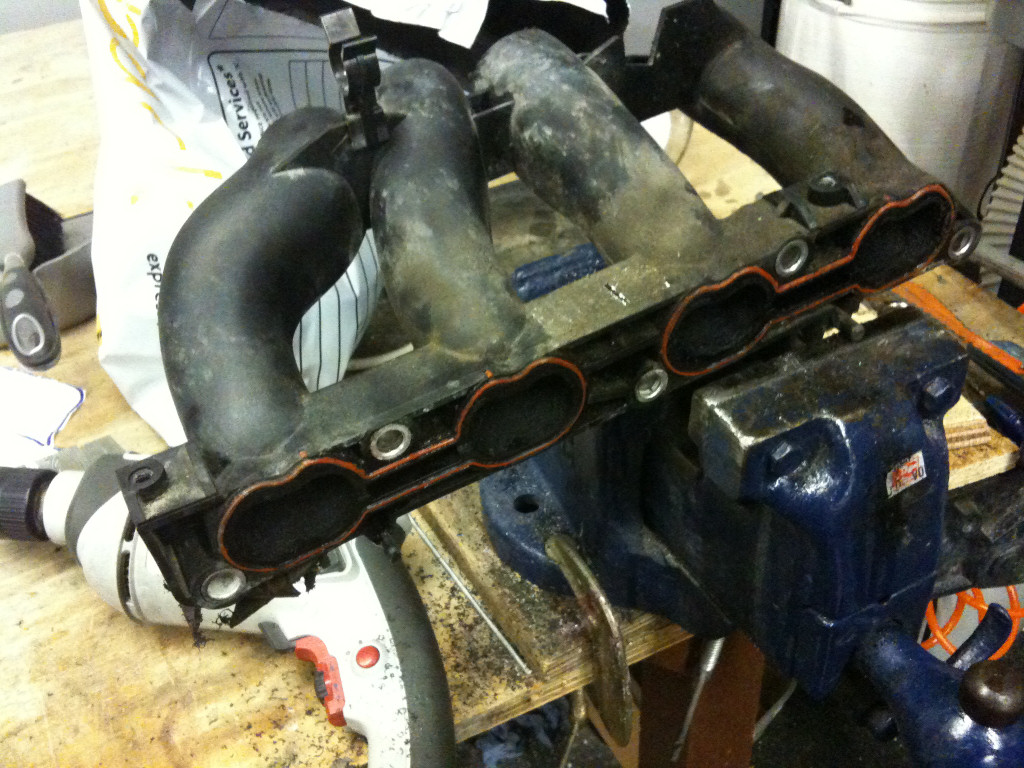
The inlet pipes will get chopped even further when I work out the distances between the head and the throttle bodies. This needs to be as small as possible as there is very little room in the Mojo engine bay!
The no.1 cylinder throttle body needs to be modified to clear the alternator. I did buy a Bedford Rascal alternator to replace the Ford one, but there's not actually much difference in size and I know the Ford one fits, so I'll re-use this part if at all possible. The alternator regulator is built into the Ford ECU so this will not work with a Megasquirt... Hmmm... After some research, I think I've worked out how to build a circuit to do the regulation so I'll build a prototype and do some tests (it's easier for me to build a circuit than to weld up new brackets!)
Anyway, back to the modifications:
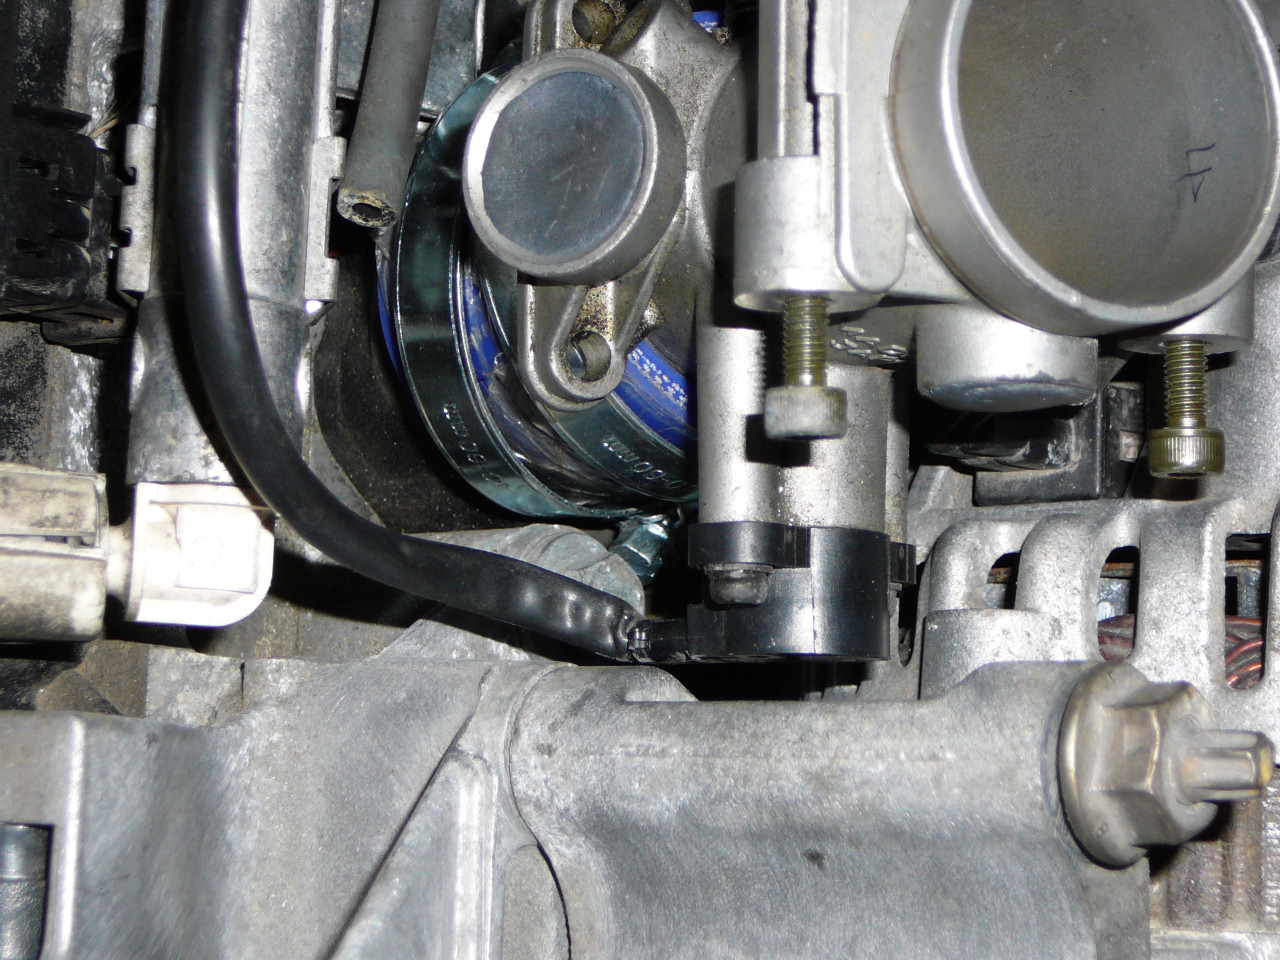
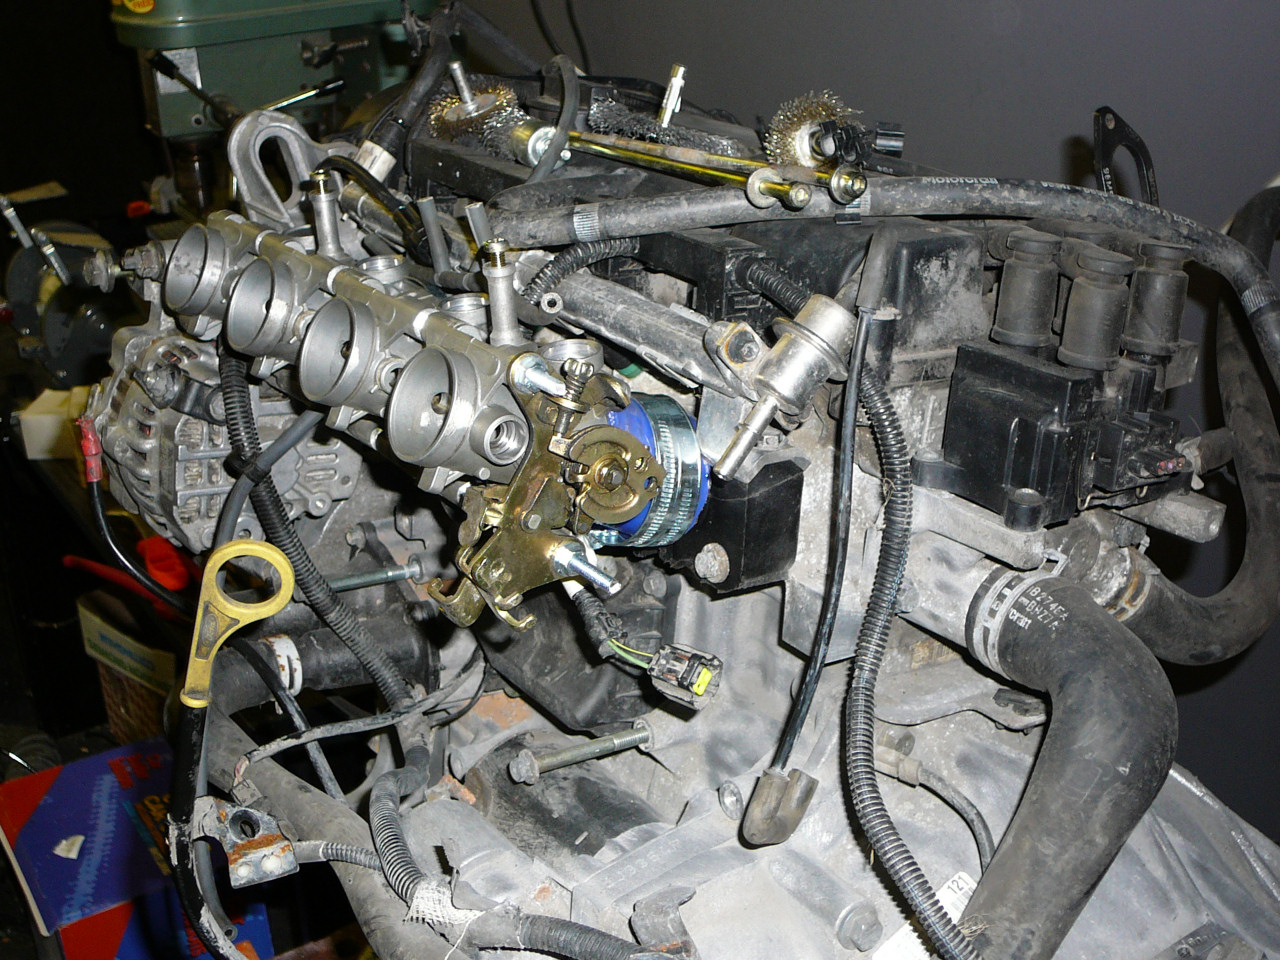
I've had to chop off one of the 'wings' of the throttle body, but this didn't do anything so it didn't matter if it wasn't there anymore. This clears the alternator with a few mm to spare now. You can also see that I've plugged the injector hole in the throttle body with some chemical metal. The Ford injectors should be fine for what I need without resorting to staged injection.
The bodies need to be respaced to fit the spacing of the Zetec inlets, so I got a length of M6 threaded rod and found that I needed about 5-6mm extra between each body, which is about the same as a M6 nut - so that's what I've used for now.
Of course, this respacing means that the throttle linkages between the bodies no longer reach each other.
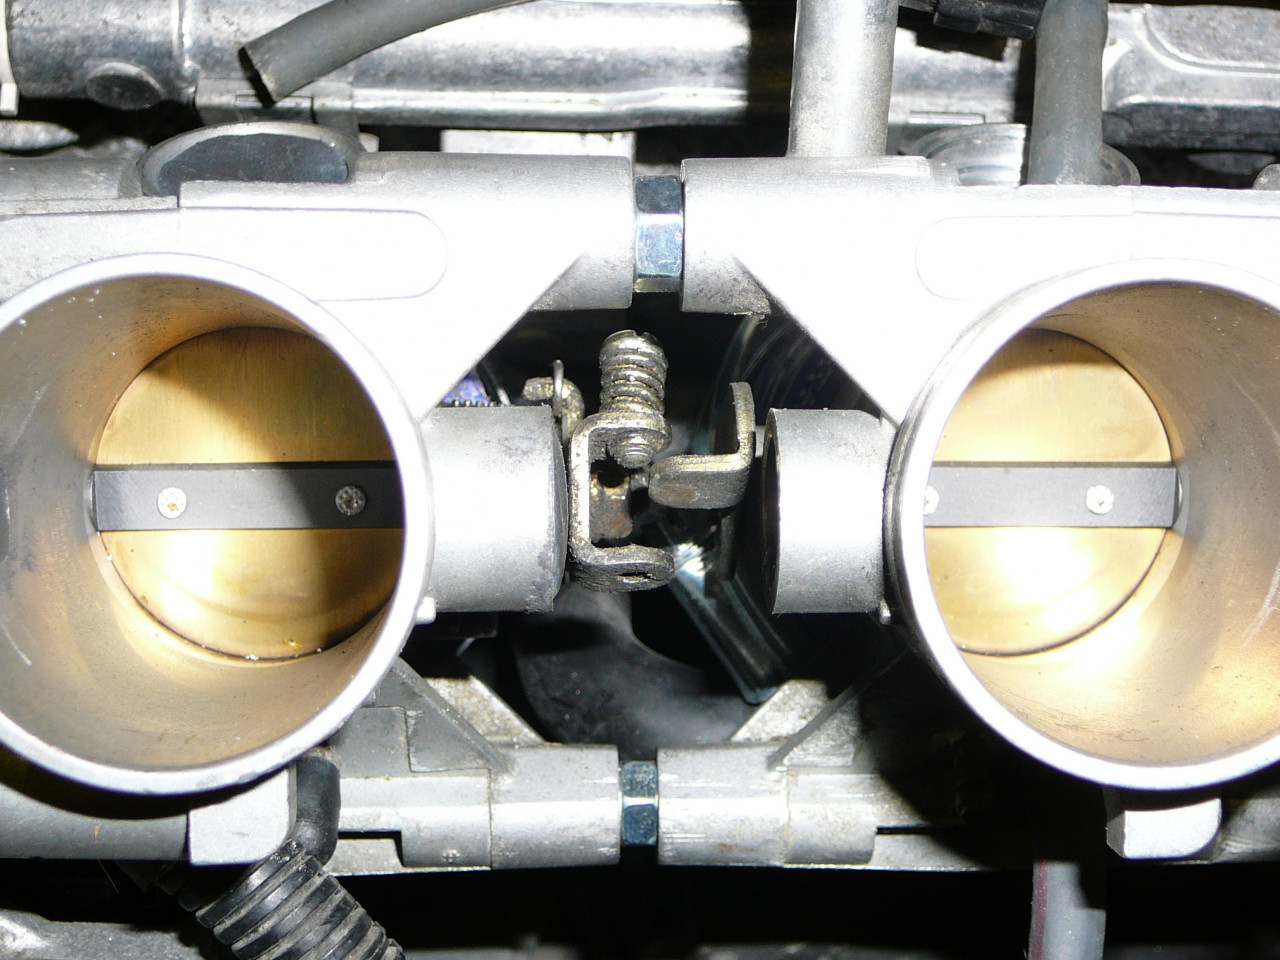
The answer here is simply to bend the linkages so that they reach again!
Here's where I'm up to so far.
I've also had to replace the idler pulley / belt tensioner for the auxilliary belt with one from a 1.25 Zetec SE which I sourced from the scrapyard. Here it is fitted to the 1600 engine.
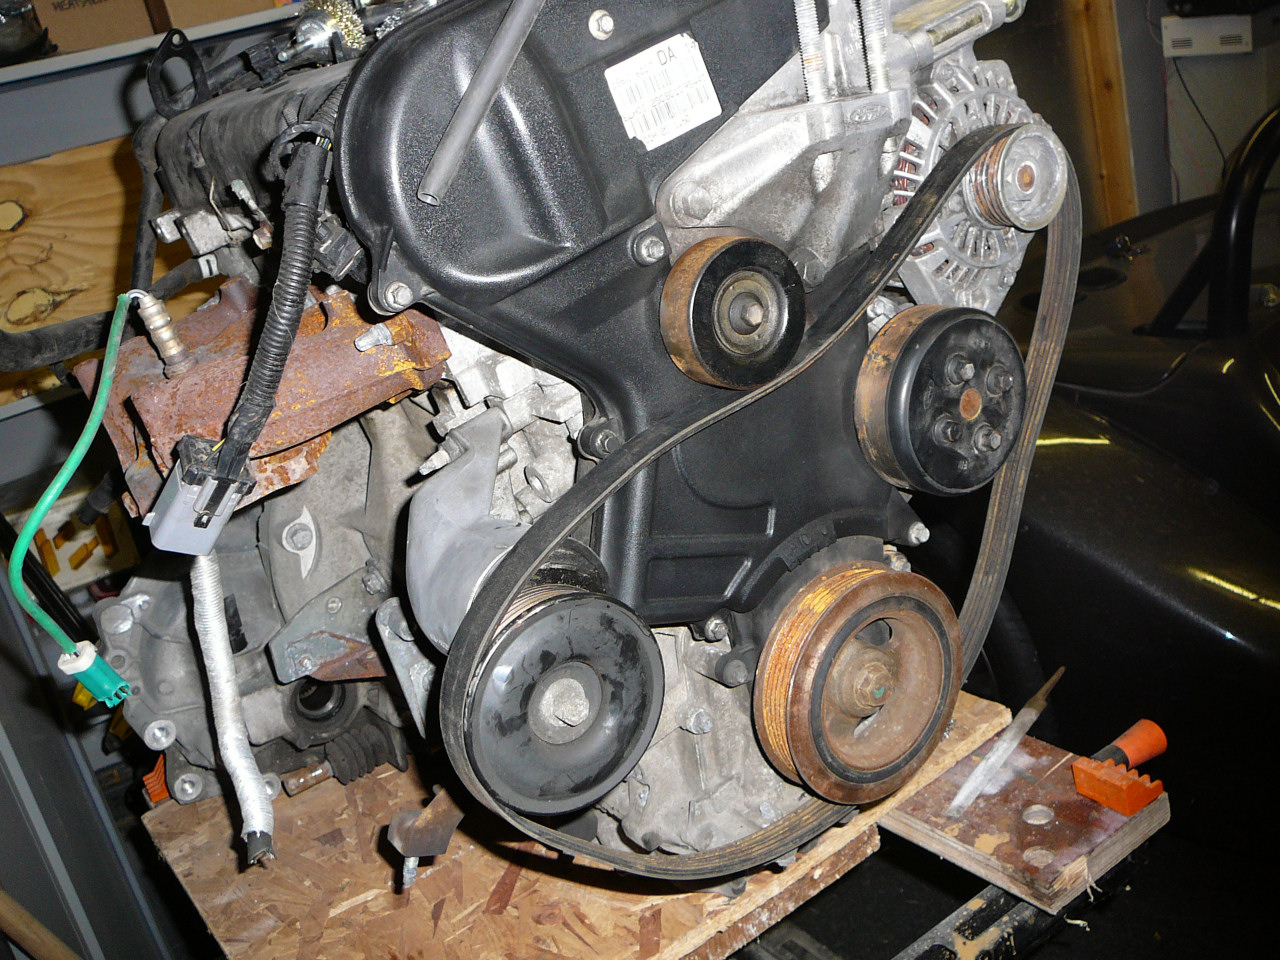
This allows me to use the standard belt from the 1.25 too.
Here is the list of the next jobs to tackle:
- Do a final build of the throttle bodies onto the inlet manifold
- Fabricate the inlet plenum
- Sort out the roof!
- Strip and clean the head, and give it a light porting.
- Get a new ECU (probably Megasquirt) and a wideband lambda sensor
- Fire up the engine!
Plenty to keep me busy over the next few weeks then.
![]()