


![]()
04/09/09
Well if you're reading this then thanks for your patience! It's been a hectic few weeks and I just didn't have the time to get around to updating the site. However - here's a mammoth update for you!
Now - where to begin...
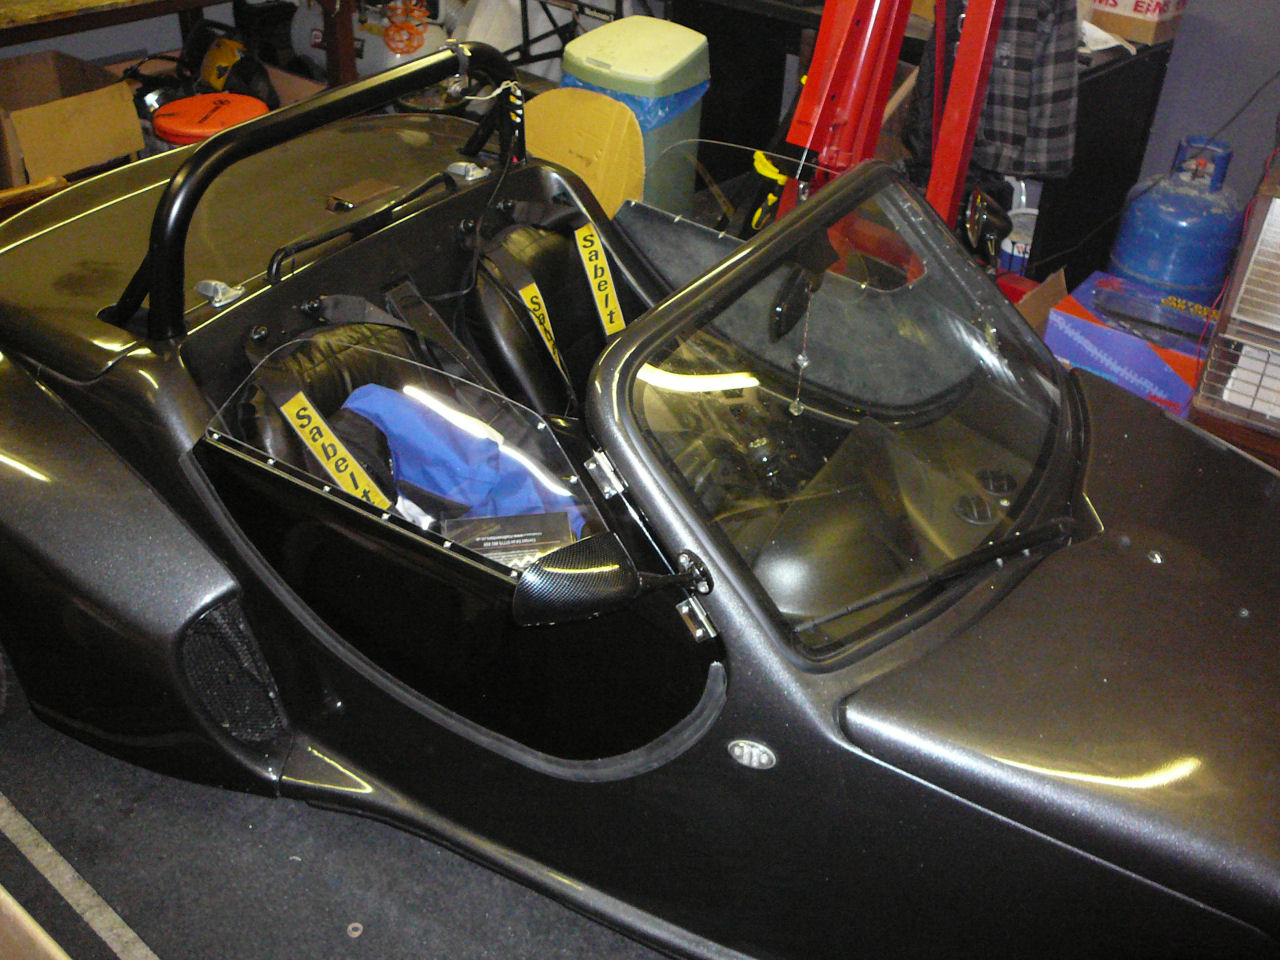
The doors arrived last month and I decided to get them fitted asap. The difference they make to the driving experience is well worth the price of them, Here's what you get for your £200:
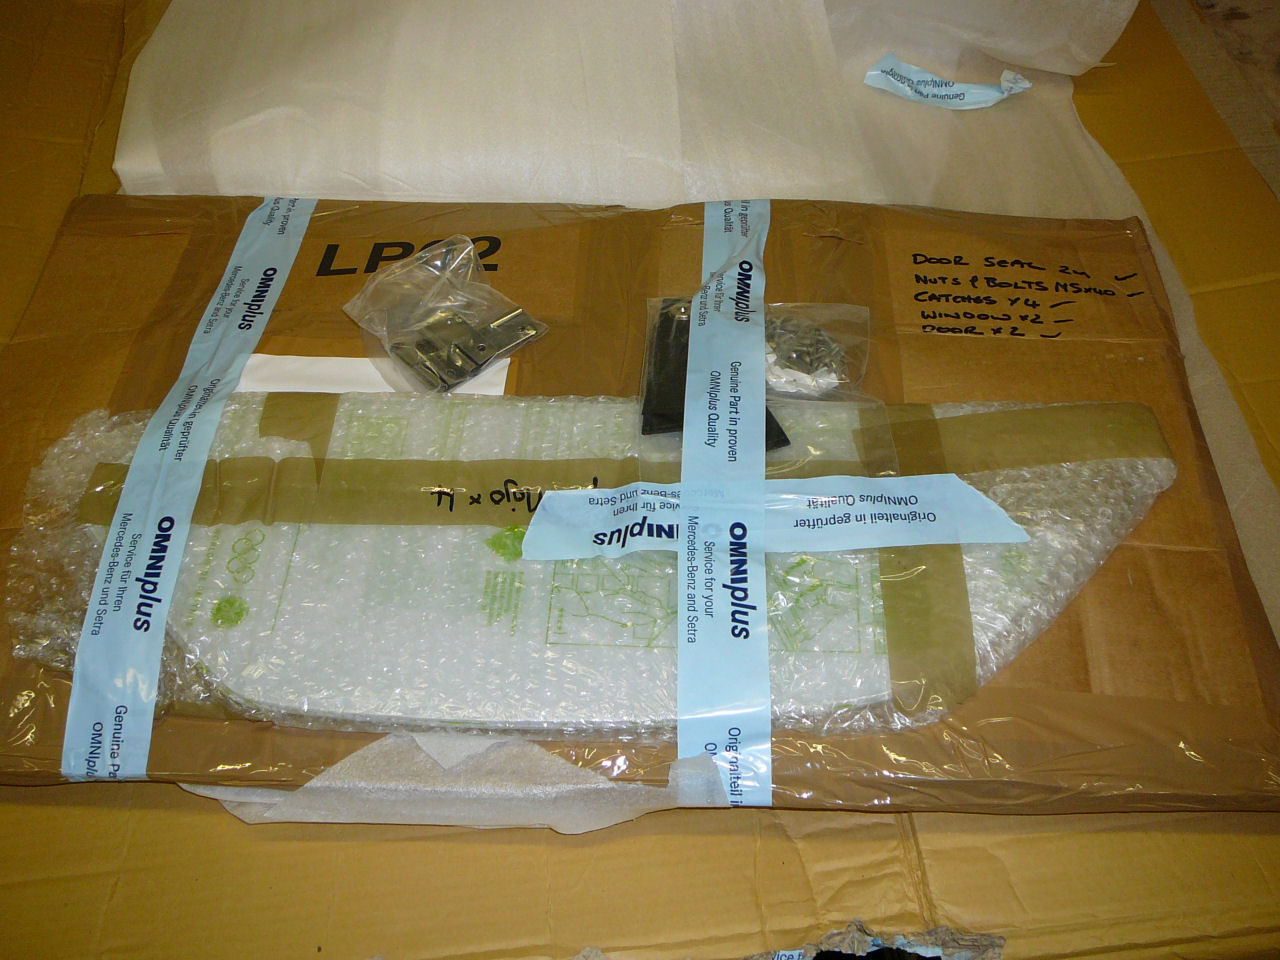
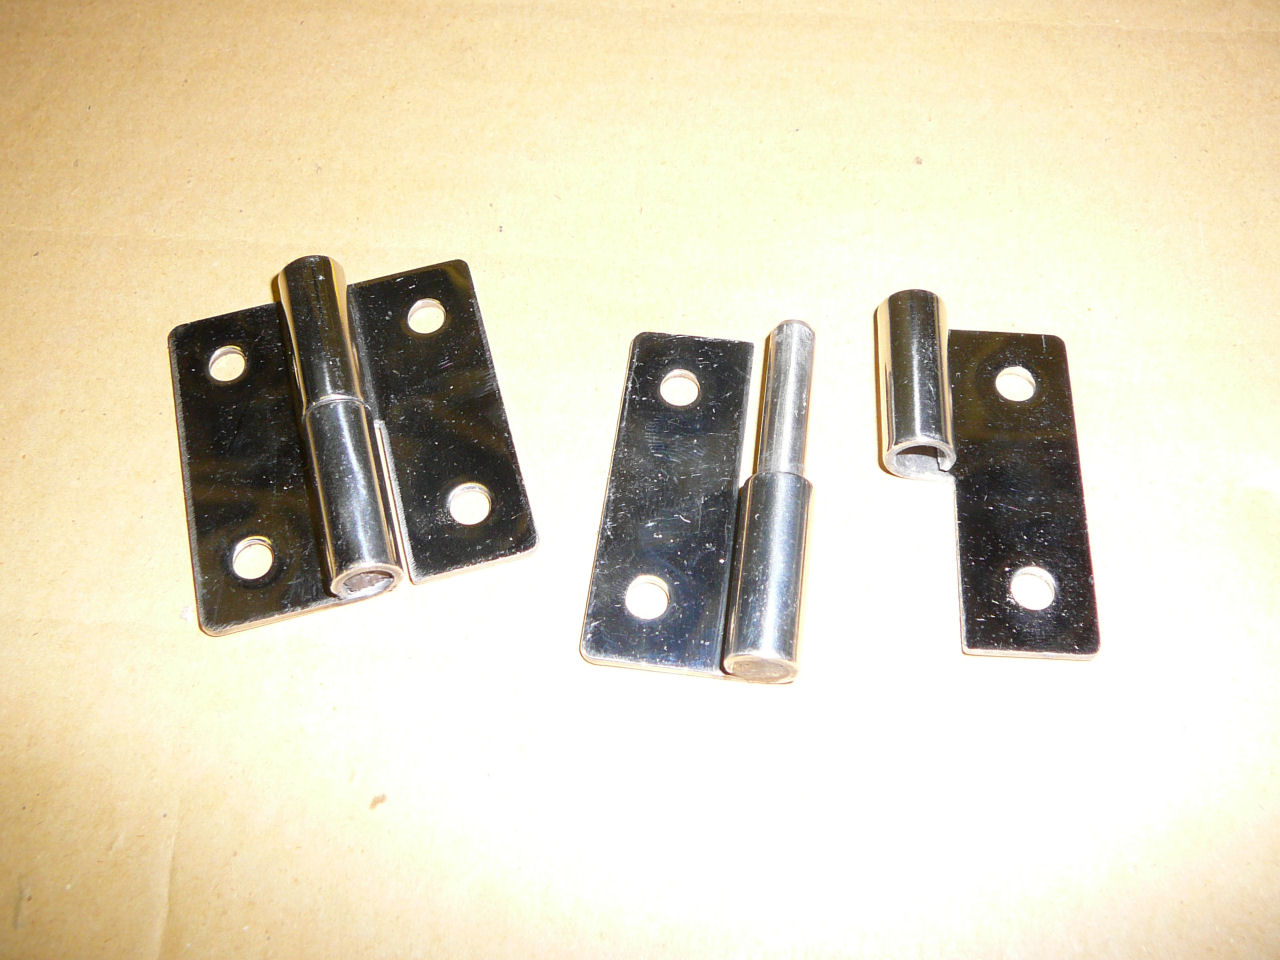
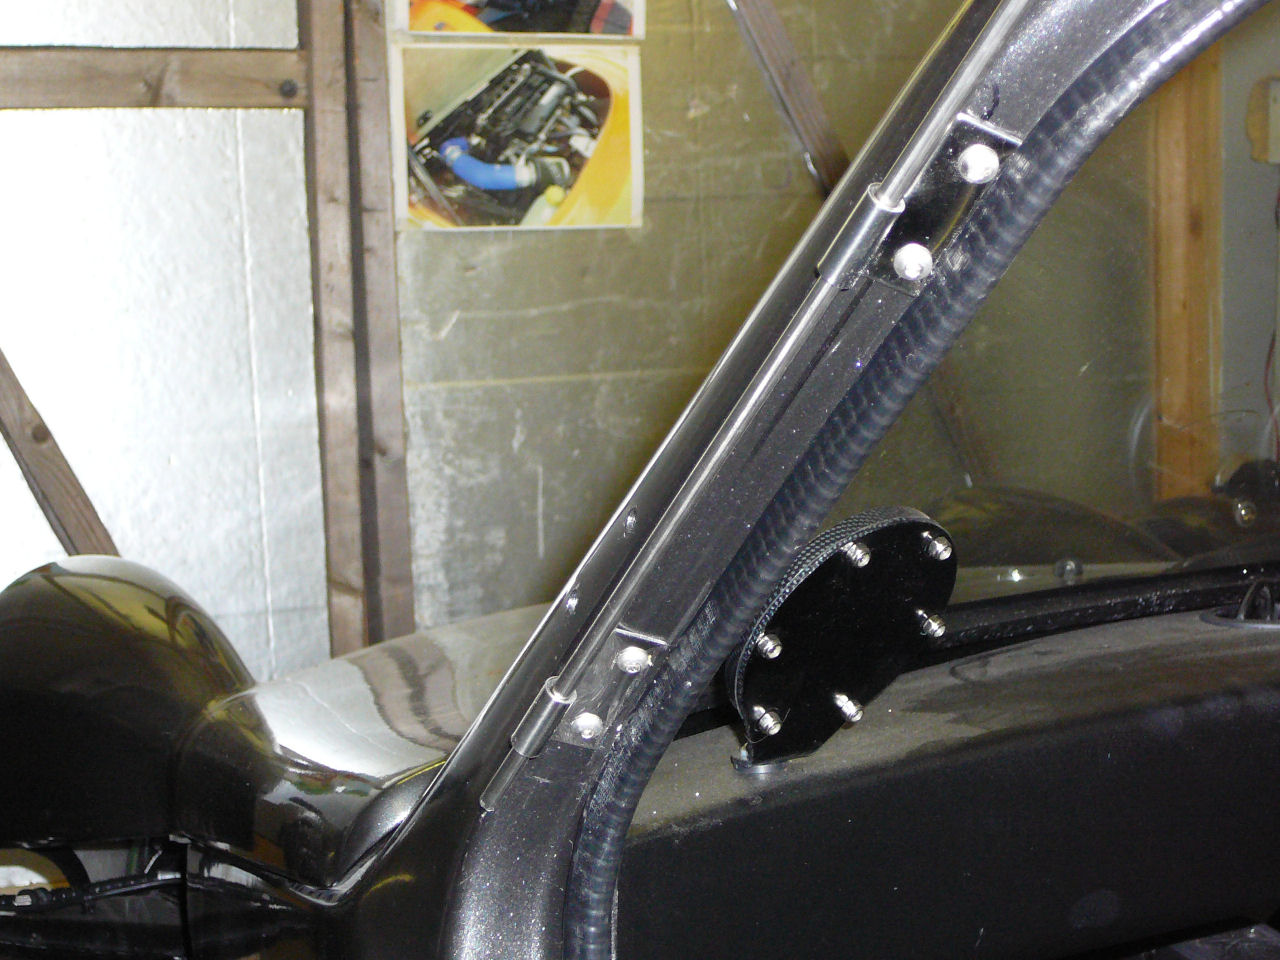
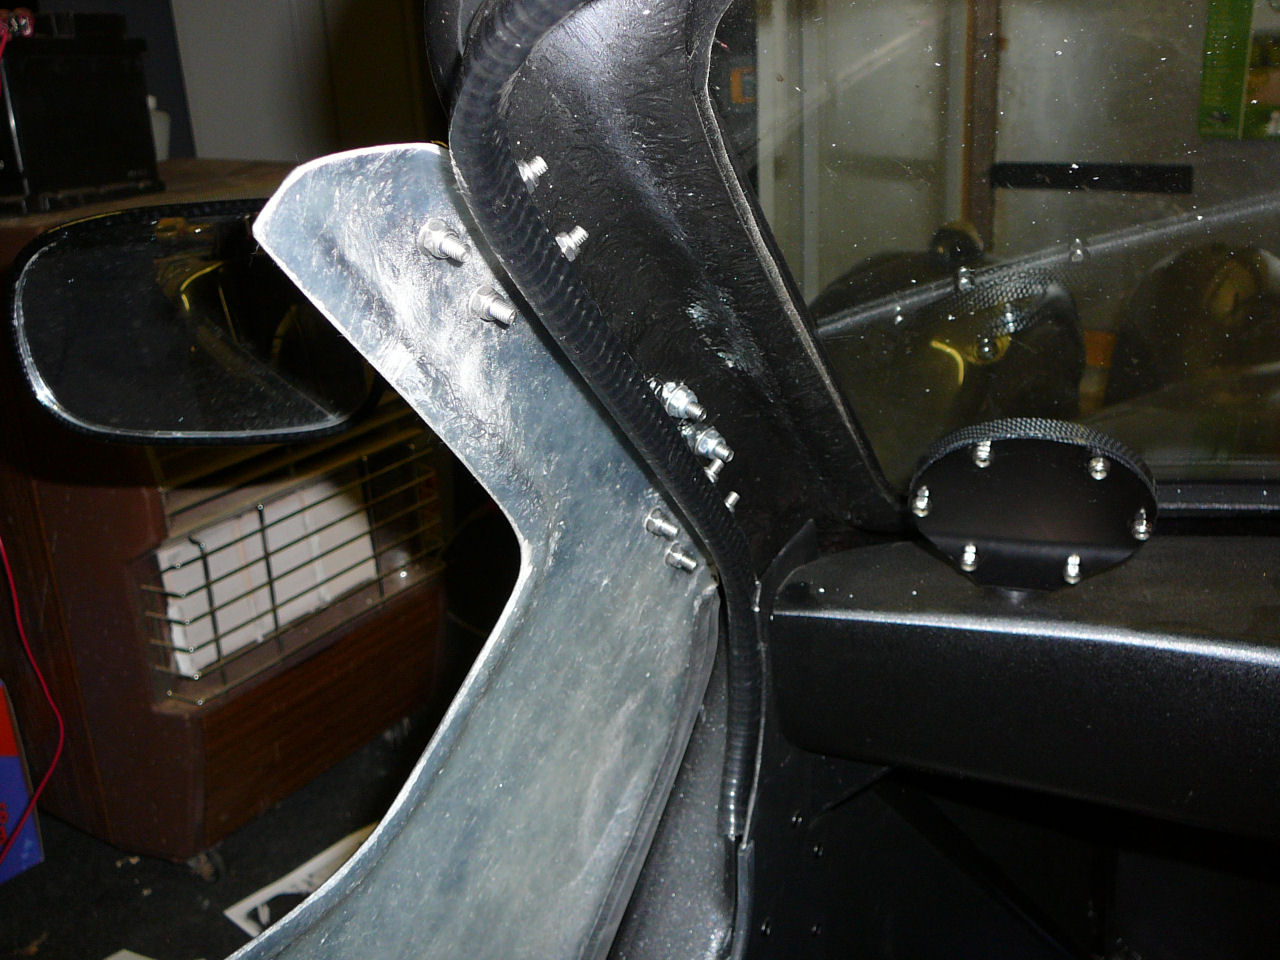
So after carefully unpacking everything I set about getting them fitted. One of the first jobs was to get the first part of the hinge fitted to the windscreen uprights so I had a reference point to work from for fitting. I've used the part of the hinge with the hollow tube as the part to fit to the windscreen upright as I think this looks a bit better if the doors are ever removed. This made lining them up fairly easy because I could just feed a length of rod through the tubes to ensure the hinges were lined up with each other. They were then clamped in place and the holes were drilled.
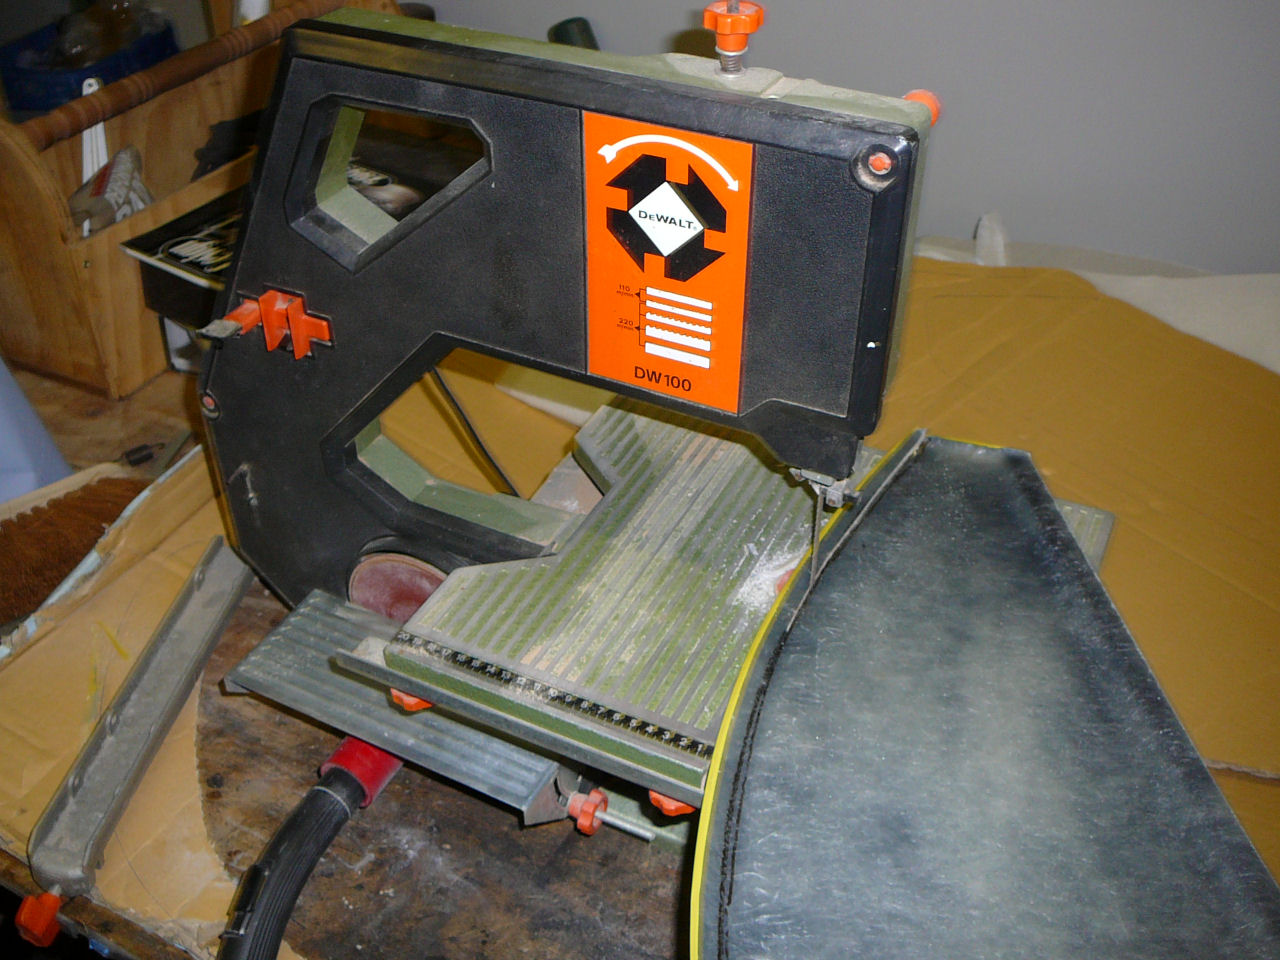
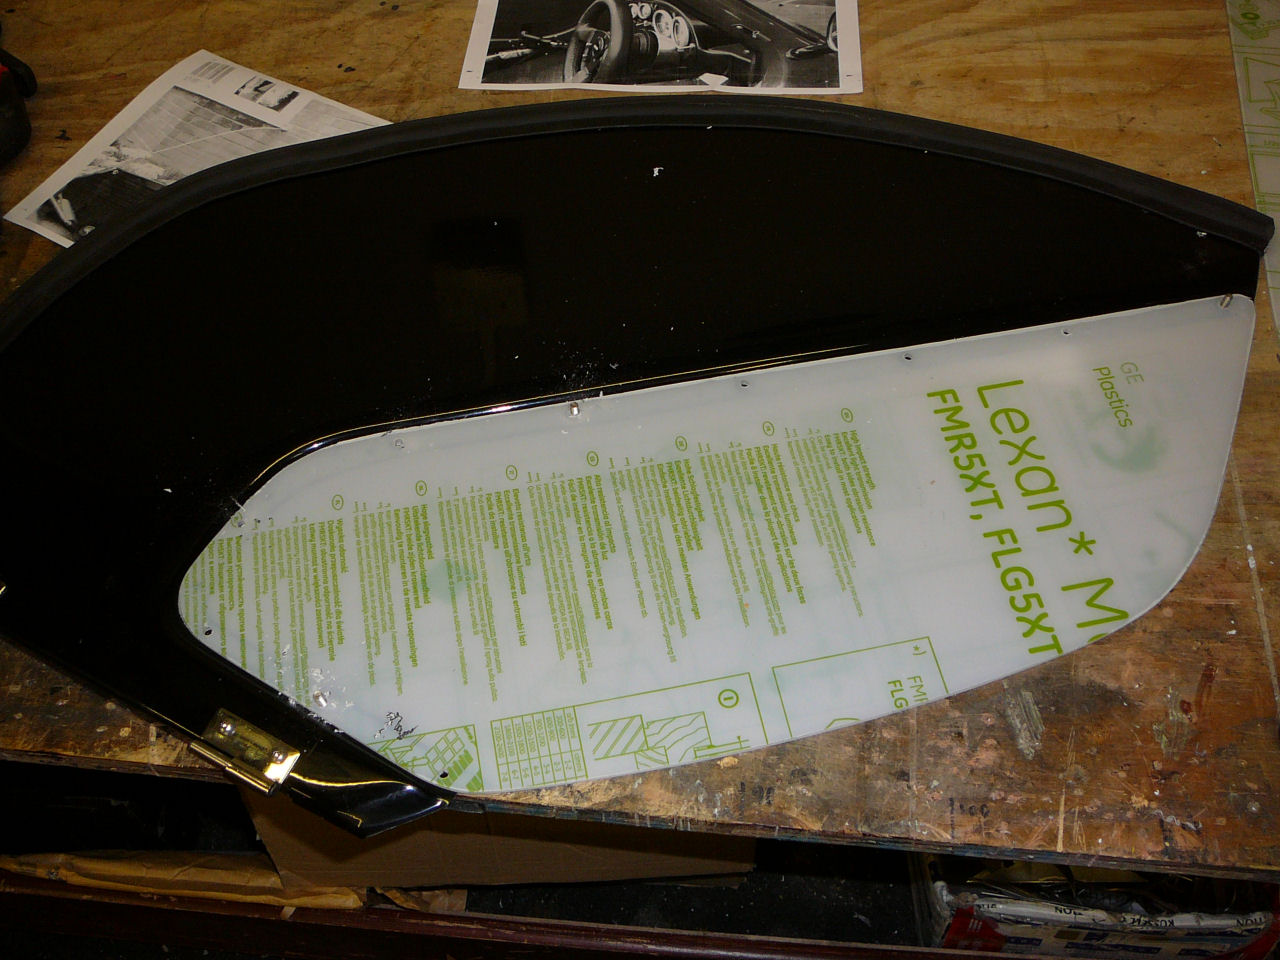
The next job was to start trimming the fibreglass part of the doors so that they fit correctly to the bodywork. The ideal way would be to make a template from card and transfer this to the door to be cut, but I just drew a line with a permanent marker and went mad with a bandsaw...
I also had to make some cutouts to accomodate the body of the hinges...
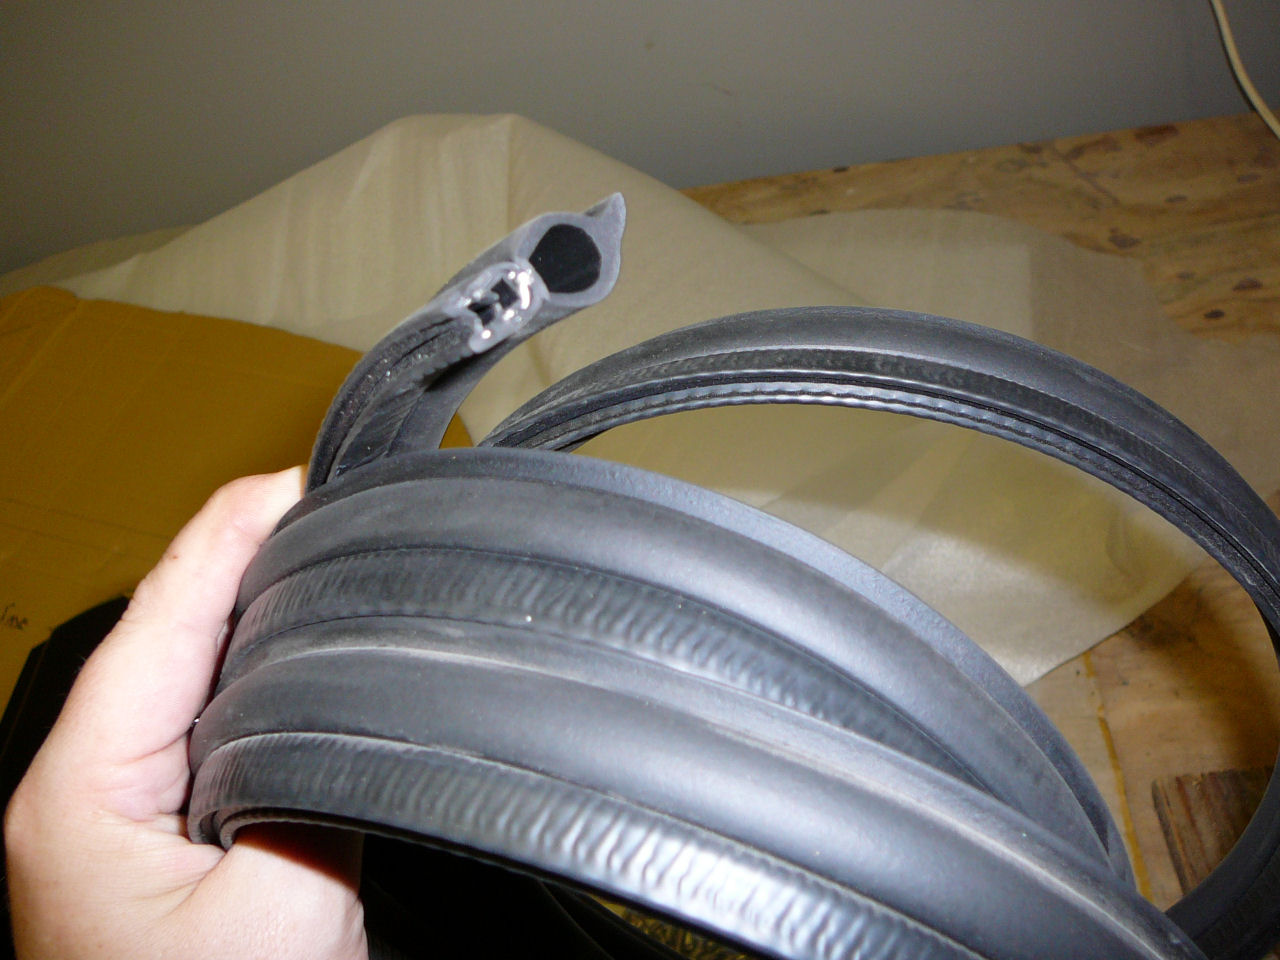
And then I could test fit them. I had to fit the rubber beading to make this part possible and screw the hinges on properly.
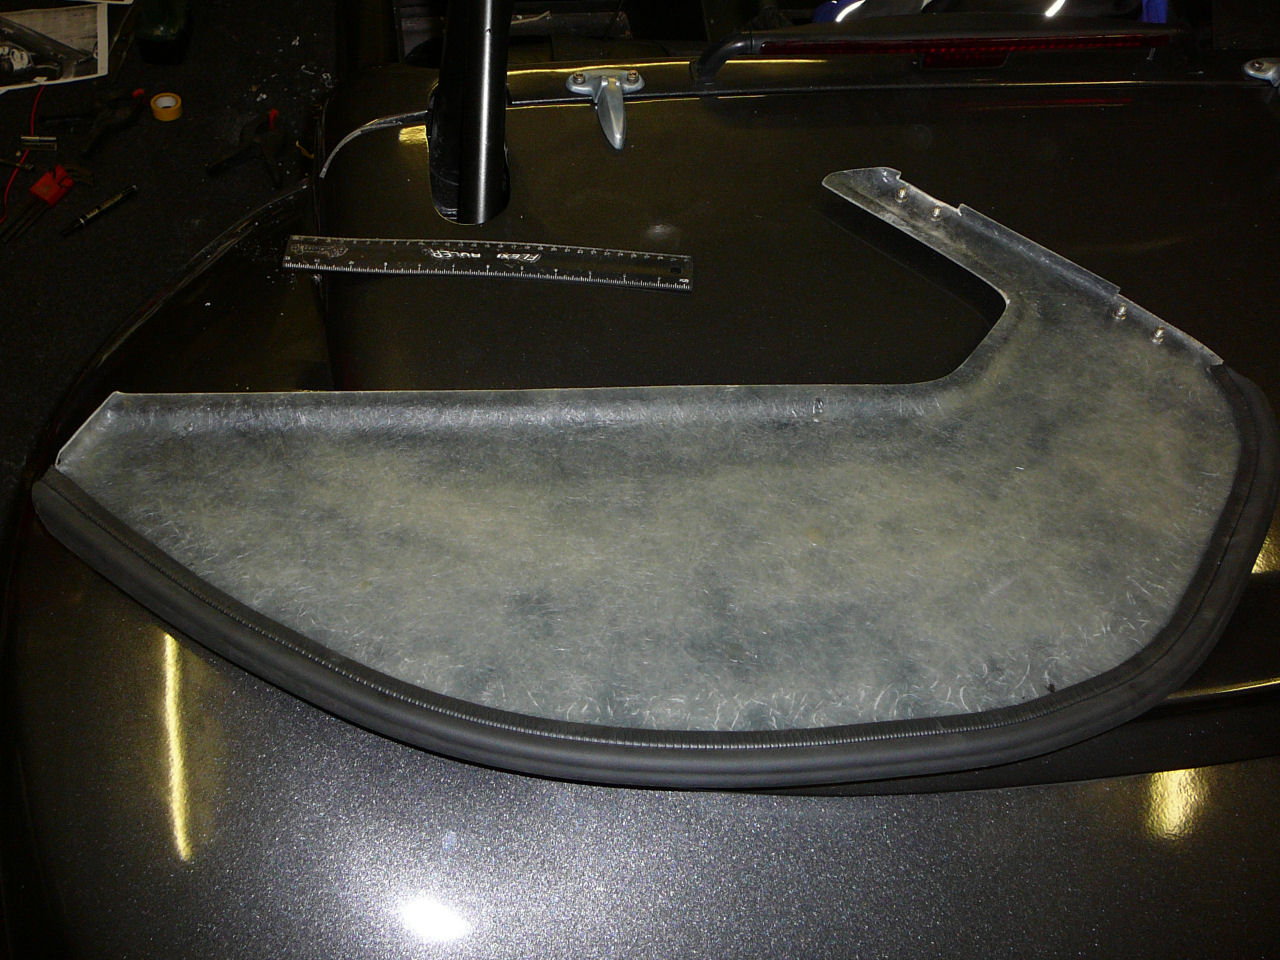

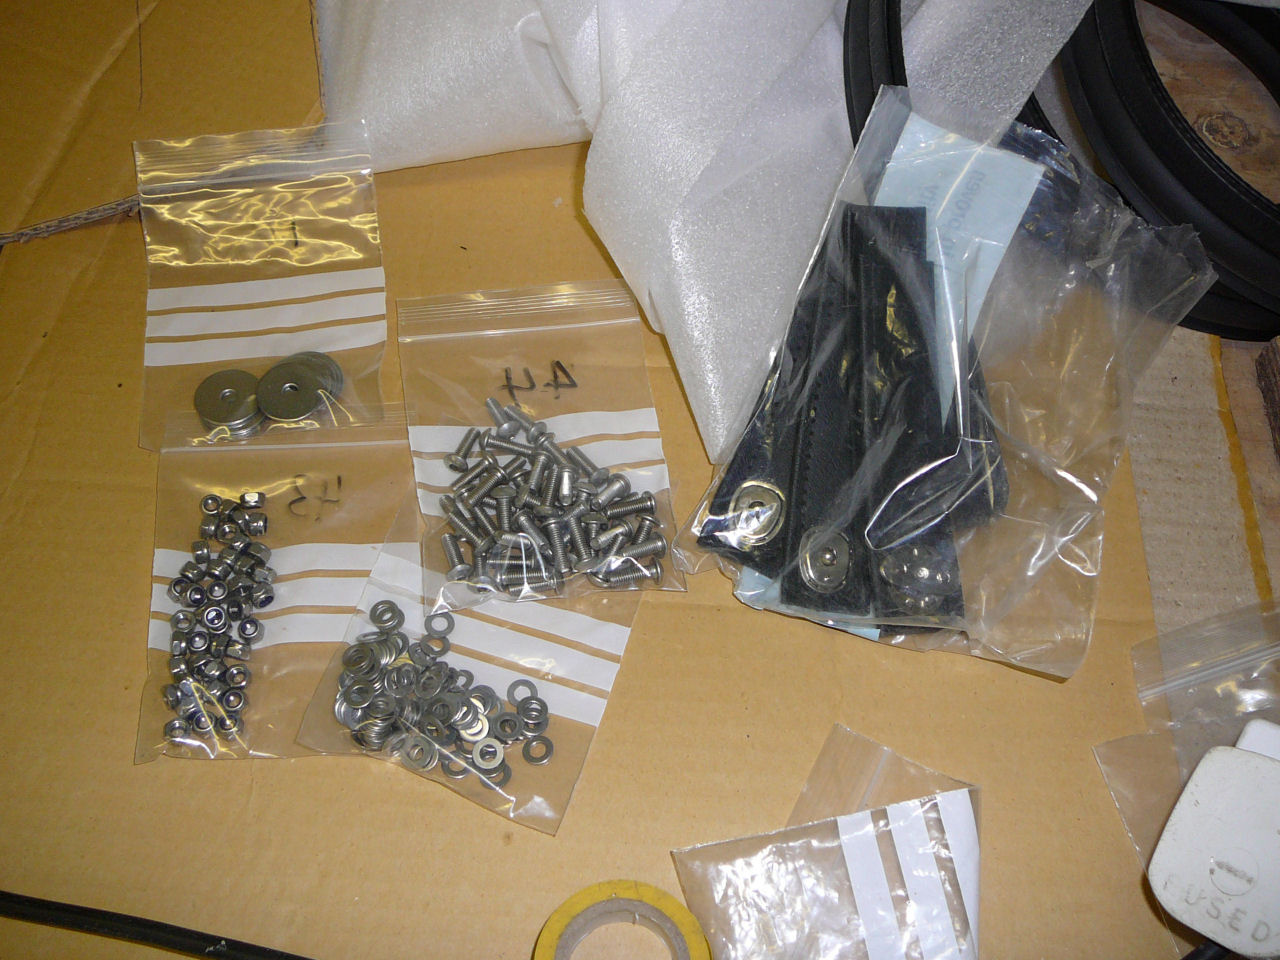
Well that seemed to go really easily! Next step is to fit the Lexan panels. This means lining everything up and drilling a bunch of holes very carefully as they are perilously close to the edge of the Lexan.
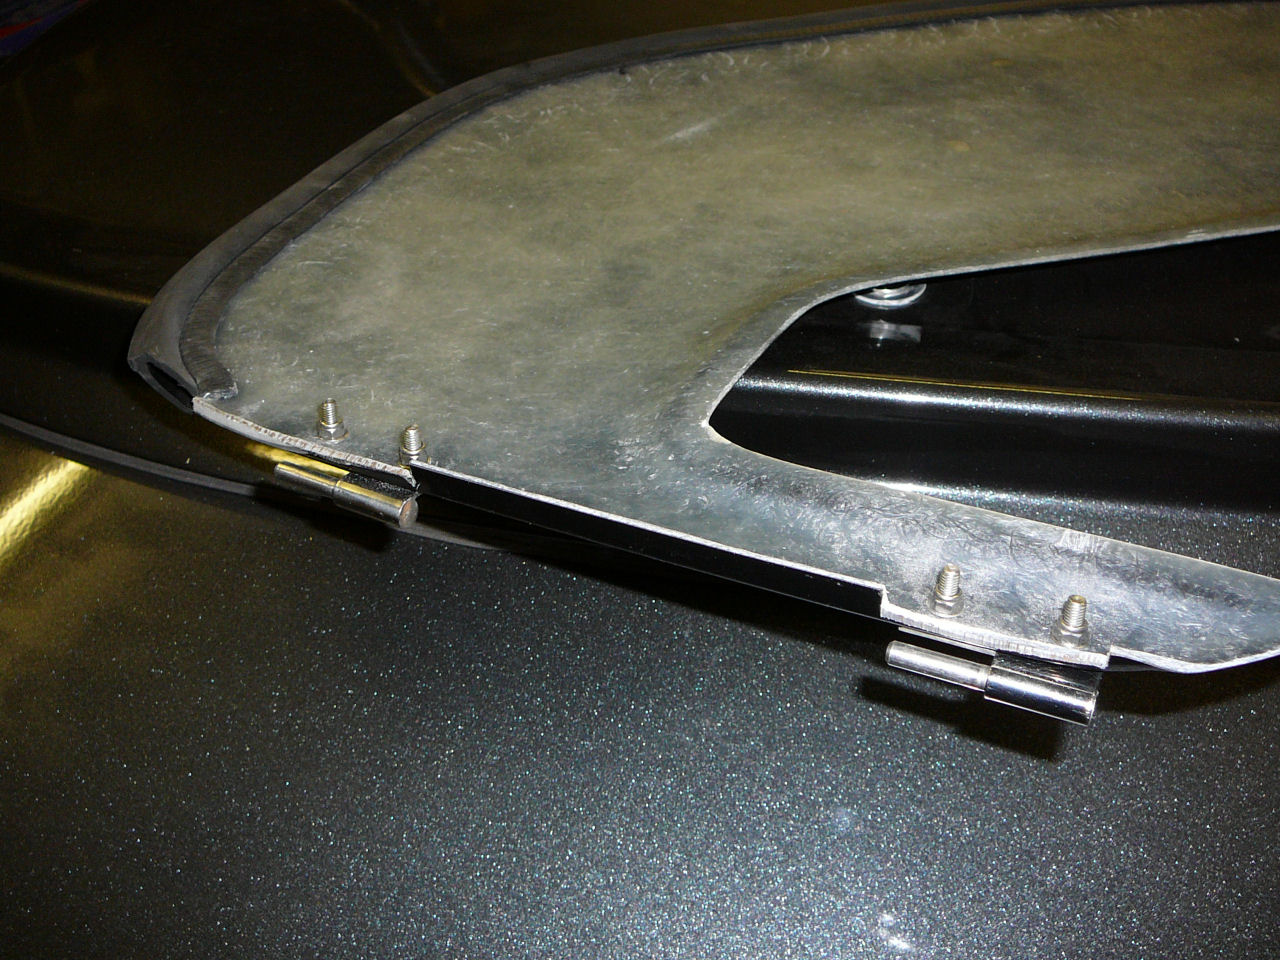
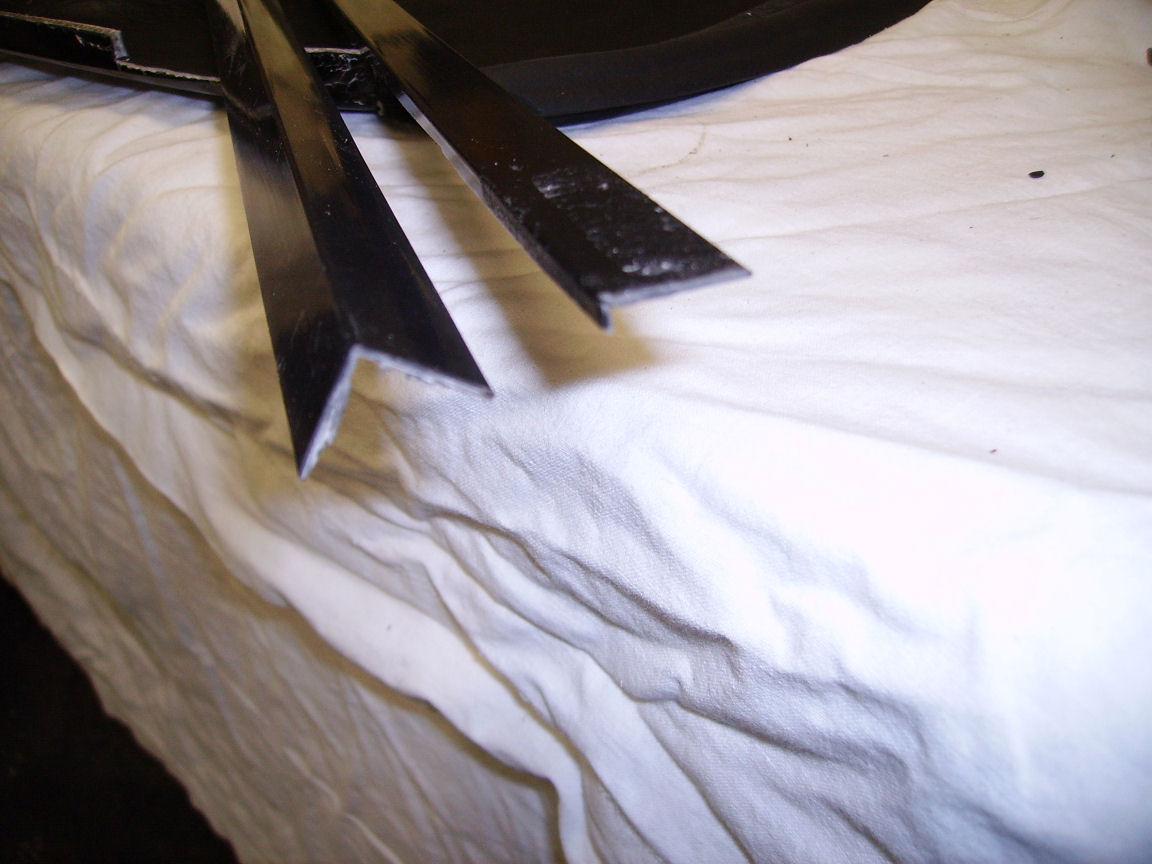
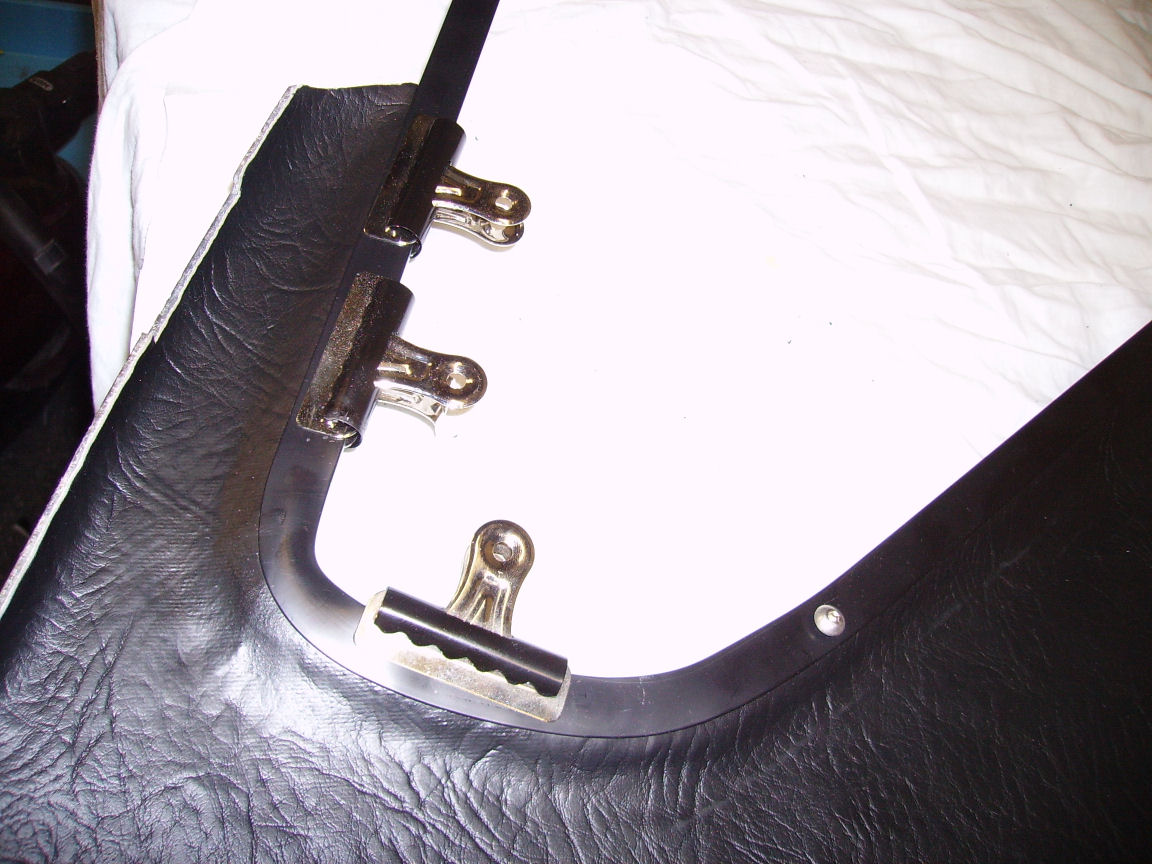
I took a leaf out of Neil Everett's book and decided to cover the inside of the doors with vinyl to make them look a bit neater and to prevent the fibreglass from making me itch. So, the Lexan, beading and hinges were removed and copious quantities of spray contact adhesive were used to stick the vinyl on. The beading holds the bottom edge of the vinyl on but I needed to work out a way of finishing the top edge. Again, Neil's website gave the answer - PVC angle from B&Q. This needed to be trimmed so that one side of the angle was about 2mm long and I managed to do this really easily with just a pair of scissors. The tricky bit comes when you need to bend the angle around the rather tight curves of the door. To do this, I secured one end of the angle with a bolt and then used a hot air gun to heat the plastic until it was soft. With a few burnt fingers the plastic was formed to follow the edge correctly and I found that bulldog clips were perfect to keep it in place as it cooled.

The holes were all the redrilled through the angle and the Lexan was refitted.
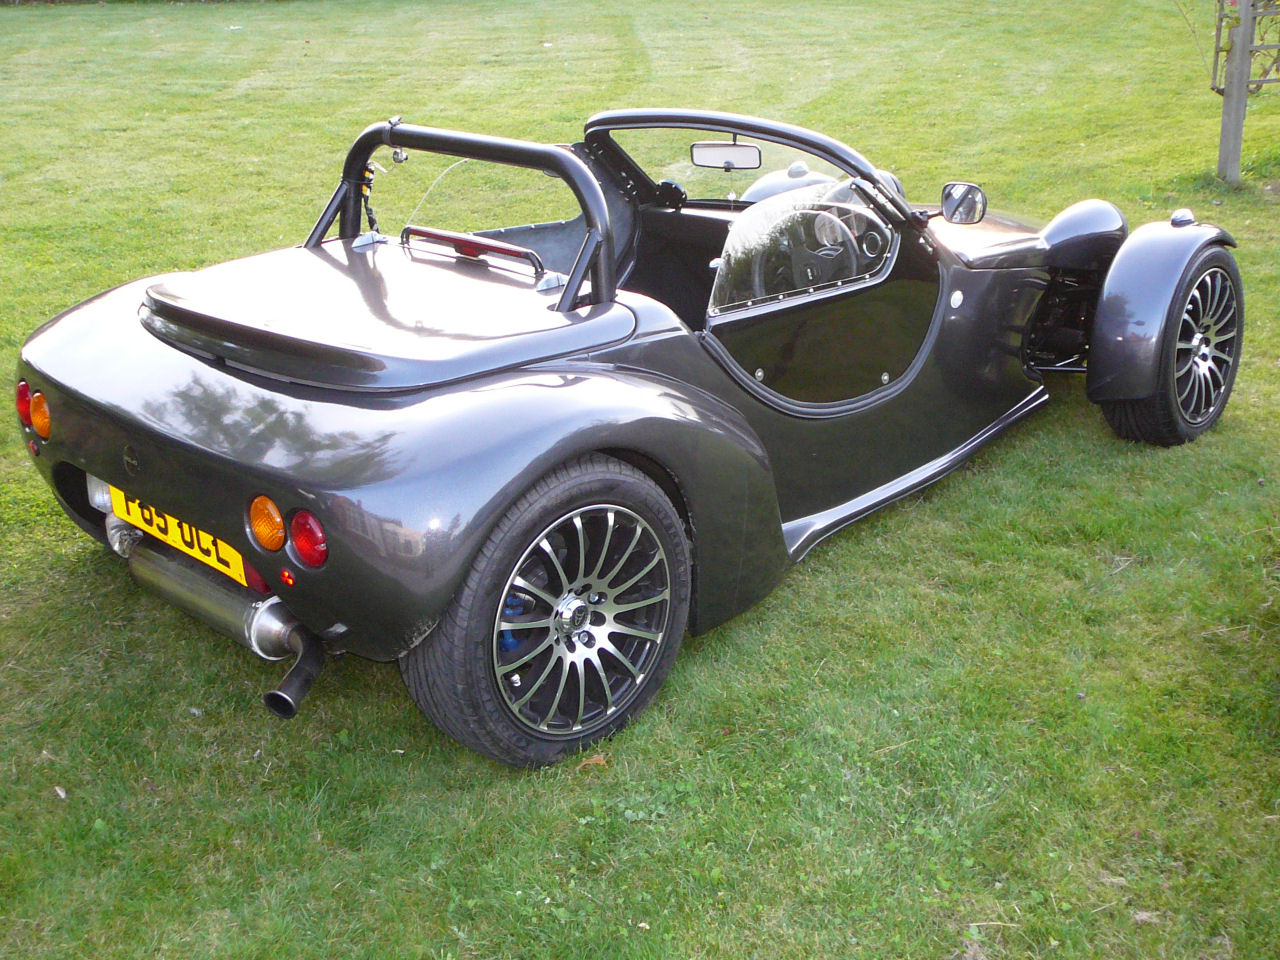
I'm dead chuffed with the end result and I'm pleased I decided to go for the option of having doors fitted. Buffeting in the car is now almost non-existent and I don't need to worry so much about stones being kicked up by the front wheels.
Here are the shots of the finished items.
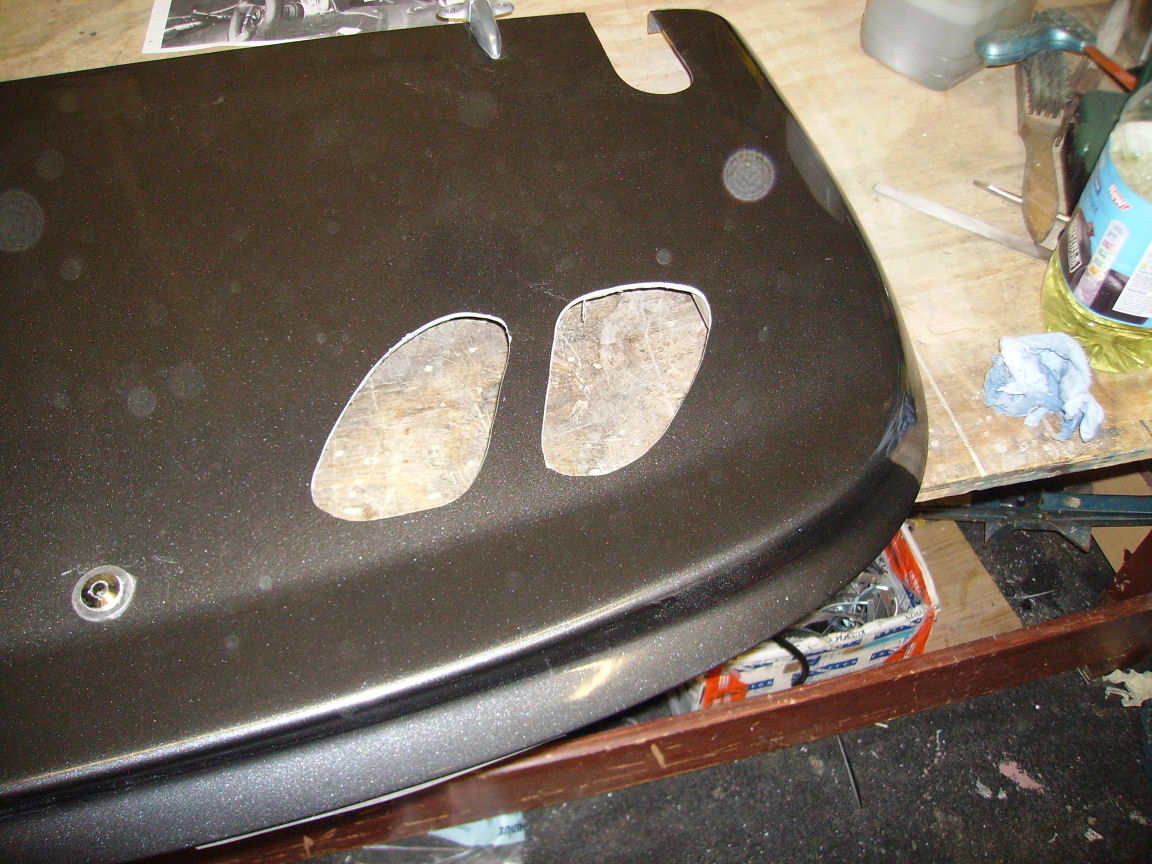
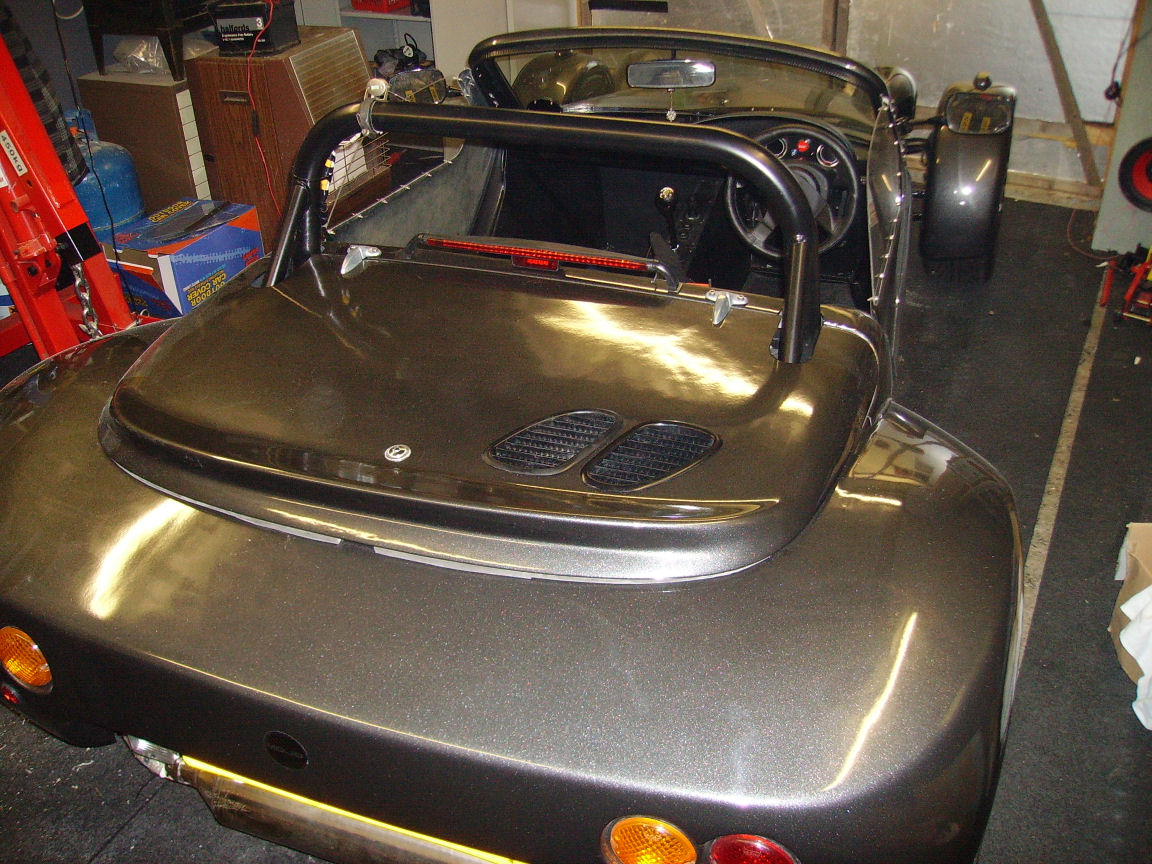
Now that they were fitted, attention turned to other items. One thing I've noticed is that the engine cover gets red hot after a run. In fact, so hot that it's uncomfortable to touch and I've noticed the fibreglass is starting to sag in places. Something had to be done, and that something was to fit some vents to let the hot air out.
After much Googling of other cars, I spotted a rather nice pair of bonnet vents at the local Diss club meet so I asked the chap which vehicle they were sourced from. The answer was a Mini Metro (or Rover 100) and a quick search of eBay got me a pair for £10.
Once they arrived I started working out where to fit them taking into account where the heat was coming from (exhaust and block), where I could fit them to avoid the aluminium reinforcement struts I'd put in, and where to put them to avoid any rain dripping onto sensitive parts. In the end I came up with this layout:
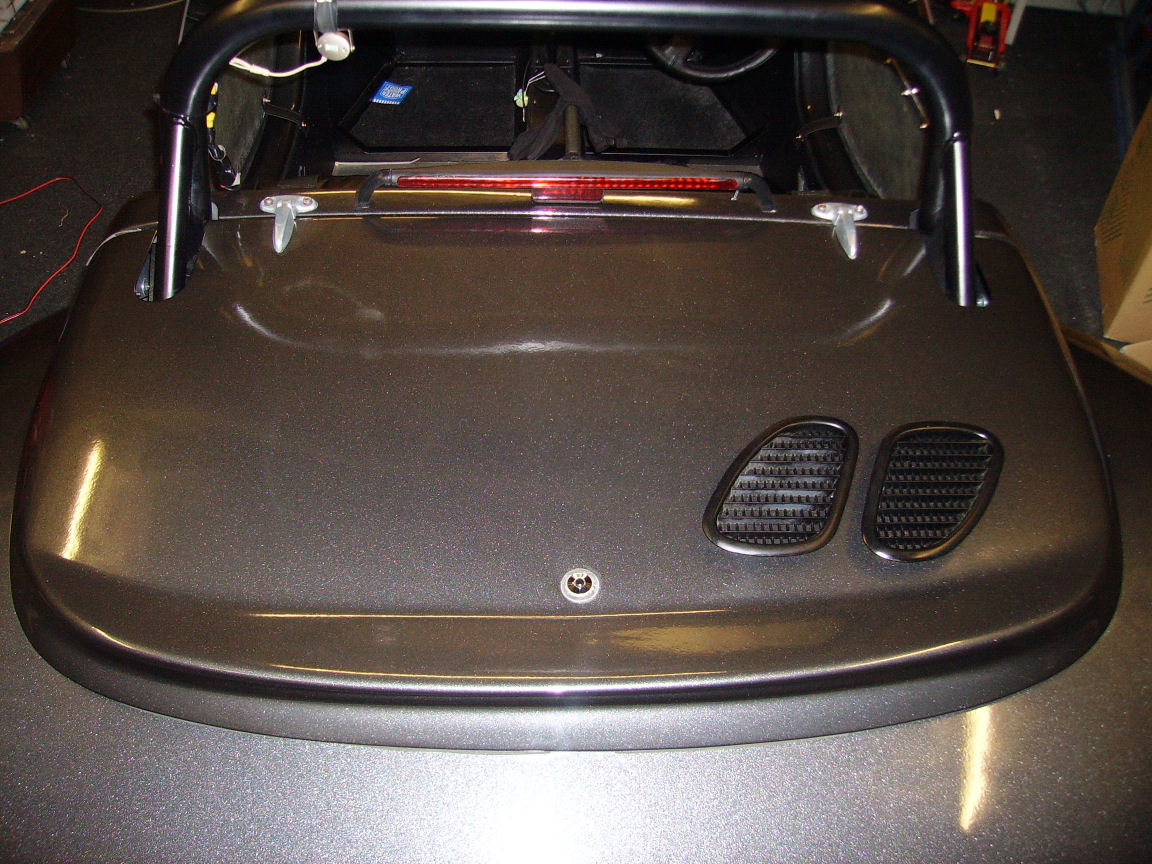
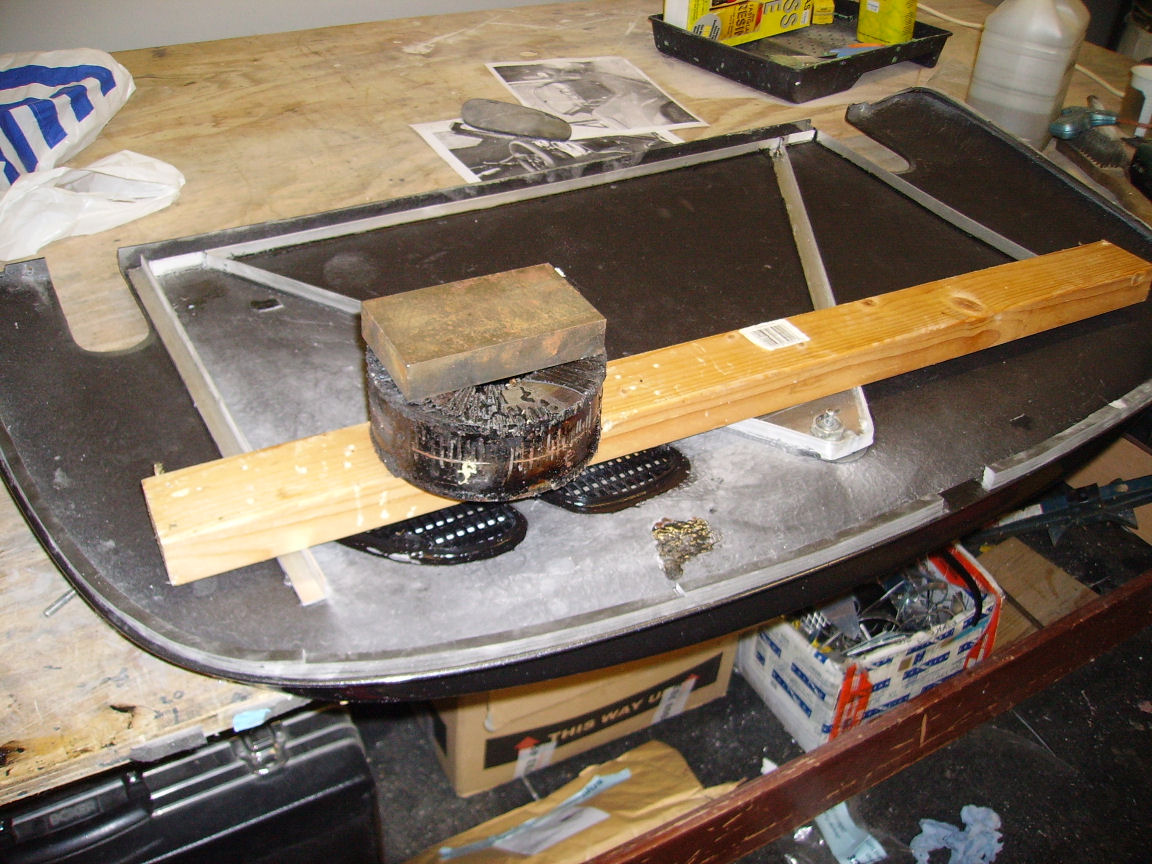
I then marked out the engine cover and took the plunge. I chain drilled the cutouts and smoothed the edges with a flap wheel sander.
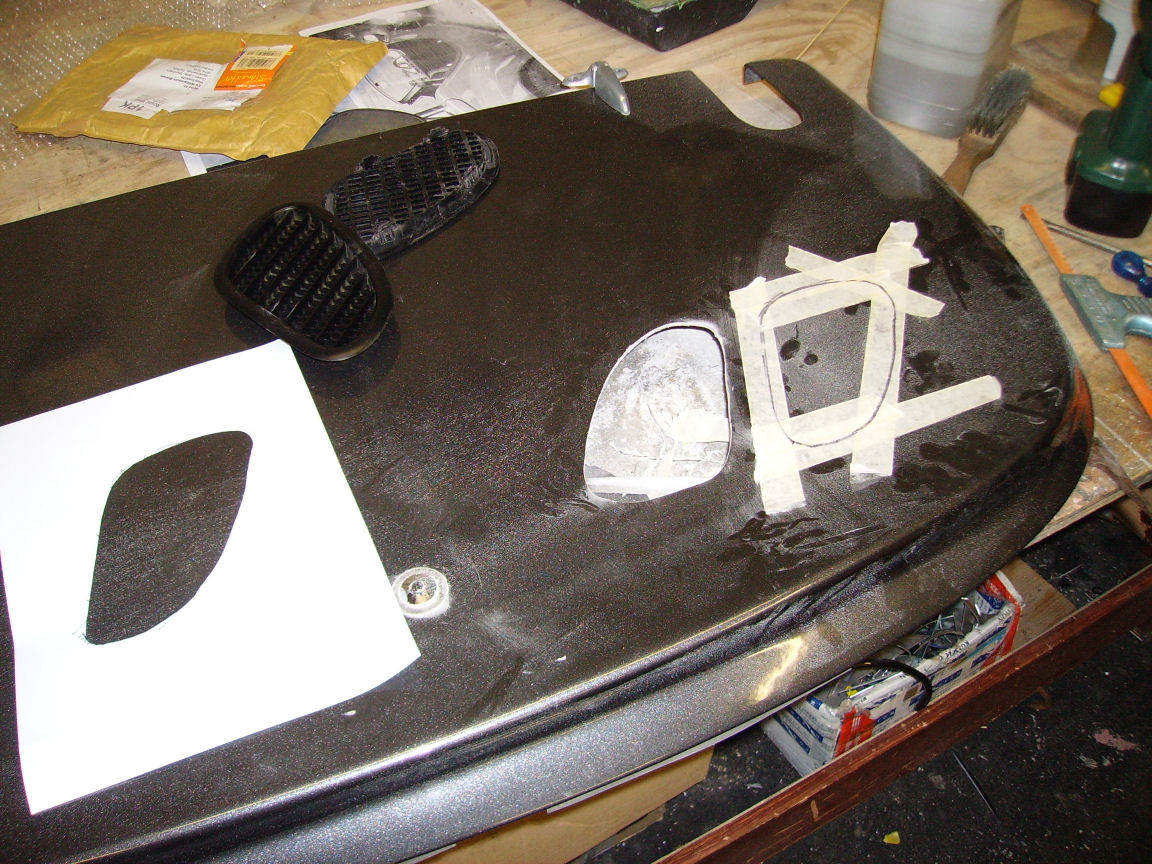
I'd forgotten the smell of GRP... and the amount of mess it makes! Once everything was a bit tidier I bonded the vents into place with some Tigerseal and put some weights on them to keep them in place overnight. The result doesn't look out of place in my opinion and it makes a massive difference to the temperatures in the engine bay. Now the hot air has got somewhere to escape nice and easily, so I'm getting average running temperatures of 88°C with some spirited driving and fairly warm weather (25°-30°C).
And that's not the end of it!
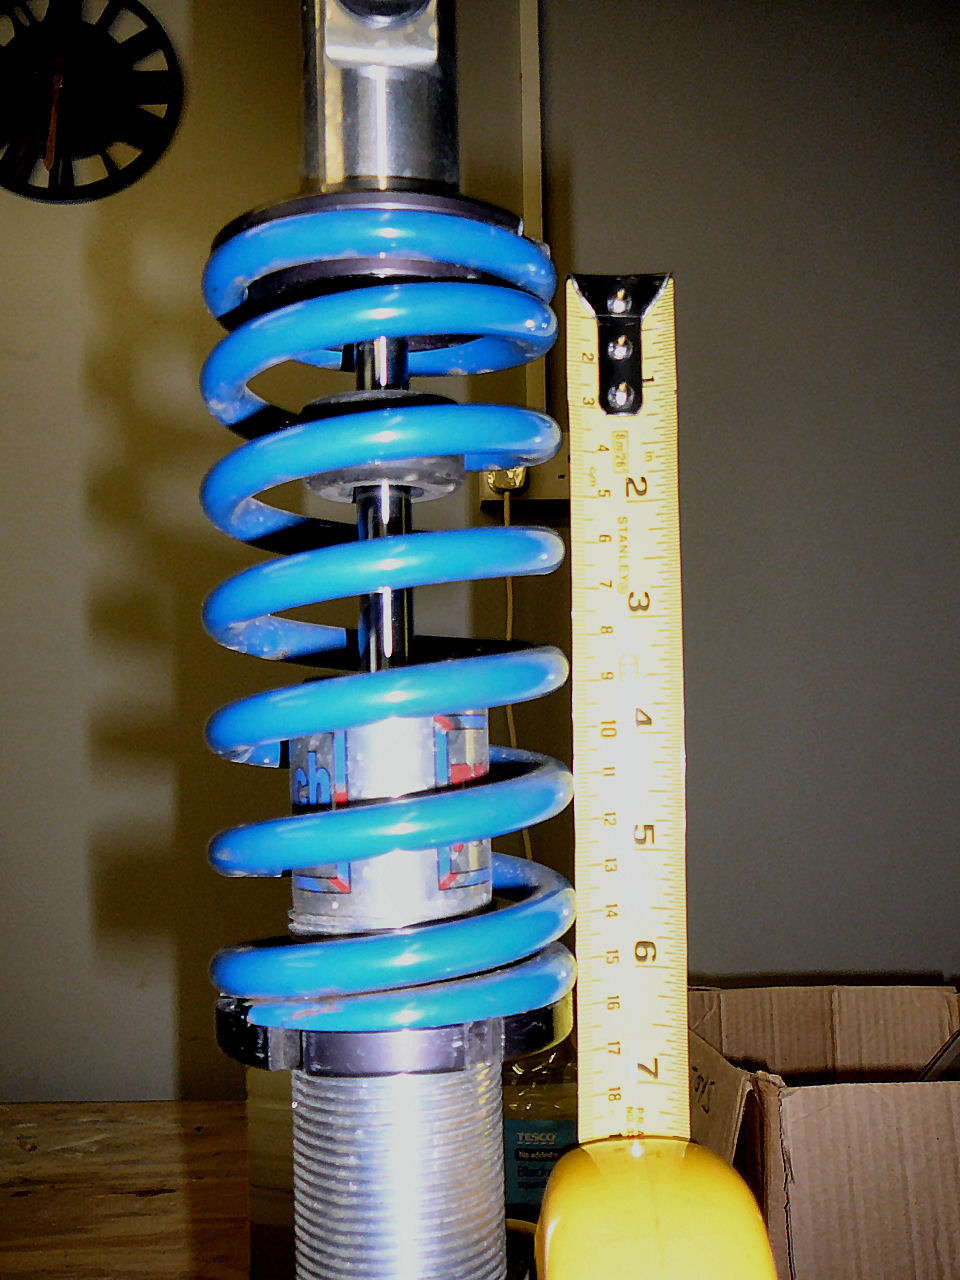
I also went to work on the suspension. For some time now I've been aware that the car was sitting a bit too low since I was noticing a lack or rebound travel when going over potholes and the rear driveshafts were not sitting parallel to the ground (the hubs were higher than the diff). In fact, since building the car a few things have settled into place which has resulted in a rear ride height of 95mm! The front was only around 80mm too...

I've got 6.5" springs fitted to the rear shocks and they're wound all the way up so there's no more adjustment available there. I tried some longer springs but these made no difference and gave even less rebound travel! One quick phone call to ProTech later and the answer was found - I needed top hat extensions. Next day, a parcel arrived...
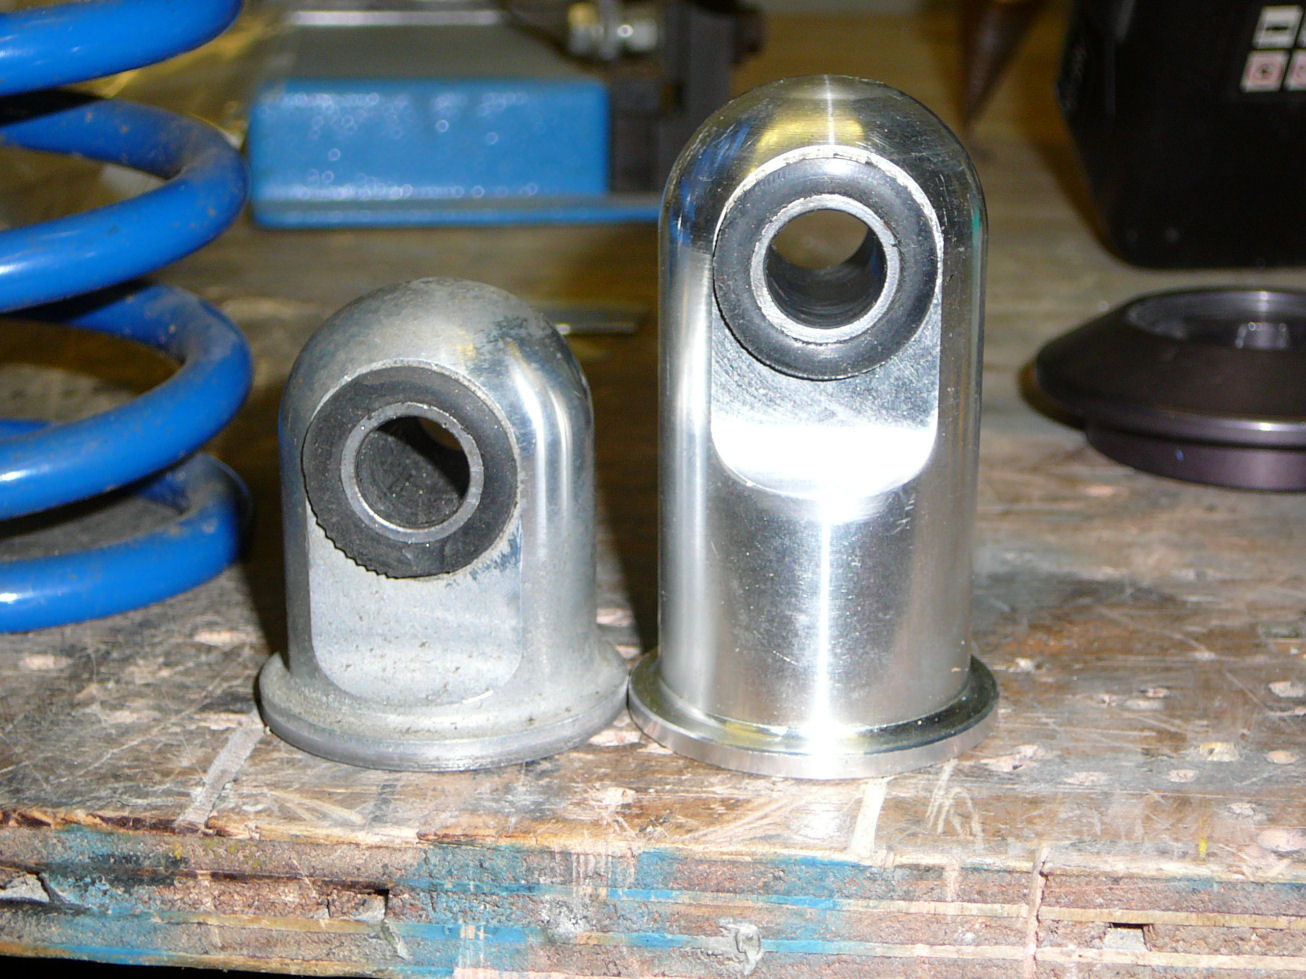
It was a simple matter to pull the rear shocks out and replace the tops which give an extra 25mm height. While I was at it, I also wound another 10mm preload onto the spring before fitting them back in place. I now have rear ride height of 120mm which is much better and the driveshafts are now nice and level.
![]()
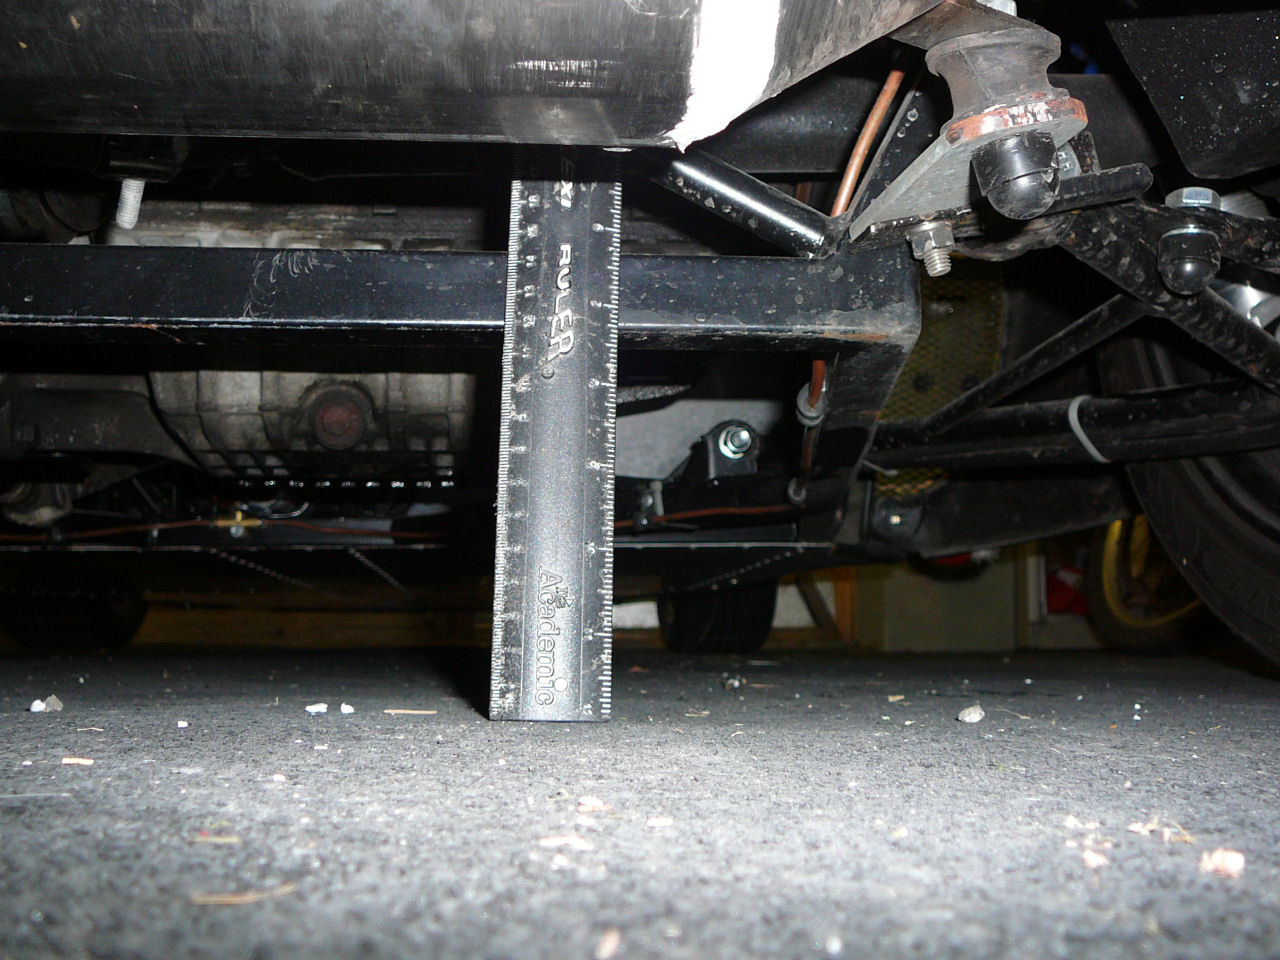
The result is that I've now got about 2" of rebound on the rears which is much more than I had before and hopefully this will help the Mojo ride the rough roads of Suffolk with a little more decorum! I also raised the front to give a clearance of about 95 - 100mm,
Since driving with the new setup I am very please with the way the car handles. There's no need to keep dodging manhole covers as we now just hop over them with no drama. I have noticed that the back end feels a bit bouncier so I'll stiffen the rear shocks by a couple of clicks and try again. At the moment, the shocks are set to one step up from softest so there's plenty of leeway.
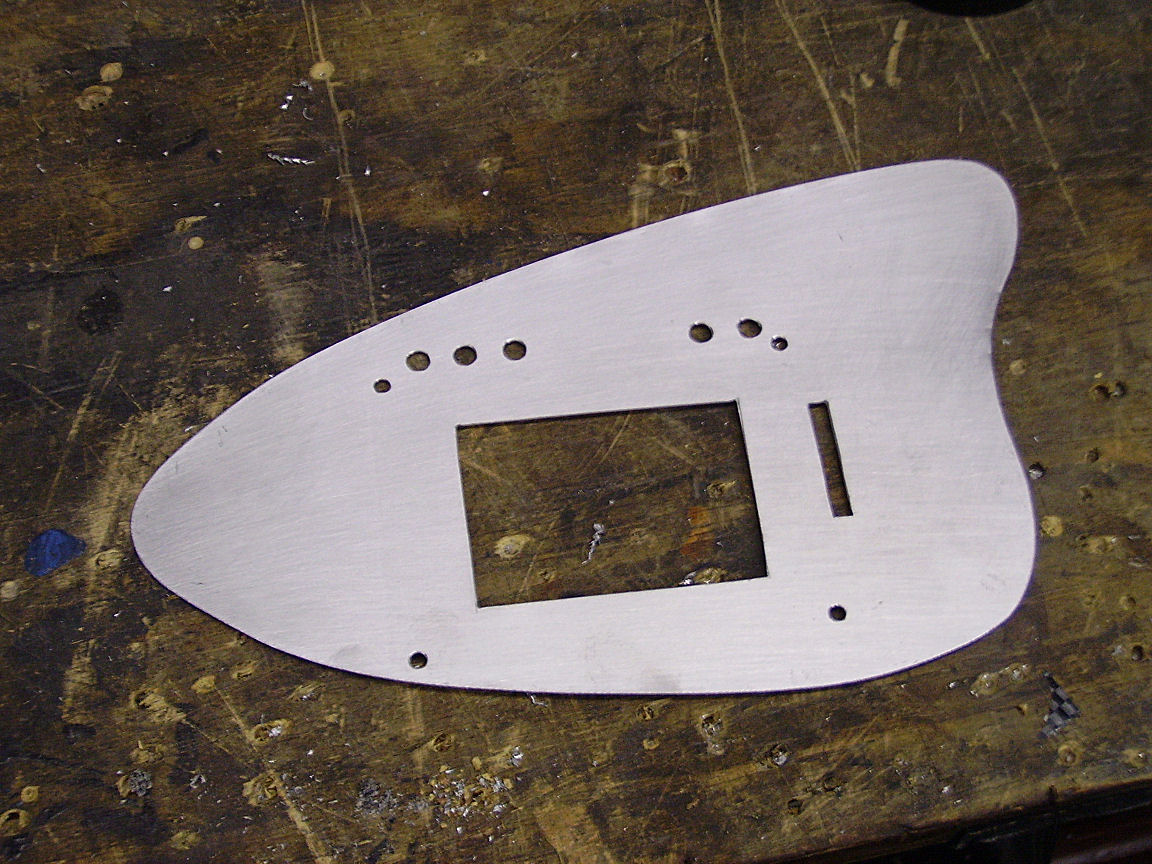
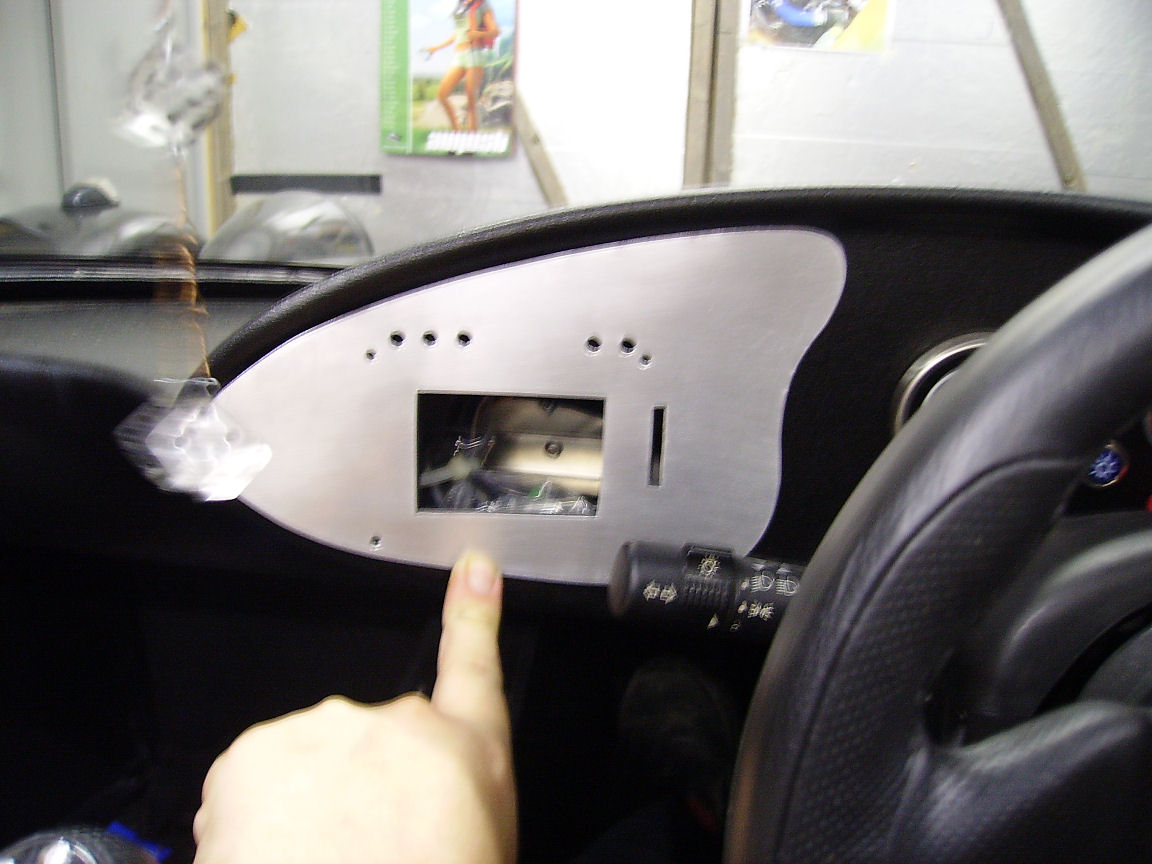
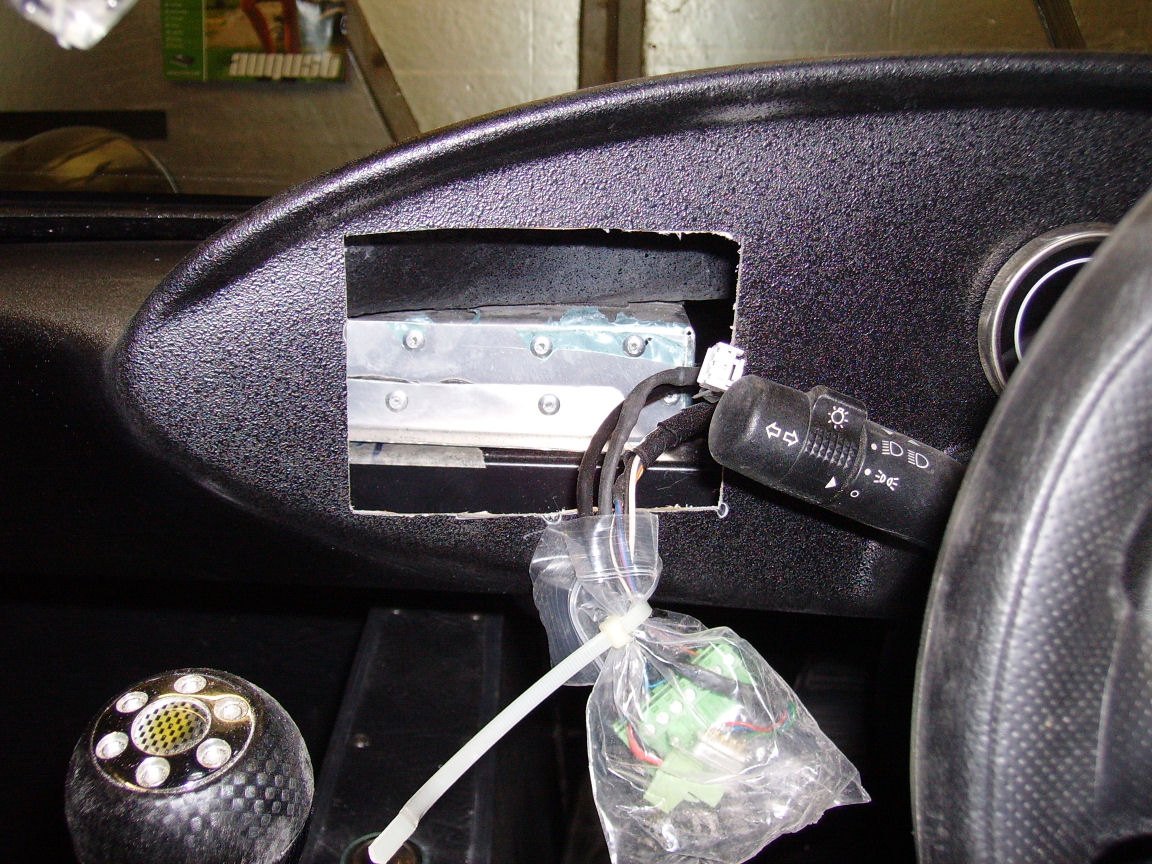
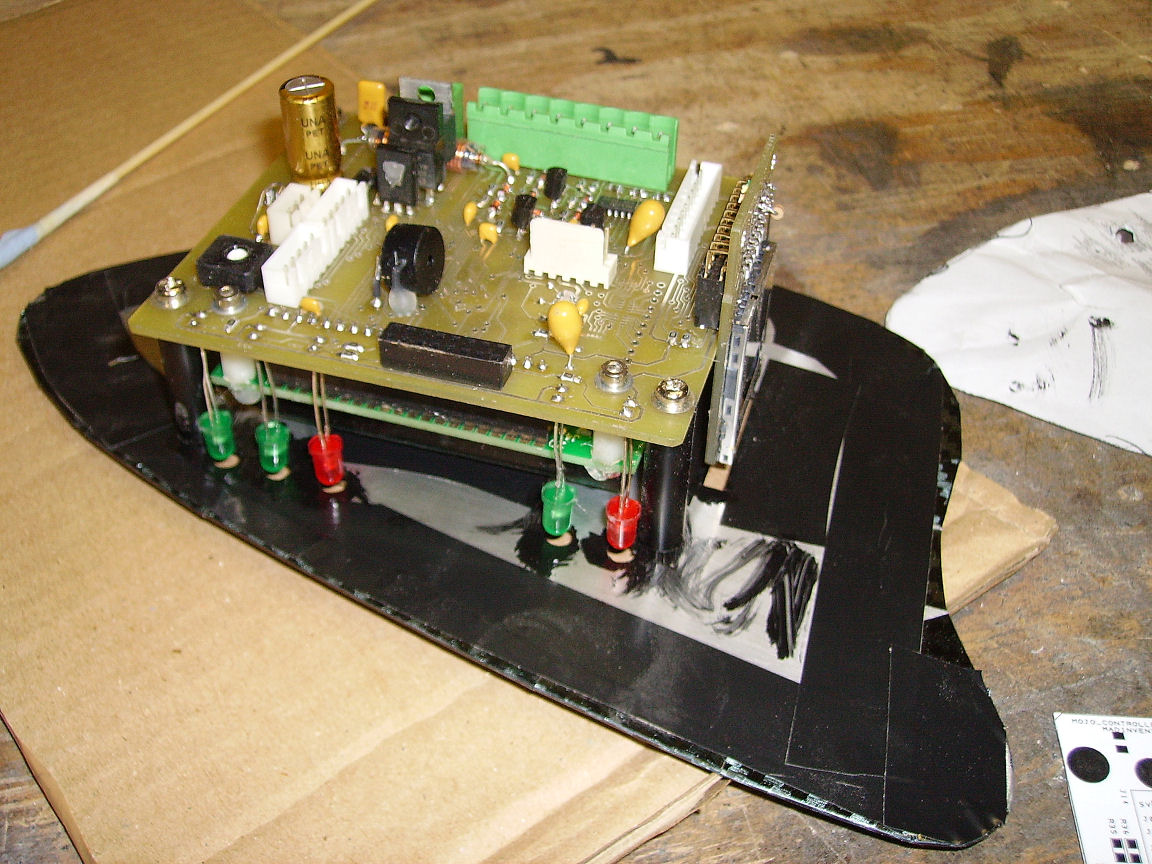
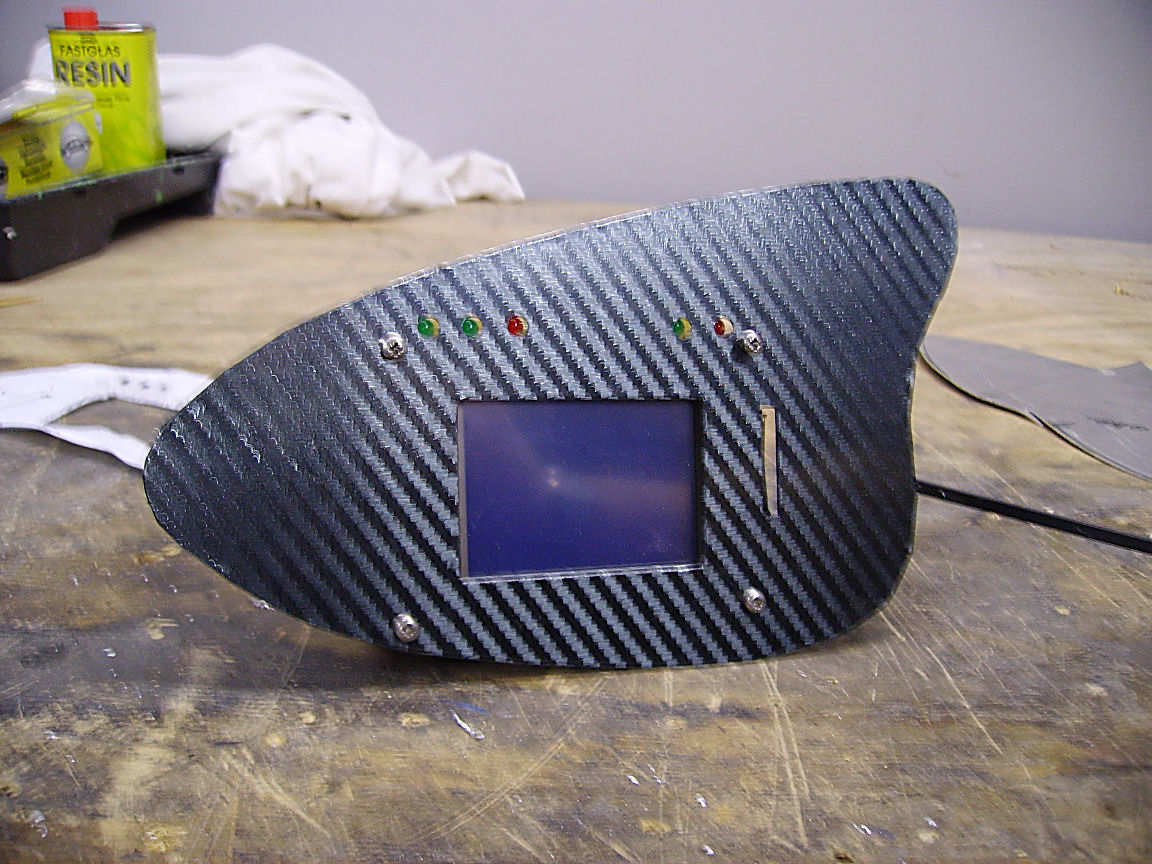
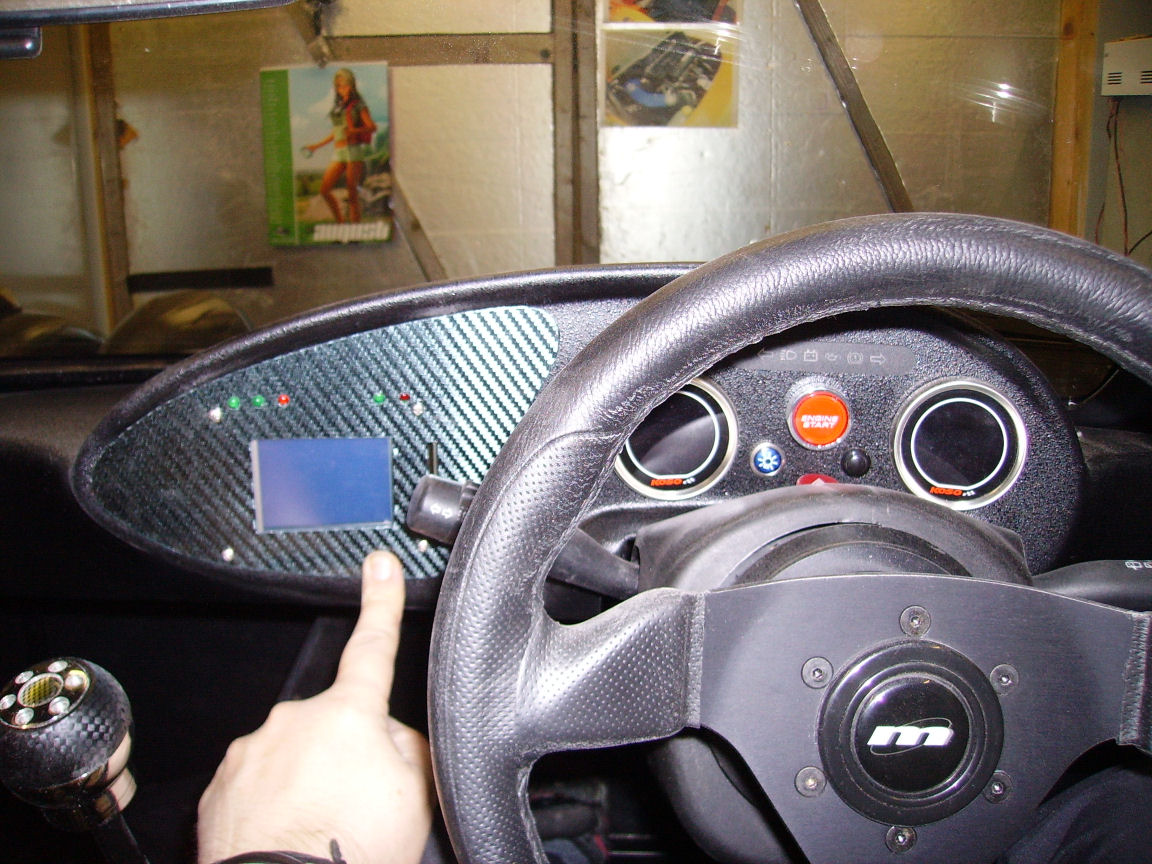
I've also been working on the dashboard and in particular the touchscreen controller. Originally, the controller was fitted from behind the dashboard which looked quite neat but was a real PITA to work on so I've since mounted it to an aluminium panel which is bolted onto the dashboard from the front which makes removal much easier for reprogramming. The aluminium plate was covered in a sheet of sticky backed fake carbon fibre so try and help it blend in a little.
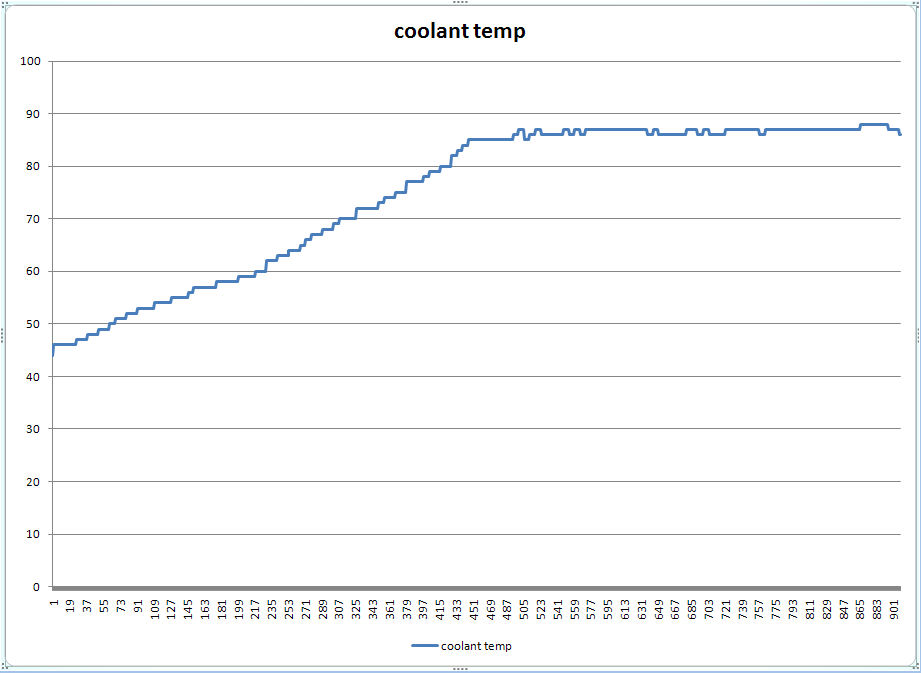
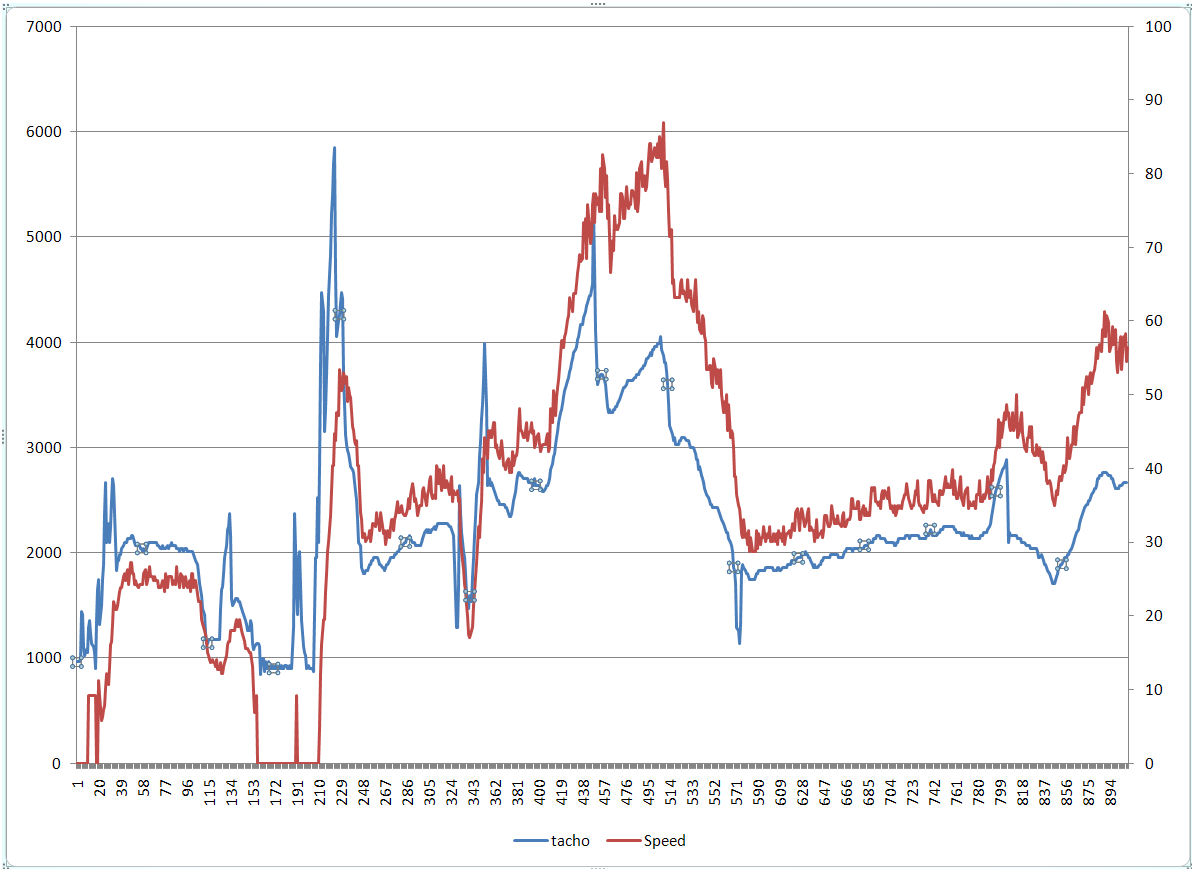
The controller now logs a number of details to the SD card as you go along and below are a couple of graphs I've managed to capture so far. The first graph shows the coolant temperature and how stable it is once the engine is up to temperature. Nice. The second shows RPM and speed for a quick run and easily shows each gearchange (I still change gear too early!) and the maximum speed. For the purposes of the constabulary - the speed shown is not calibrated and I did not break the speed limit at any time. <ahem>.
I'm currently working on a video overlay system which will enable me to plot this data onto a video feed from my new bullt camera. Watch this space...
![]()